


Try Digiscoping to Take Better Bird Photos
Updated: Mar. 21, 2024
Use a smartphone and spotting scope to try digiscoping, a popular trend in bird photography. Here's what you need to get started.
Our editors and experts handpick every product we feature. We may earn a commission from your purchases.
Confession: I’m a bird-watcher, not a professional photographer. My true photographic passion is capturing a moment, then producing a picture I can quickly share and use as a reference later. This is why digiscoping (taking photos with a spotting scope and smartphone) is perfect for me and why you should give it a try, too.
Check out the ultimate guide to backyard bird photography.
What is Digiscoping?
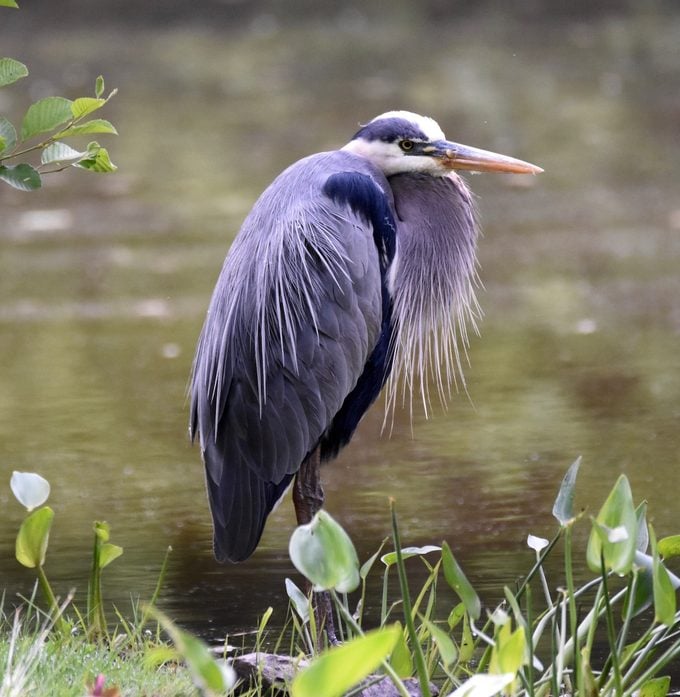
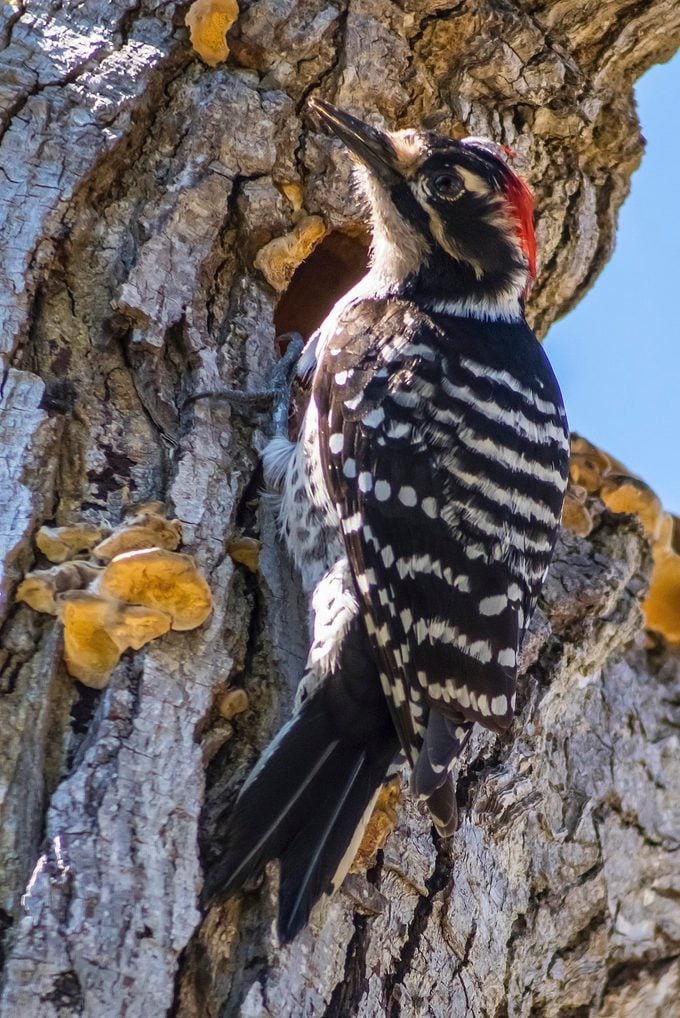
Digiscoping is shooting digital photos through a spotting scope with a cell phone or point-and-shoot camera. Digiscoping isn’t just for birds! If you’re fast enough, try zooming in on butterflies.
Just getting started with birding? Learn how to choose binoculars and bird field guides.
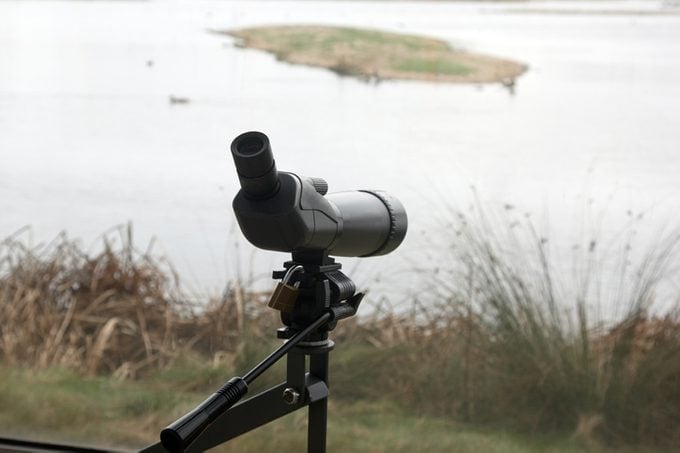
Get the Right Equipment for Digiscoping
Today’s smartphones have amazing cameras that keep getting better, but they’re not made for taking photos of faraway objects. In order to create shareworthy photos with a smartphone, you’ll need to invest in a few add-ons. First is a spotting scope. The quality of your photos will be dictated by the quality of the glass in your scope and the optical sensor on your phone. For outstanding results, buy the nicest spotting scope and smartphone that your budget allows. Research online and note which scope and phone combinations you see most frequently, and which produce the best-looking image for your purposes.
Next is a smartphone and scope adapter. Given the prevalence of Apple’s iPhone and Samsung’s Galaxy line, these two are guaranteed to have the most custom-built adapters to connect to the scope, but almost any will work with a universal adapter. Which adapter you choose will be determined by the phone and scope combination you have.
Adapters save you the hassle of trying to hold your phone at just the right angle to capture a photo through your spotting scope. While it’s possible to take photos this way and even get good results, using an adaptor means spending less time wrangling your rig and more time enjoying the wildlife. Finally, you’ll also need a tripod or window mount. Both are standard for balancing a spotting scope and for successful digiscoping, one or both are required. The addition of a window mount will allow you more flexibility, like using your car as a bird blind.
Get inspired by these spectacular hummingbird photo contest winners.
Head out into the Field—or the Backyard
You don’t need to go far to capture great images. Backyard feeders are good starting points because you can aim your scope right at a feeder and wait for the bird to come into view. All smartphones allow for a live view of the screen while taking a photo, so by having the phone mounted to the scope, you’ve essentially created a live monitor of your scope view. With the scope trained on a perch, simply wait until the bird is in view and fire away! If you’re using a universal adapter, be aware of any light leaks around the camera hole that might allow light from behind you to pass through and reflect back into the camera. This can lead to ghosting—refections picked up in your photos.
If you experience this problem, a little electrical tape can usually solve it; simply cover the gap with tape. Any small movement can blur the image, so use a very light touch to capture photos, and experiment with burst modes in your smartphone’s camera settings that allow you to take many shots in rapid succession. This way you can go over the images later and choose the ones you like best.
In cases where you’re dealing with very low light or you’re at a high zoom factor on the scope, try using the timer function. It won’t require you to touch the screen to trigger the shutter. But most of all, don’t forget to test different methods and learn what works best for you!
Don’t miss the 51 best spring bird pictures ever.
Experiment with Video
One of my biggest digiscoping revelations came when I upgraded my phone to one with slow motion video. This feature opened up a whole new way of seeing and documenting birds. I once spent several days photographing rough-legged hawks in snowy Wisconsin and while I was too far from them to get any frame-filling images, the slow-motion video I got of them hunting the landscape was both stunningly beautiful, and extremely educational. After filming, watching and then seeing the birds in subsequent visits, I found myself much more competent at picking them out at a distance simply by fight style.
Check out 8 tips to take breathtaking hummingbird photos.

Share the Photos on Social Media
What used to require transferring images to a computer and running through fancy image processing programs is now usually achievable right in your phone. Taking photos with your smartphone makes sharing them with friends and family simple. With the touch of just a few buttons, it’s easy to post photos to social media. You can share your images with friends, ask about identification or show off some neat photography features you discovered in the field!
If you love watching and photographing wildlife, a spotting scope and your smartphone might be the perfect combination. And remember, birds aren’t the only wildlife your scope can get you closer to. I’ve experimented with non-bird images through digiscoping as well and I encourage you to do the same!
Psst—we found more birding gadgets and gear you never knew you needed.
How to Buy a Spotting Scope
Decide whether a travel-sized (65mm) or full-size (82mm) lens is best for you. The measurement corresponds to the diameter of the objective lens (the larger end). The larger lens is the better performer, but there’s a tradeoff in weight and cost. Increasing to 82mm can result in two extra pounds! My advice? Put both scopes on tripods, sling each over your shoulder and take a walk. If you decide that owning the heavier one means you won’t use it as often, then buy the lighter one.
Next, get more of the best bird-watching tips for beginners.