How to Arrange Fresh Cut Flowers Like a Pro
Updated: Nov. 15, 2023
Not sure how to arrange the fresh cut flowers you got from the grocery store, farmer's market or your own garden? Here's what you need to know.

Don’t stress about arranging fresh cut flowers. Simply pick up blooms and greenery from the grocery store, farmer’s market or your own backyard and arrange them at home for professional results. With a few techniques, pro tricks and the proper tools, you’ll have stunning floral centerpieces all year long at a fraction of the florist price. Here’s how to arrange fresh cut flowers for professional results.
Want to grow your own flowers to arrange? Here are the best flowers for a cutting garden.
9 Key Steps to Design a Gorgeous Display of Fresh-Cut Flowers
- Create a stunning floral display in a few key steps
- Snip stems with garden shears at an angle about an inch from the bottom.
- Play with textures, color and height for maximum vibrancy and interest.
- Choose a vase or container that’ll support the weight of flowers and water without tipping.
- Fully opened flowers will fade faster, so pick some mostly closed buds to include.
- Remove any leaves that will touch water to prevent flowerrotting bacteria from forming
- Prop up big, heavy blooms (such as hydrangeas or daisies) with floral tape and a bamboo skewer.
- Lock blooms into place by adding chicken wire or a flower frog to the inside of a container, or create a grid on top with tape.
- Replace water daily to extend the flowers’ longevity.
Choose the Fresh-Cut Flowers Wisely
In-season blooms are the most affordable, though roses, carnations, orchids and eucalyptus are generally available and not overly expensive in every season. When choosing flowers, look for mostly closed buds. Buying fully opened florals means the clock is ticking on their freshness. If you spot any brown spots or falling petals, skip them.
Does your birth month flower have special meaning?
Think About the Color Scheme
There are multiple choices for floral arrangement colors depending on the overall look you want to achieve. A singular color bouquet looks stunning, but you’ll need to play with textures and height for vibrancy and interest. A mix of long-stemmed white roses, short white tulips and hanging hydrangeas always looks elegant tucked among greenery.
On the other end of the spectrum, playing with color is so much fun! But adding too much color can look busy and unintentional. If you go the rainbow route, try clustering similar colors together or keep the stems at a similar length. Dark greenery adds a nice contrast, and popping in a tall branch or burst of berries brings interest to the branch line.
Check out simple ways to make DIY bouquets.
Select the Right Vase

Considering your vase is arguably as important as choosing fresh blooms and a color scheme. If you come home with 58-inch quince branches, and only have delicate bud vases in the cupboard, you’re going to be disappointed. The good news is that lots of different containers can work as a vase in a pinch, as long as it holds water and won’t tip over from the weight of the flowers or branches.
Check out thrift shops for secondhand vases, or shop our list of the prettiest hanging baskets, flower boxes and vases to keep on hand. We’d recommend using wide-mouth mason jars for wildflowers, matching bud vases for effortless deconstructed bouquets and galvanized bucket vases for big bunches of gladiolas. Of course, a cylinder glass vase is perfect for roses. Etsy is overflowing with artistic and unique vases for one-of-a-kind flower arrangements.
Clip and Snip the Stems and Leaves
Time to snip. Carefully spread out your fresh cut flowers and greenery, and cut the stems at an angle about an inch from the bottom (or shorter, depending on your vase) using garden shears. That’s right, you should get a pair of good quality garden shears and leave your scissors for cutting paper. Flowers and branches with woody stems really need a proper garden shear to cleanly cut the stem and allow for water and nutrients to reach the buds. Make your bouquet about one and a half times taller than its container.
To prevent bacteria (which will rot your flowers) remove any leaves that sit below the water level of the vase. Thorns should get snipped off, too. Want to conceal stems inside the vase? When the vase is empty, wrap a large leaf around the inside for natural camouflage.
Need to send a professional flower arrangement? Here are the best flower and plant delivery services.
Use Professional Flower Arranging Tools
Now that your fresh cut flowers are sorted and clipped, it’s time to share some professional flower arranging secrets. Florists use tools to control how flowers are placed and displayed in vases. That’s right! Florists don’t just plop flowers in the vase with some water and hope for the best. They use tools to manipulate and secure flowers. Psst—using flower arranging tools also means getting away with buying fewer flowers for more dramatic results. Here’s how the pros do it.
Flower Frogs
A very handy piece of flower arranging equipment with a very cute name: flower frogs. You can find flower frogs on sites like Esty, or buy them new on Amazon. No matter where you find a flower frog, they sit in the bottom of a vase, and provide structured pins that sort of grab onto the stem and hold it in place. This tool works best with branches and flowers with thicker stems.
Chicken Wire
Chicken wire is the perfect material for DIY professional flower arrangements. Buy it in sheets and simply cut and place on any vase, bowl or bucket that you want to turn into a base for your floral masterpiece. The thin wire is easy to hide with leaves and flowers, and the small holes hold all thicknesses of stems. Chicken wire is a smart tool to have in your flower arranging arsenal.
Flower Frog Lids
It doesn’t get much easier than screwing a flower frog lid onto a mason jar, and arranging to your heart’s content. We especially like this tool for controlling more dainty flowers and greenery. Florist pro tip: Start by adding the largest flowers first. Work in a circle and turn the mason jar as you go to make sure the arrangement is symmetrical (or asymmetrical if that’s the look you want.) Then layer in the next variety of flowers, and finish with greenery, grasses or berries. Gorgeous!
Scotch Tape
Don’t have a flower frog or flower frog lid handy? No problem. Make a grid on the mouth of the vase using Scotch tape and follow the same instructions from above, arranging the flowers within the different squares. This affordable trick works especially well with square vases, when all of the flowers tend to fall to one side in the large opening. To create a natural look, keep the stems longer on the center flowers and cut shorter for the flowers on the sides. And try to keep the tape dry—fill the vase with water before taping.
Don’t miss these garden subscription boxes for fresh plants delivered to your door.
Floral Tape and Bamboo Skewers
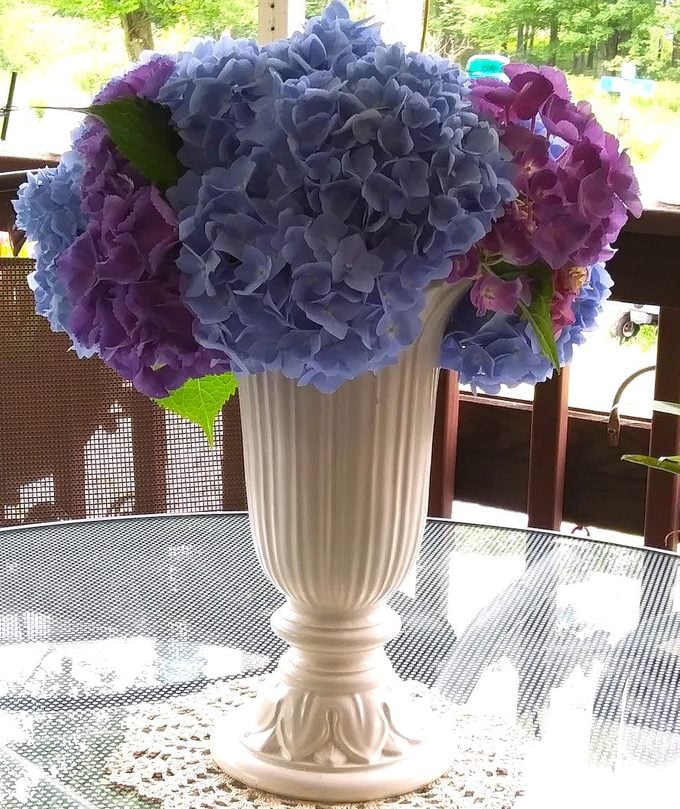
Big bold blooms like daisies and hydrangeas have a tendency to droop and hang from their weight. Not so pretty in a flower arrangement. To prevent the wilted look, simply use a small strip of floral tape on your bigger blooms and affix them to a kitchen bamboo skewer. Popping the skewer into a flower frog will keep your arrangement picture perfect. Why floral tape? The green color blends in with your stems, and the material is far more flexible to work with than Scotch tape. You can use floral tape to make vase grids, too.
How to Keep Fresh Cut Flowers Fresh
Recut the stems and replace the water daily to extend the life of your floral arrangement. As fresh cut flowers start to fade and wilt, take them out of the arrangement and toss them. This will keep the other stems alive longer, as you’re removing any bacteria and rot from dead material. Usually the greenery in a flower arrangement will last a couple of weeks longer than the buds. Just trade the wilted flowers out for fresh ones on your next grocery trip, and arrange them like a pro.
Next, discover easy ways to dry flowers.


