


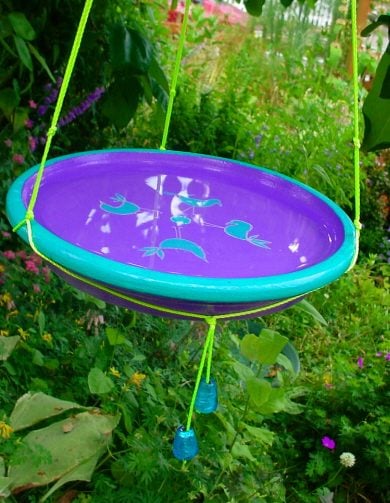
DIY Hanging Birdbath Project Idea

Updated: Mar. 21, 2024
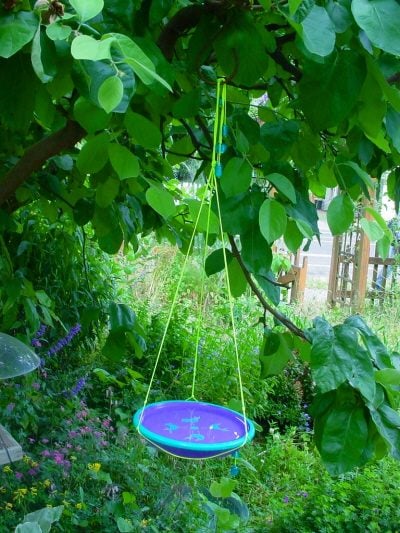
Follow these step-by-step instructions to make your own hanging birdbath with simple materials.
Here’s an easy DIY way to make your own hanging birdbath.
Materials
- Terracotta saucer (8.5″ diameter)
- All-purpose Sealer (preps porous surface for paint)
- Acrylic craft paint – Purple, turquoise, white
- Rubber stamps – 4 related images like my four birds
- Staz-On Opaque White stamping ink (made for non-porous surfaces)
- Waterproof clear spray on sealant
- Nylon chord – Chartreuse
- 8 Blue glass beads
- 1 Flat brush (base coats/ sealer), 1 Small pointed paint brush ( edges and detail)
- Lighter (to melt cut ends of nylon chord)
Instructions
Wash the saucer and dry completely. Coat with one coat of sealer and let dry. Coat the entire saucer with two coats of purple paint, doing one side at a time and letting it dry for at least 30 minutes between coats. Paint the lip turquoise, it may need two coats. Stamp the inside of the saucer with birds.
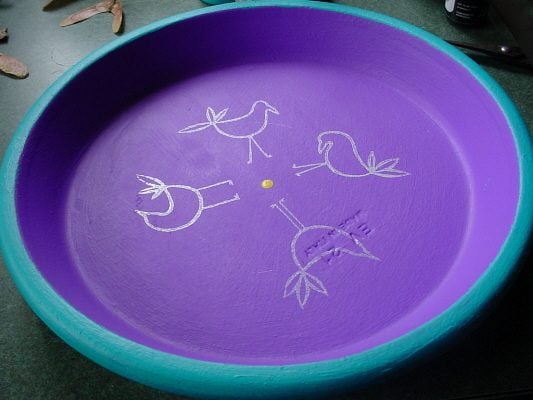
Paint a disc over the dot in the center, let it dry and then add the white dots around the edges.
Paint the inside of the birds

Spray on 2 coats of the waterproof sealant.
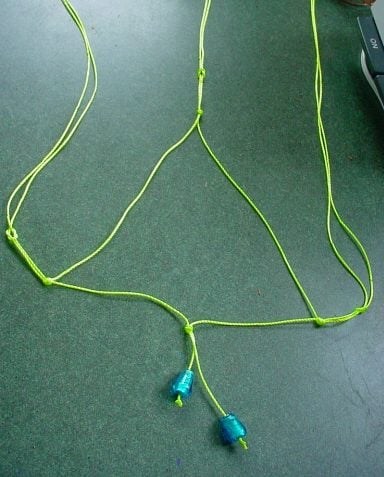
I measured the saucer circumference just beneath the top lip (25.5 inches) and added one-foot to that for the length of chord that would become the bottom of tripod hanger. By dividing the circumference by 3 to determine I needed 8.5” between each corner loop of the hanger. I made the first loop in the middle of the chord, then two others on each side of that 8.5 inches apart.
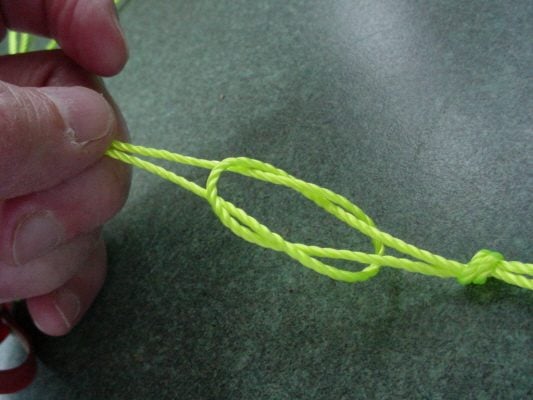
Next I cut three 3’ lengths of chord, folded them in half and looped one through each to the loops of the hanger and securing and tying them together at the top.

Last I added the beads, 6 at the top and 2 at the bottom, tying a double knot beneath each one and melting the knot to form a stop so the bead would not fall off.
Tips
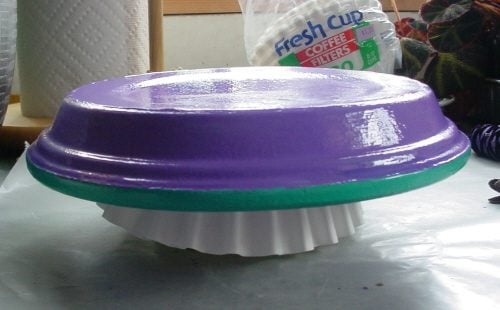
Elevating the saucer on a butter tub makes it easier paint. To keep the cut ends of the nylon chord from unraveling melt them using the lighter immediately after cutting.