
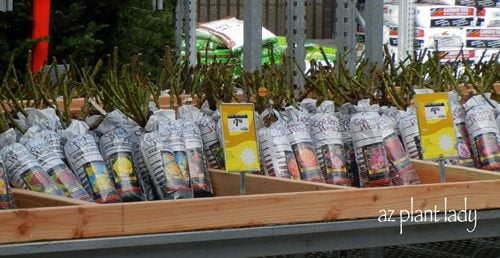
It’s hard to believe that there is anything to do in the garden in January, but in zones 8 to 10, bare root roses have already started to show up at nurseries, including mine. In colder climates, bare root roses can be found in the spring.
Although bare root roses look nothing like the pretty picture on the package, with the proper placement, selection, planting and care, they will soon be covered with brightly-colored blooms.
Container roses can be planted instead of bare root roses throughout the growing season, but you will have the greatest selection available to you when you purchase bare root roses and they are less expensive.
Learn how to prepare and prune roses for winter.

Deciding on which rose(s) you will you add to your garden can be both fun and exciting as you imagine what each type will look like growing and blooming.
There are different types of roses including hybrid tea, floribunda, grandiflora, shrub roses and miniature roses. Hybrid tea roses are perhaps the most popular type of rose planted and they usually produce a single, large rose per stem. Floribunda roses are generally smaller shrubs and produce multiple blooms per stem. Shrub roses have old-fashioned shaped flowers and are generally easier to grow.
This Rugosa rose deserves lots of love.
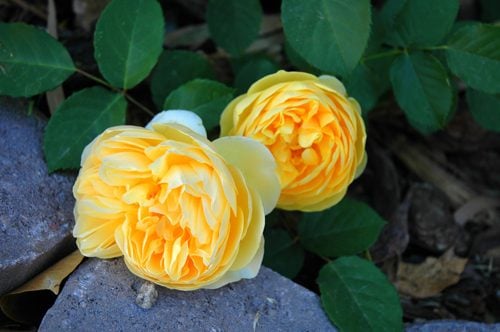
Roses are available in almost every color, except for blue. You can plant a garden full of roses of the same color or plant roses with different colors together. It is all up to you. To help you with your selection, check with your local rose society, which often have a list of roses that will do best in your area. You can find links to local rose societies here.
Some of my favorites are Abracadabra, Mr. Lincoln, Touch of Class, Double Delight, Chicago Peace, Pristine, Rio Samba, Abraham Darby, Glamis Castle and Graham Thomas.
Find out why Knock Out Roses are a gardener’s dream come true.
Bare root roses are classified as grade 1, 1 1/2 and 2. Grade 1 roses have at least 3 large canes (branches) and the lesser grades have fewer and/or smaller canes. When possible, buy grade 1 roses, but sometimes when you can only find a grade 1 1/2 in the rose you really want – go ahead and buy it. If you plant and care for it correctly, it should grow into a beautiful and healthy rose. I’ve grown a few grade 1 1/2 roses when I couldn’t find grade 1 and they turned out beautifully.
Avoid buying bare root roses whose canes look shriveled and dry. Also don’t purchase any that have new growth already growing.
It is best to purchase your bare root roses the day before you are ready to plant.
As soon as you get them home, remove the packing material and stick them in a pail full of water so that it covers the roots. This helps to rehydrate your rose. Keep the roots submerged for at least 12 hours before planting, but no more than 24 hours if possible. You can add vitamin B1 transplant solution to the water if you like, which is said to reduce transplant shock, but this step is optional. I must admit that I have planted roses without adding any B1 to the water.
Still need help choosing which roses to plant? Birds & Blooms has a great article that lists their Top 10 Roses.
So what do you do after you have your bare root roses? Here’s our guide to planting bare root roses.
Did you know that the desert is full of skeletons? Not the spooky kind, but another type of skeleton….the cactus skeleton!
Saguaro Cactus Skeleton
Now the beautiful, saguaro cactus has a skeleton that is actually highly prized.

As it nears the end of its life, the Saguaro cactus begins to decay.

In the photo above, you can see that the top part of the cactus has fallen, leaving only the bottom still standing.

Here it is close up. The decay is till present as you can see inside. The woody remains of the saguaro are called ‘ribs’ and are what supports the Saguaro cactus.

Native Americans used the Saguaro ‘ribs’ to build roofs, walls and even furniture. Another use was that they would make long poles that they used to knock off the Saguaro fruit, which is edible.
Saguaro are not the only types of cacti that leave behind skeletons.
Why is a cactus covered in spines?
Cholla Cactus Skeleton

A teddy Bear Cholla (above), also has an interesting skeleton.


Above, you can see a photo of a segment of a Teddy Bear Cholla that is in the process of decaying. You can see the woody cactus skeleton starting to show through.

Cholla skeletons are sometimes used as walking sticks. Artisans also use cholla skeletons to make Southwestern forms of art. Check out 14 cute cactus gifts for cactus lovers.
It is illegal to remove Saguaro and Cholla skeletons from the desert, unless you have permission from the owner. Specimens can sometimes be purchased at certain plant nurseries that specialize in cacti.
So do as I do. Enjoy these cactus skeletons out in the desert and take lots of photos.
Next, discover the desert birds of the Southwest.
Are you tired of spending $3 or $4 for a bag of salad greens from your grocery store? Salad greens fresh from the garden are not only less expensive, but they are more convenient and taste better. So what do you do if you don’t have enough room in your garden to plant salad greens? Or what if you don’t have a garden at all? Well, you can grow your own salad garden as long as you have a sunny window by creating a ‘salad bowl’.
It is very easy to grow your own leaf lettuce in containers.
Here’s how to do it:
1. Select a planter that is at least 8″ deep with holes for drainage.
2. Fill with good quality potting soil and moisten completely, before planting seeds.
3. Plant with seeds – try leaf lettuce, arugula, escarole or garden cress. I like to buy a packet of ‘Mesclun’, which contains a mix of leaf lettuce, endive, arugula and chervil. (Transplants also work well).
4. Put in a sunny area that receives at least 6 hours of sunlight, but avoid hot, afternoon sun.
5. Keep the soil surface moist until seeds germinate. I like to use a spray bottle filled with water and lightly mist the soil so that I don’t displace the seeds.
6. Once the seeds germinate, back off slightly on the watering, but do not allow the soil to dry out.
7. Thin seedlings to the recommended distance recommended on the seed packet and fertilize every two weeks using a fertilizer at 1/2 strength.
8. Start harvesting your salad greens. Snip off the outer leaves first. Your salad greens will continue to produce new leaves for you to harvest.
As your salad greens start to slow down, you can simply pull them out and start over again. So what are you waiting for? Grow your own salad garden in a bowl and start enjoying fresh salad greens as close as your windowsill.
Can you envision trailing plants such as lantana or sweet potato vine cascading over some of the upper tiers of a fountain? Here are some other ideas for transforming an old, unused fountain into a focal part of your garden, filled with container plants.
When creating a garden with multiple levels, try choosing one or two types of the same plants that you will plant in each level. This helps the different levels to ‘flow’ together visually. Then you can add different plants to finishing out each level.
Psst! Here’s how to turn a birdbath into a mini fairy garden, and how to make a miniature succulent fairy garden, too.
Another idea to fill your fountain, is by using contrasting colors. Imagine the top level filled with purple, trailing flowers. Then fill the middle bowl with bright orange flowers (orange and purple are great examples of contrasting colors). Finish off with adding purple flowering plants in the bottom level. This creates a truly beautiful and striking color statement in your garden.
Try adding grass-like plants in the different levels, to mimic the shape of falling water. Fortnight lily (Dietes bicolor) would work well planted in the center, surrounded by low-growing, flowering plants, such as Verbena, that would drape downward.
How about filling your fountain with herbs such as basil, oregano, rosemary and thyme? Just make sure not to over water them.
Want to attract hummingbirds or butterflies to your garden? Fill your fountain with Lantana, Verbena, Salvia and other plants that are attractive to hummingbirds and butterflies.
So, do you have an unused fountain? Don’t throw it away. Transform it into a beautiful, focal point in your garden—fill it with plants.
Check out the top 10 container plants that you can use in your fountain garden.
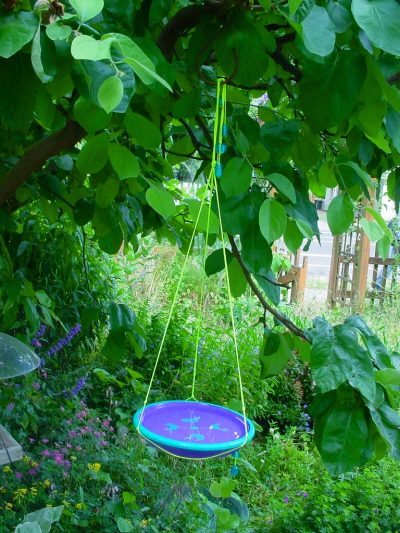
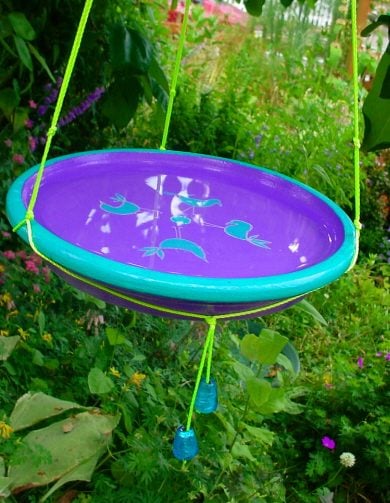
Here’s an easy DIY way to make your own hanging birdbath.
Materials
- Terracotta saucer (8.5″ diameter)
- All-purpose Sealer (preps porous surface for paint)
- Acrylic craft paint – Purple, turquoise, white
- Rubber stamps – 4 related images like my four birds
- Staz-On Opaque White stamping ink (made for non-porous surfaces)
- Waterproof clear spray on sealant
- Nylon chord – Chartreuse
- 8 Blue glass beads
- 1 Flat brush (base coats/ sealer), 1 Small pointed paint brush ( edges and detail)
- Lighter (to melt cut ends of nylon chord)
Instructions
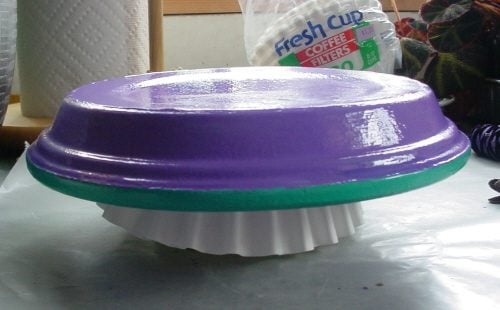
Wash the saucer and dry completely. Coat with one coat of sealer and let dry. Coat the entire saucer with two coats of purple paint, doing one side at a time and letting it dry for at least 30 minutes between coats. Paint the lip turquoise, it may need two coats. Stamp the inside of the saucer with birds.
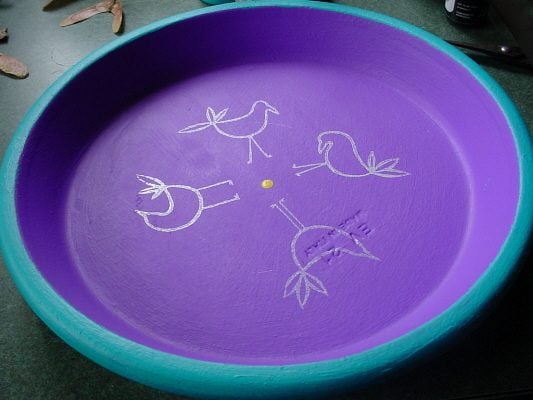
Paint a disc over the dot in the center, let it dry and then add the white dots around the edges.
Paint the inside of the birds

Spray on 2 coats of the waterproof sealant.

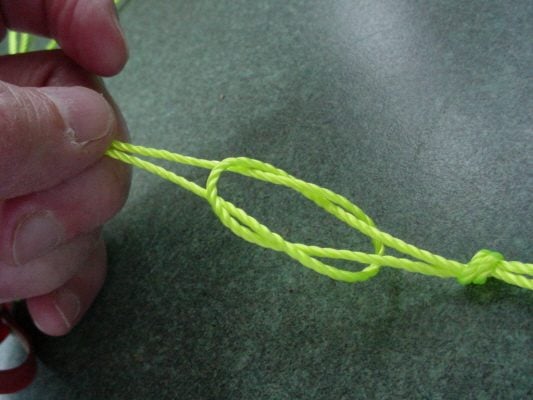
I measured the saucer circumference just beneath the top lip (25.5 inches) and added one-foot to that for the length of chord that would become the bottom of tripod hanger. By dividing the circumference by 3 to determine I needed 8.5” between each corner loop of the hanger. I made the first loop in the middle of the chord, then two others on each side of that 8.5 inches apart.
Next I cut three 3’ lengths of chord, folded them in half and looped one through each to the loops of the hanger and securing and tying them together at the top.
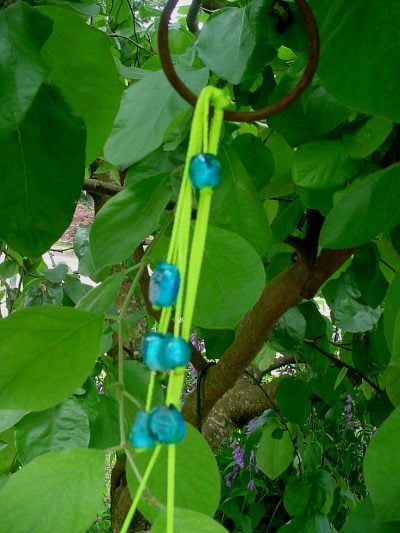
Last I added the beads, 6 at the top and 2 at the bottom, tying a double knot beneath each one and melting the knot to form a stop so the bead would not fall off.
Tips
Elevating the saucer on a butter tub makes it easier paint. To keep the cut ends of the nylon chord from unraveling melt them using the lighter immediately after cutting.
Who doesn’t love to take a dip in the pool on a hot summer’s day? I certainly do. But I must admit that I don’t have a pool of my own. Because of that, I don’t have to worry about trees and plants that may drop leaves and/or flowers.
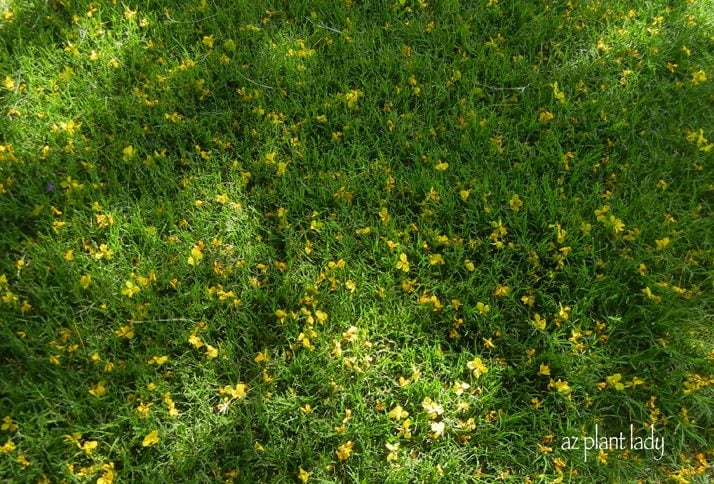
To be honest, I like how fallen flowers look when they fall on my grass on directly on the ground, underneath my plants.
But for those of you who have swimming pools, this can be a huge headache. So, here is a list of plants that are recommended for use around swimming pools.
Backyard Tip: Most of the following plants are low-litter…NOT litter-free. It is difficult to find plants that do not drop the occasional leaf or flower.
Best Trees for Around Pools
- Willow Acacia Acacia salicina
- Shoestring Acacia Acacia stenophylla
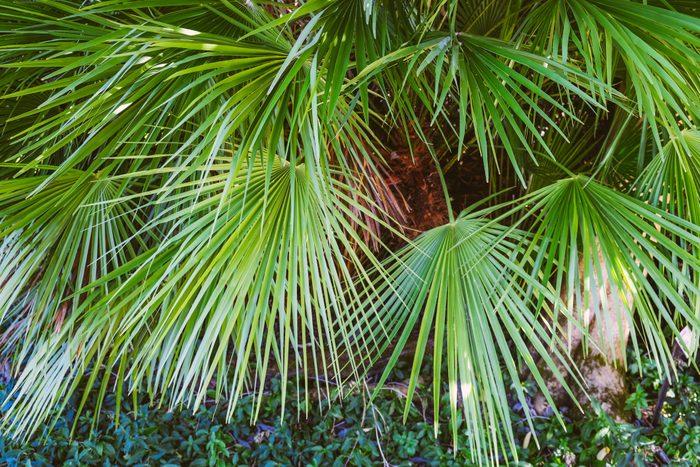
- Mediterranean Fan Palm Chamaerops humilis
- Desert Fern Lysiloma watsonii
- Pygmy Date Palm Phoenix roebelenii
- Southern Live Oak Quercus virginiana
- Queen Palm Syagrus romanzofianum
Best Shrubs Around Pools
- Mexican Bird-of-Paradise Caesalpinia mexicana
- Red Bird-of-Paradise Caesalpinia pulcherrima
- Red Fairy Duster Calliandra californica
- Natal Plum Carissa grandiflora
- Bush Morning Glory Convolvulus cneorum
- Hop Bush Dodonaea viscosa
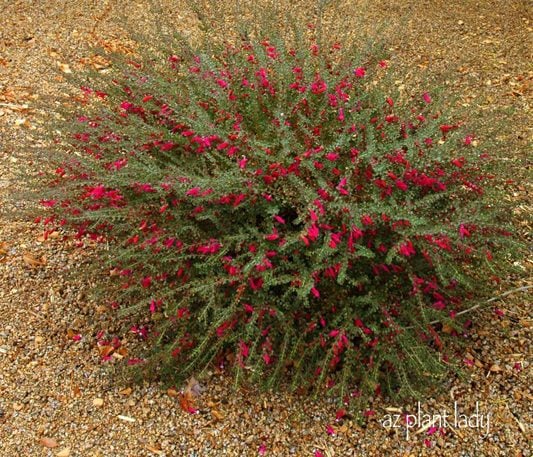
- Valentine Eremophila maculata ‘Valentine’
- Mexican Honeysuckle Justicia spicigera
- Lantana Lantana species
- Texas Sage Leucophyllum species
- Heavenly Bamboo Nandina domestica
- Rosemary Rosmarinus officinalis
- Autumn Sage Salvia greggii
- Chaparral Sage Salvia clevelandii
- Arizona Yellow Bells Tecoma stans
- Orange Jubilee Tecoma x ‘Orange Jubilee’
- Cape Honeysuckle Tecomaria capensis
Perennials/Groundcover Plants Around Pools
- Desert Marigold Baileya multiradiata
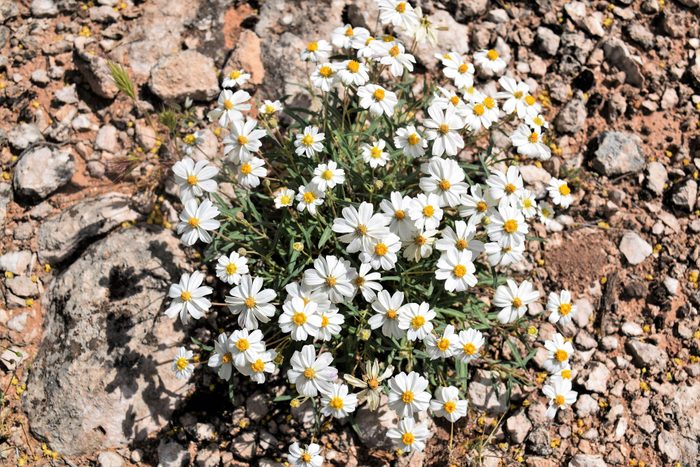
- Blackfoot Daisy Melampodium leucanthum
- Iceplant Drosanthemum speciosum
- Gazania Gazania rigens
- ‘Katie’ Ruellia Ruellia brittoniana ‘Katie’
- Verbena Verbena species
- Canna Lilies Cannaceae species
- Lily of the Nile Agapanthus orientalis
- Daylily Hemerocallis species
- Fortnight Lily Dietes bicolor
- Whirling Butterflies Gaura lindheimeri
- Angelita Daisy Hymenoxys acaulis (Tetraneuris acaulis)
- Penstemon Penstemon species
- Rain Lily Zephranthes species
Vines Around Pools
- Pink Trumpet Vine Podranea ricasoliana
- Purple Lilac Vine Hardenbergia violaceae
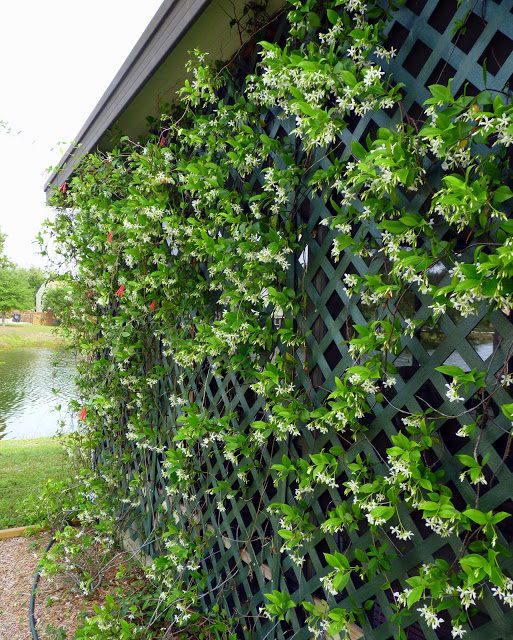
- Star Jasmine Trachelospermum jasminoides
Accent Plants Around Pools
- Agave Agave species
- Aloe Aloe species
- Sago Palm Cycas revoluta
- Desert Spoon Dasylirion wheeleri
- Golden Barrel Cactus Echinocactus grusonii
- Red Yucca Hesperaloe parviflora
- Deer Grass Muhlenbergia rigens
- Red Fountain Grass Pennisetum setaceum ‘Rubrum’
This list is by no means meant to include all low-litter plants suitable for use around swimming pools, but it is a good start.
We hear from readers all the time, asking us what to do about birds flying into windows. It’s a tough one. The only thing you can really do is to break up the reflection in the glass. We’ve heard of readers using everything from wind chimes to streamers to do this, but here at our offices in Wisconsin, we use a simple paper cutout. You can buy window clings and gels to put on your windows to accomplish this as well, but a simple silhouette print works, too. Here’s a printable hawk picture to scare birds that you can use for your own windows. Download your own pdf to print out by clicking on the bird below.

Does Spanish Moss Harm Live Oak Trees?
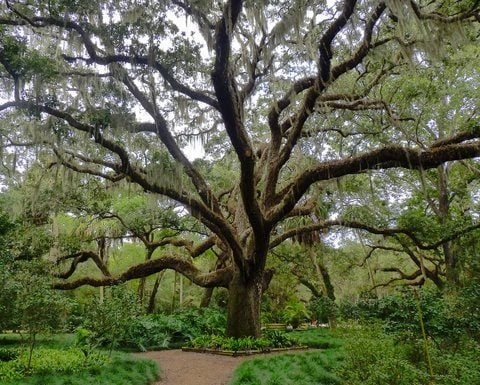
Perhaps no image is more representative of the southern outdoors than a giant live oak dripping with Spanish moss. But there’s a real misconception out there that Spanish moss is bad for the trees. I thought this post would be a good time to clear up that myth.
Southern live oaks (Quercus virginiana) are native throughout much of the southeast, and get their common name from the fact that they remain green (live) throughout the winter. To fulfill their deciduous nature, each spring the trees lose their leaves and immediately grow them back. Like all oaks, it produces acorns—great for squirrels and other nut-eaters.
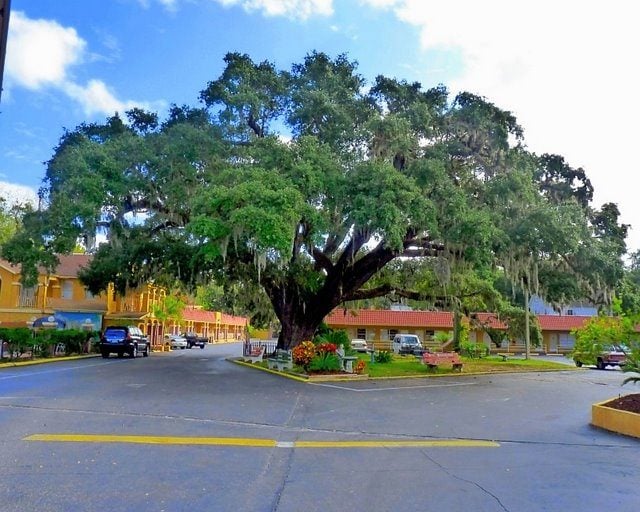
Live oaks are survivors. Many specimens are more than 500 years old, and one is even believed to be 1,400 years old! They withstand floods, hurricanes, and salt spray. They even tend to survive fires, because fire rarely reaches the crown, allowing the tree to re-sprout vigorously from the roots.
This longevity makes live oaks the perfect spot for large growths of epiphytes such as Spanish moss (Tillandsia usneoides). An epiphyte is a plant that absorbs nutrients from the water and the air. It does not take any sustenance from the tree in which it hangs, nor does it dig roots into the tree or “suffocate” the tree.
Basically, Spanish moss just needs somewhere to hang out. Live oak foliage leaches an especially high amount of the nutrients it needs. While excessive growths of Spanish moss can be problematic for unhealthy trees in high wind situations, in most cases healthy live oaks have extensive root structures that keep them in place during storms.
Learn how to repair and care for storm damaged trees.
Spanish Moss Benefits
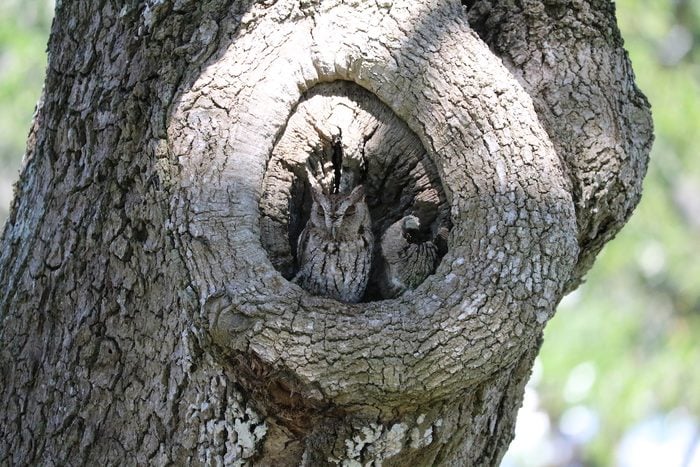
Spanish moss is great for wildlife. Birds use it for nesting material, and it provides shelter for creatures like bats and bugs, including a type of spider that’s been found nowhere else. Throughout history, humans have used it to stuff mattresses, as packing material and insulation, and even in the car seats of some of the first Fords. (This proved to be a problem when the red ants living in the Spanish moss made their presence known. They solved this problem in the future by boiling the moss first.)
So really, y’all, there’s no reason for southern nature and wildlife lovers not to like Spanish moss just as much as the stately tree that it hangs in.