
Looking for a rustic way to mark plants in your garden, or want to create a personalized DIY garden sign? These tree cookie plant marker signs are easy to do, cost very little, and look great in any garden!

What You Need:
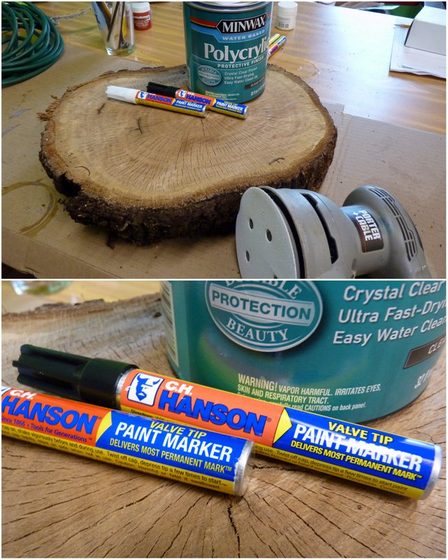
- Tree cookies (see below)
- Medium-Grit Sandpaper
- Paint pen(s) in desired color(s)
- Polycrylic protective finish (or any sealer for use on wood)
- Paintbrush
What are Tree Cookies?
Tree cookies are simply flat rounds of wood cut from tree branches or trunks. There’s no need to cut down a living tree – use one that has fallen naturally, or save some branches from pruning. Avoid very resinous trees like pine; birch or oak is best. You can also buy tree cookies at craft stores and online; just do a search for “tree cookies”.
What to Do:
- Begin by sanding the surface of your tree cookie. There’s no need sand both sides unless you plan to decorate both. If you have a power sander available, this process will go much more quickly, especially if you’re doing multiple cookies. Wipe the surface free of debris after sanding.
- If you’re great at lettering or drawing, you can just pick up the paint pen(s) and go to work now, but most of us probably feel better sketching out the text or design first with a pencil and tracing over it with the paint pen. You can also use paint and paintbrushes if you like, but the nice thing about paint pens is that they’re easy enough for anyone to use.
- Once the painted design dries, use a paintbrush to apply two thin coats of polycrylic sealer, allowing it to dry between coats. Allow to dry according to the directions on the can, and you’re done!
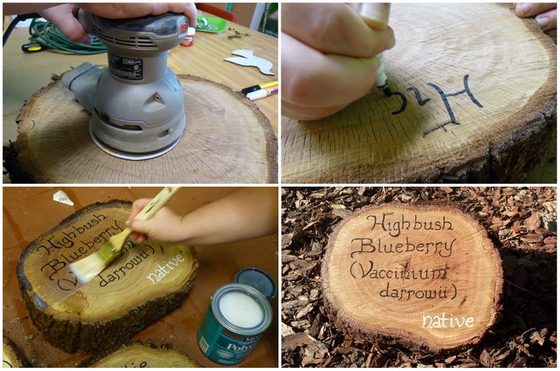
We’re using these tree cookies in the gardens where I work to mark plantings, but you can do just about anything with them. Ours are around 8 inches in diameter and 2 inches thick, but you can cut yours to any size that works for you, including smaller ones to mark seed beds or decorate potted plants. TIP: Smaller ones make great DIY garden gifts and even Christmas tree ornaments!
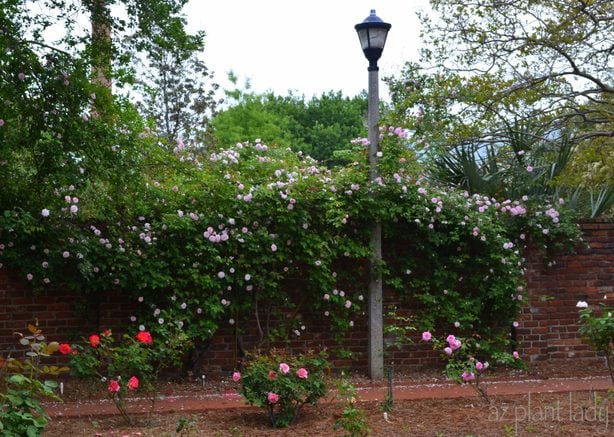
Is the view out your window looking rather barren to you? Dress up your bare wall or fence with beautiful plants! This old, brick wall gorgeous with these roses climbing on it. Unfortunately, not all garden fences or walls are attractive to look at. This is why it good for gardeners to know the best plants to grow against a fence.
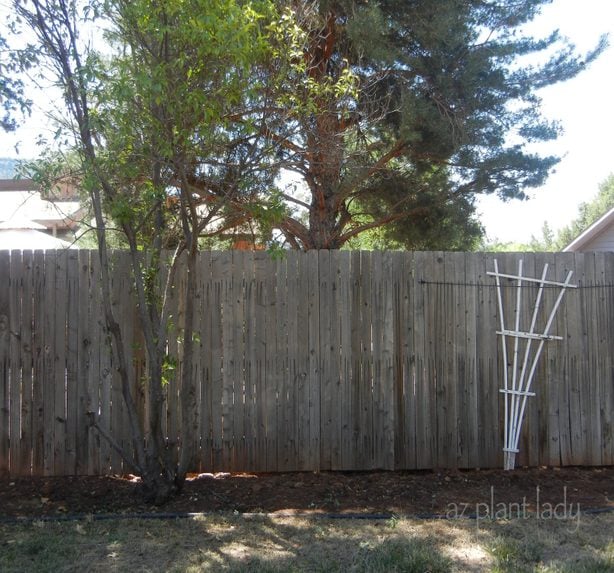
Maybe you have a bare wall that you view from your window. Or maybe your garden is surrounded by a wooden fence. Whether you have a wall or fence, you don’t have to settle for viewing a rather boring expanse. It is quite simple to dress up these bare spaces using plants planted in the ground or in containers. Painting a fence or wall is also great way to add color to your garden.
Best Plants to Grow Against a Fence
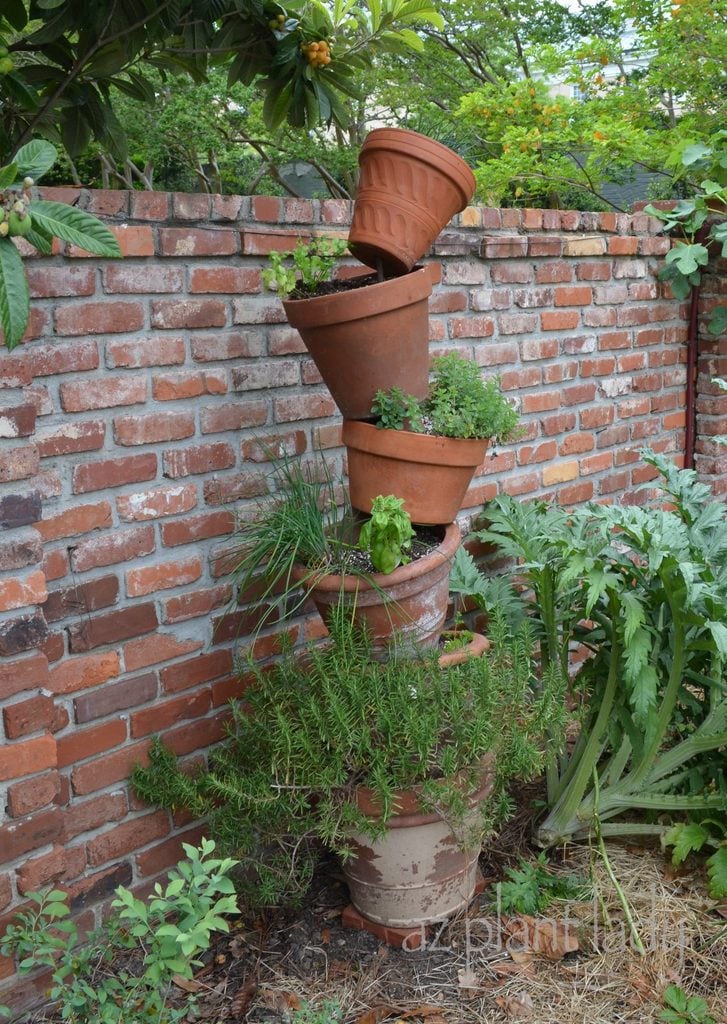
This simple ‘tipsy pot plant tower‘, located at the University of South Carolina is filled with herbs. Next to it is an artichoke plant, which not only produces delicious artichokes—it is also often grown as an ornamental plant.
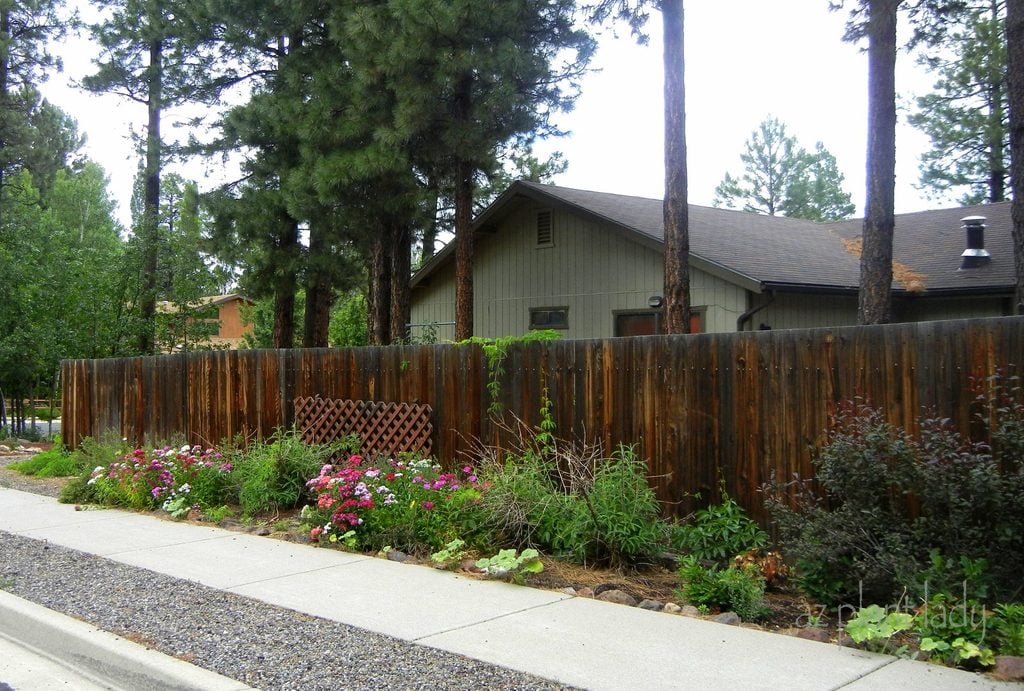
Perennials are a great way to beautify a bare fence, like this garden in Flagstaff, Arizona. Select perennials that do well in your area and pair with ornamental grass and plants that will provide fall color.
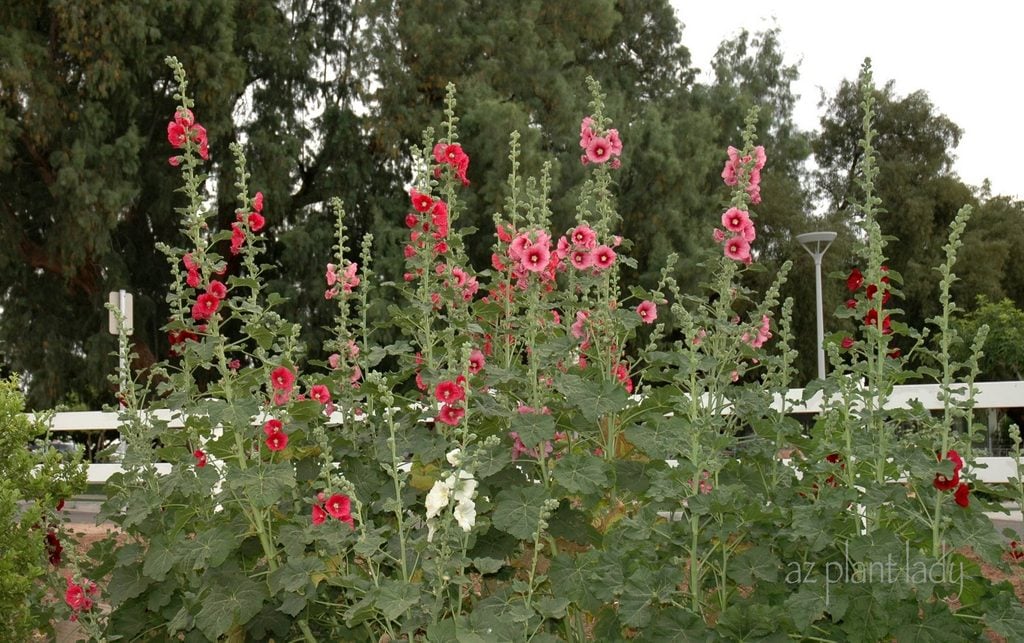
Tall-growing biennials like hollyhocks provide a colorful screen against a fence all summer long.
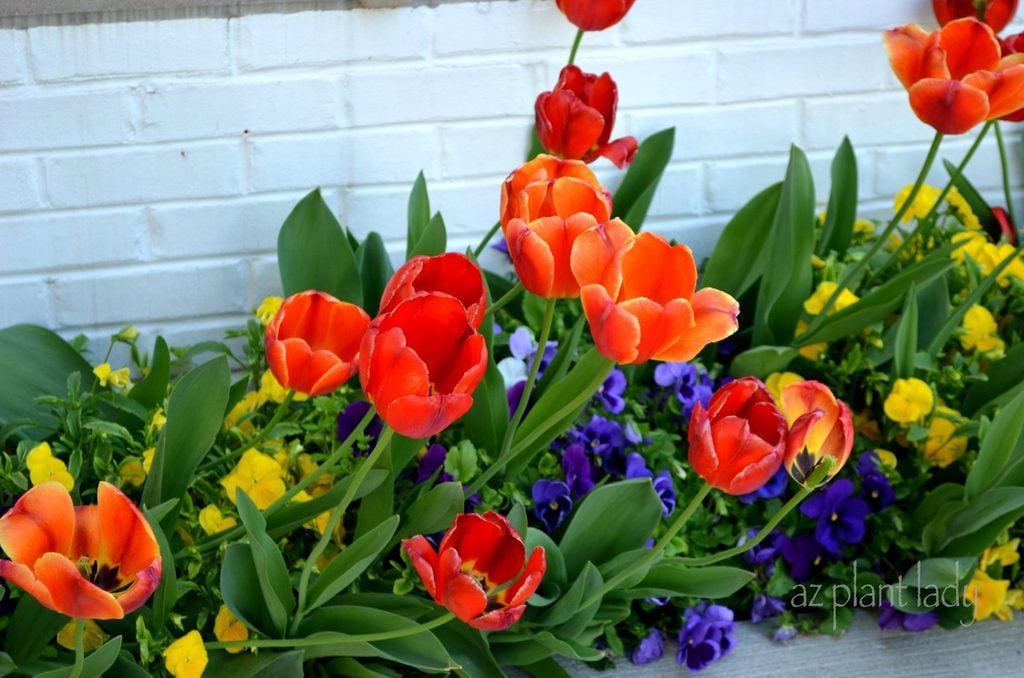
This colorful planting against a bare wall creates a colorful spring display in Berea, Kentucky. Include tulips, violas and pansies.
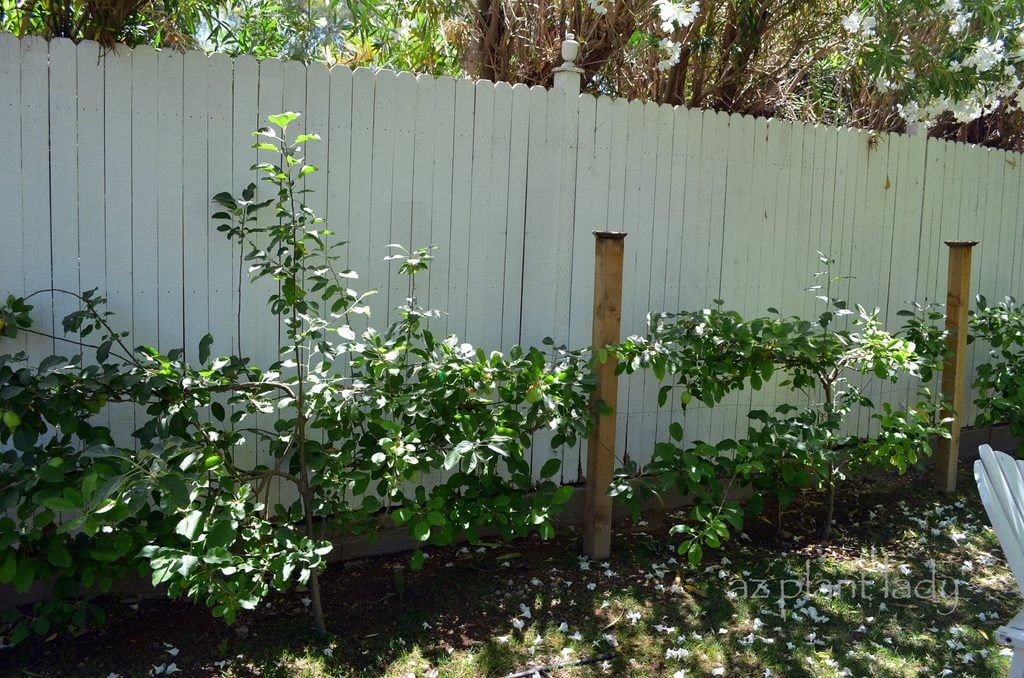
Espaliered fruit trees, like this apple tree, not only look great growing against a fence—they also produce delicious fruit!
Vines to Grow Against a Fence
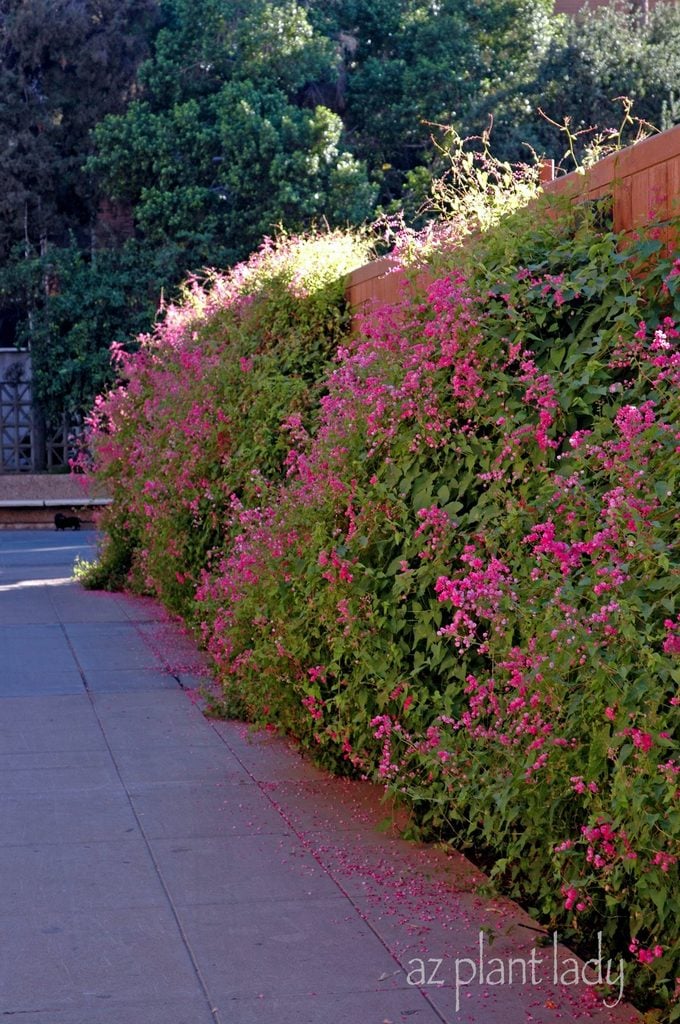
Flowering vines are a great choice for bare walls such as this Queen’s Wreath Vine (Antigonon leptopus) at Arizona State University. There are many different types of flowering vines and you are sure to find one that will grow in your climate.
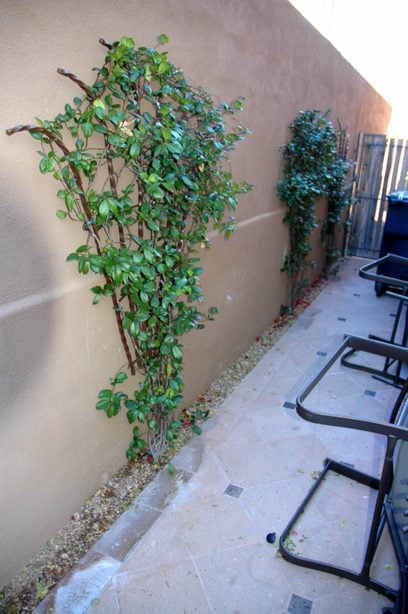
Vines are also a great choice for narrow spots like these star jasmine (Trachelospermum jasminoides) growing up on decorative trellises made up of rebar.
Shrubs to Grow Against a Fence
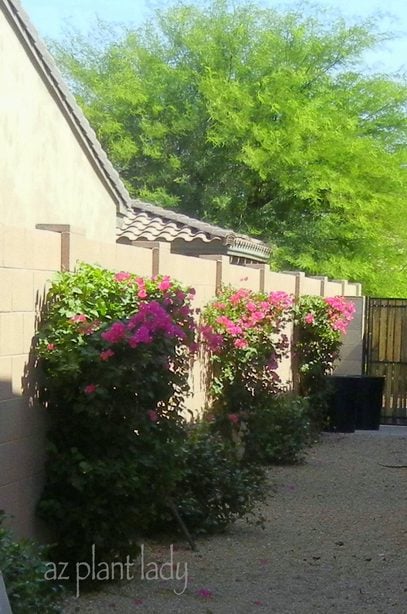
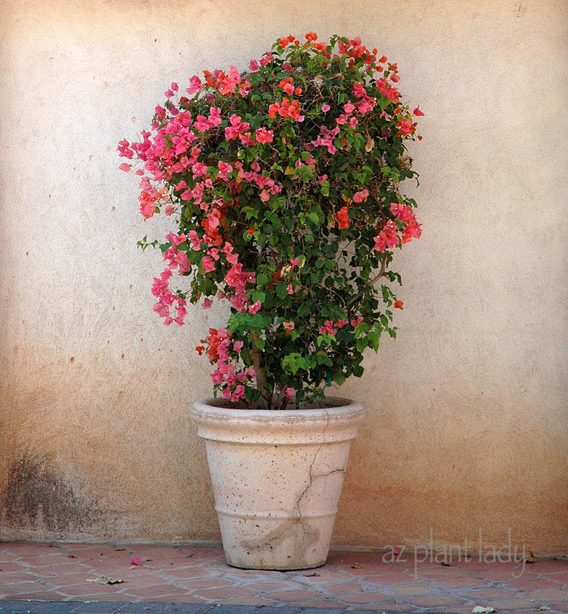
Side yards are often used for storage and utility. This can be quite a depressing view from a window that faces out into this area. An easy solution is to plant a flowering shrub, centered across from each window, like the bougainvillea, above.
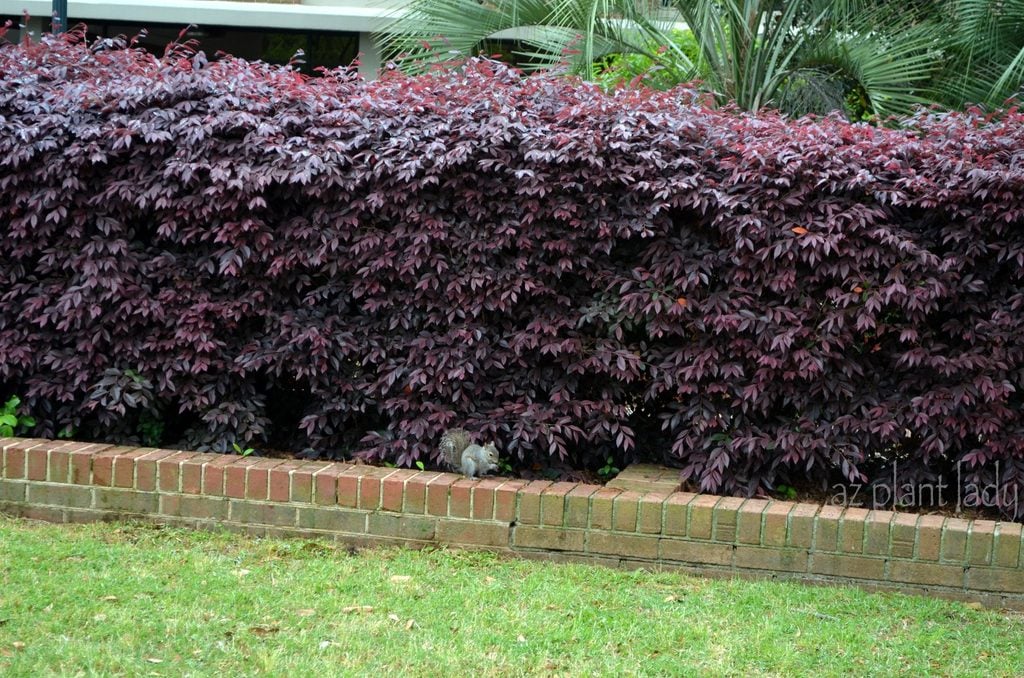
Shrubs with colorful foliage are also a great choice for covering bare walls or fences, like this one at the University of South Carolina.
Container Plants to Place Against a Fence
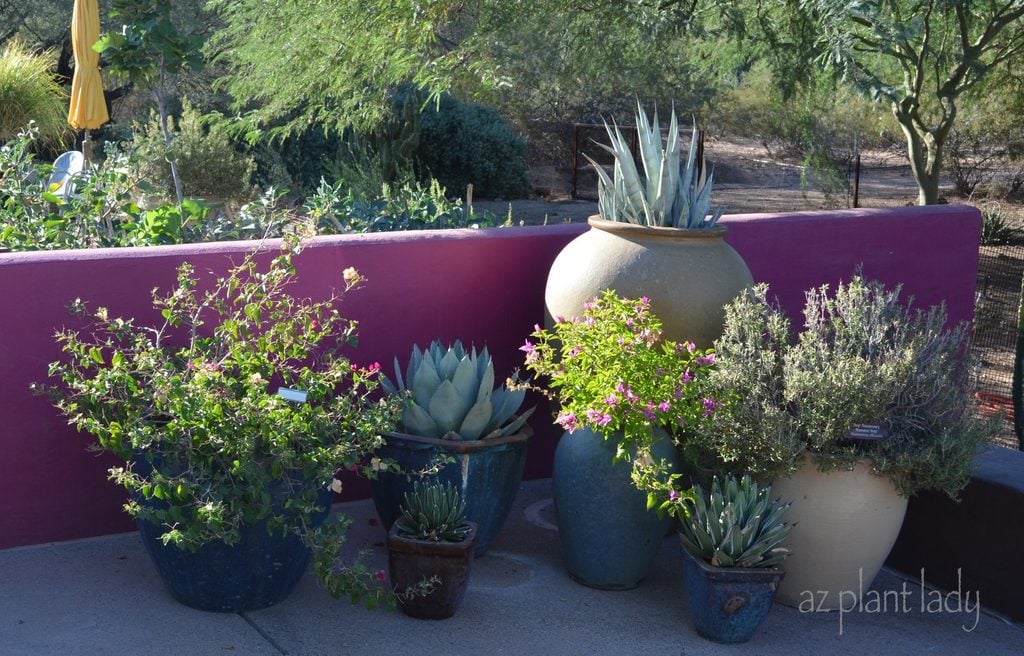
Don’t have soil in which to add plants? Then containers are your best choice. Select a variety of pots and plants for added texture and interest.
Containers mask an unsightly item or block a view. A group of stout containers can hide low-lying items like utilities and hose reels, while taller containers will cover even larger items. Check out 10 dwarf flowering shrubs for containers.
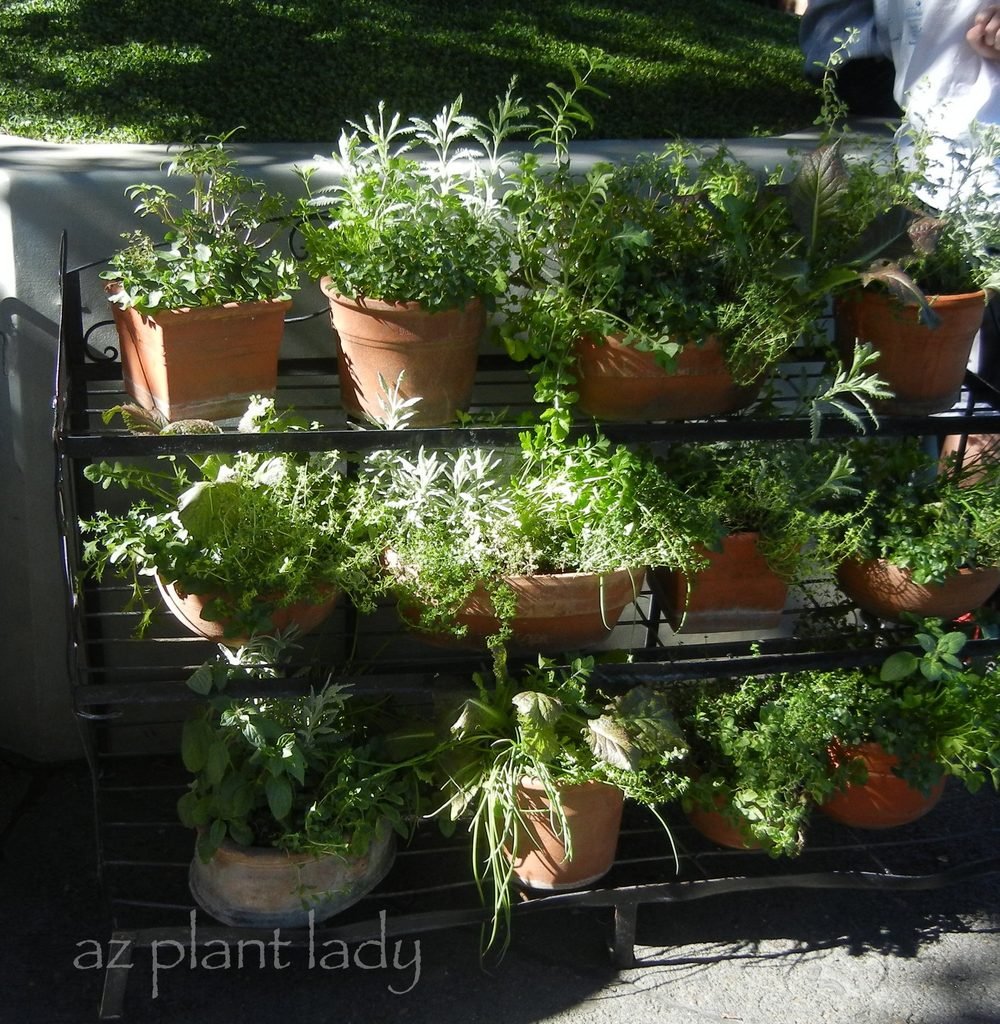
A plant shelf is a wonderful way to decorate a bare wall, like this one filled with potted herbs at Disneyland.
You can grow shrubs against a bare wall, even without soil to plant it in – just use a container instead.
Edible Plants to Grow Against a Fence
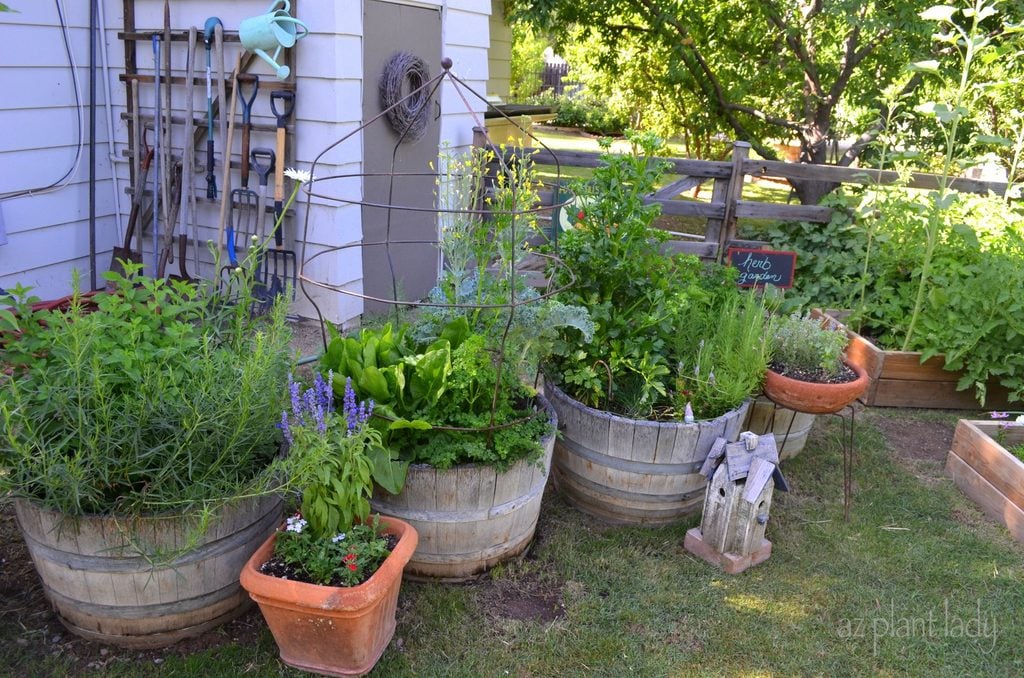
Dress up a bare fence with whiskey barrels and fill with edible plants such as herbs and vegetables.
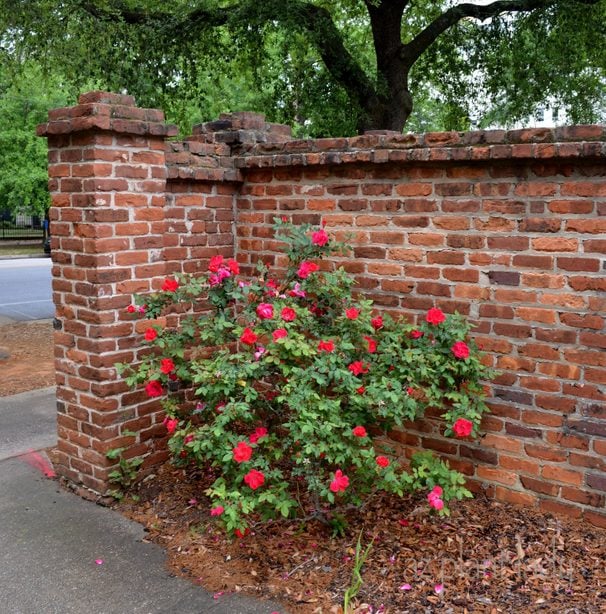
Never underestimate the ability of a single rose bush to dress up a bare corner. Plant a climbing rose to beautify a fence. Or lean a trellis against a structure to create a wall of blooms. Learn how to choose the best roses for your garden.
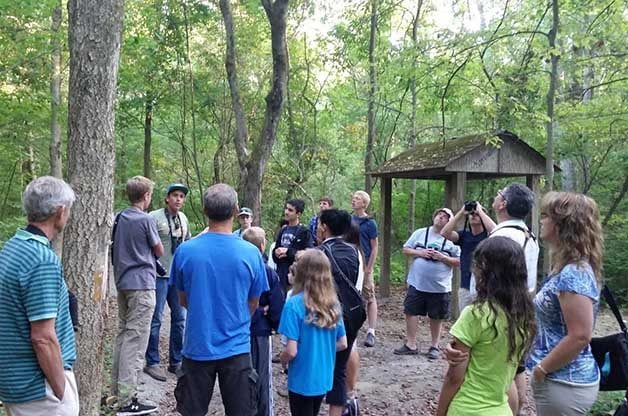
In just a few short days I’m heading to Cape May, New Jersey to attend the Cape May Autumn Bird Festival. I couldn’t be more excited, but my excitement is a tiny bit halted by the daunting task of packing. This is especially difficult when you’re heading off to a whole different part of the country. Here are a few things I’ve learned since going on a few bird-watching trips. And trust me, this is list is as much a help to me as it is you. Hopefully this way, I’ll remember all of these things!
- Print a bird list. A lot of festivals, Audubon societies, etc. will give you bird lists. But just in case, find one online you can print. Plus, if you’re like me, you’ll want to take a look at some of the birds you might see!
- Fashion doesn’t count. Pack for comfort and warmth, especially this time of year. I find that I’ll pack a huge bag full of clothing options, but end up wearing the same comfortable sweatshirt for a couple of days in a row.
- Bring sunscreen. Just because it’s not the heat of the summer, doesn’t mean you can skip the SPF. I learned this the hard way when my hands and face got sunburned while horse back riding in Colorado on a chilly spring day.
- Don’t forget the essentials. The basics are easy to overlook. Make yourself a to-do list and include binoculars, field guide, chargers for electronics, a jacket, warm socks, rain gear. Check out the best birding gear you never knew you needed.
- Check the weather. While a 10-day forecast isn’t always going to be accurate, it doesn’t hurt to look at the forecast for the area you’ll be birding in. That way you’ll have an idea of exactly what type of clothing to bring and if hats and gloves will be necessary.
- Invest in a bird-watching bag. Whether it’s a backpack or cross-body type thing, you’ll want something comfortable to hold water, extra clothing layers, field guides and snacks.
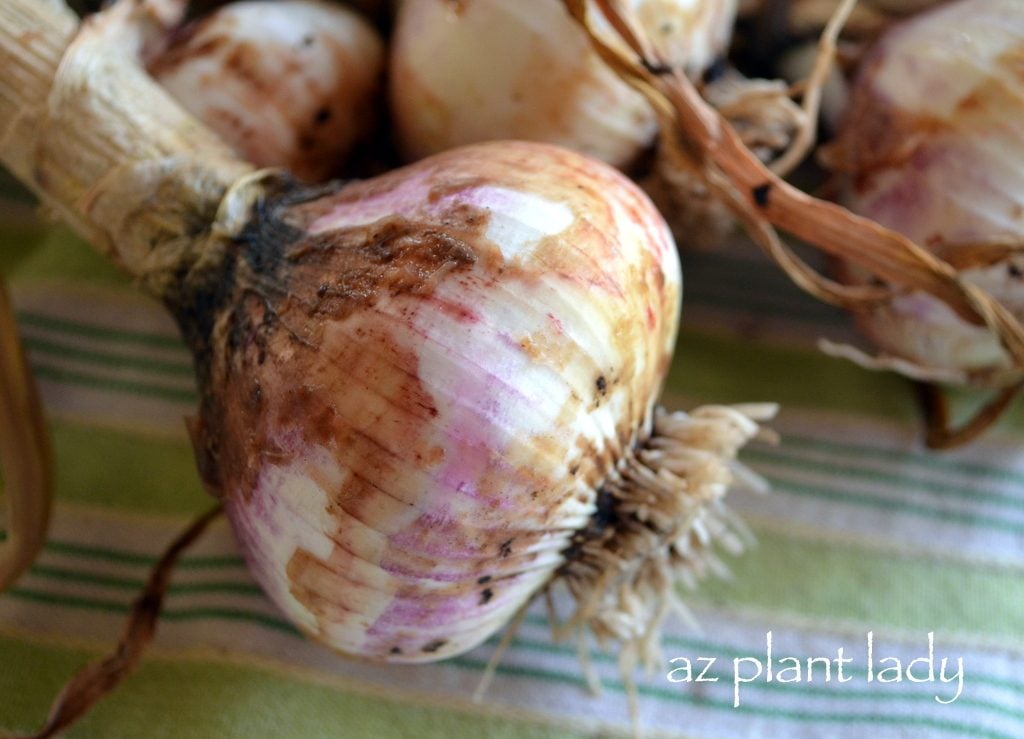
Did you know that planting garlic can keep damaging insects away from your garden? In previous posts, I talked about how garlic helps roses by repelling aphids and help prevent fungal diseases such as blackspot and powdery mildew.
Today, I am going to share with you another way that garlic can help you in the garden. Plant garlic around fruit trees to help prevent borers.
Borers are small beetles that lay their eggs in the crevices of bark. The eggs hatch and the small larvae eat their way into the sapwood of your tree, which causes damage and can even kill a tree. Borers usually target young or drought-stressed fruit trees, although they can go after a healthy tree, too.
Bugs simply don’t like the smell of garlic.
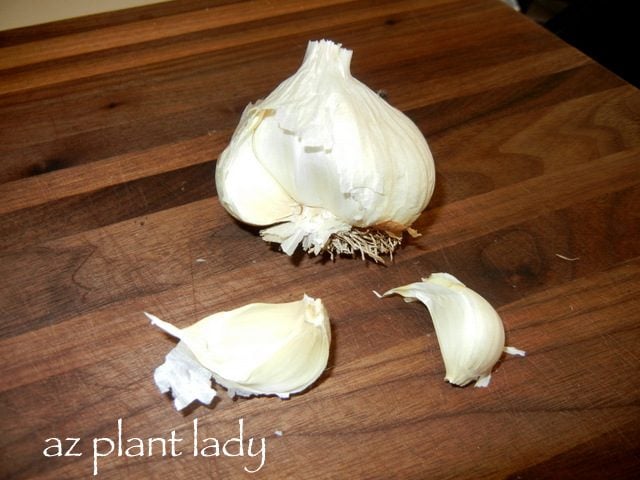
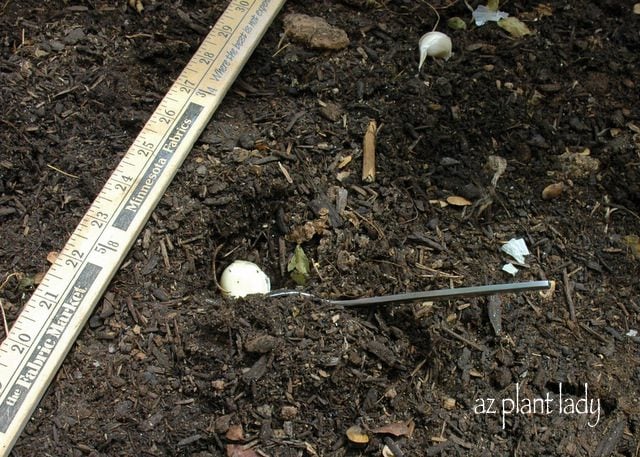
Now, you don’t have to go out and buy fancy garlic from the garden nursery to plant, (although you certainly can if you like). A simple trip to your local supermarket is all you need to do. Plant 5 to 7 garlic cloves around your tree about 1 or 2 inches deep. Keep the papery skins on and plant each clove so that the pointed part faces upward.
As garlic begins to grow, green shoots will form. You can cut a few and dice them much like you would chives and use them with you cook for a mild garlic flavor. In cold climates, the greens will die back in winter, but will come back in spring. For those of you in warmer climates, the greens will last year round.
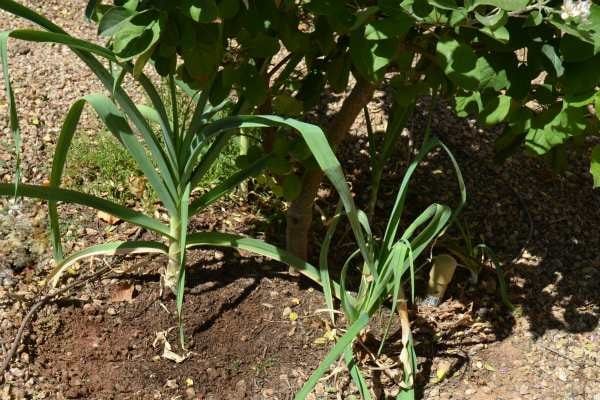
If you have apple, apricot, cherry, nectarine, peach or pear trees, I highly recommend planting garlic around each tree. Garlic is easy to grow and can be grown among existing plants or even in containers.
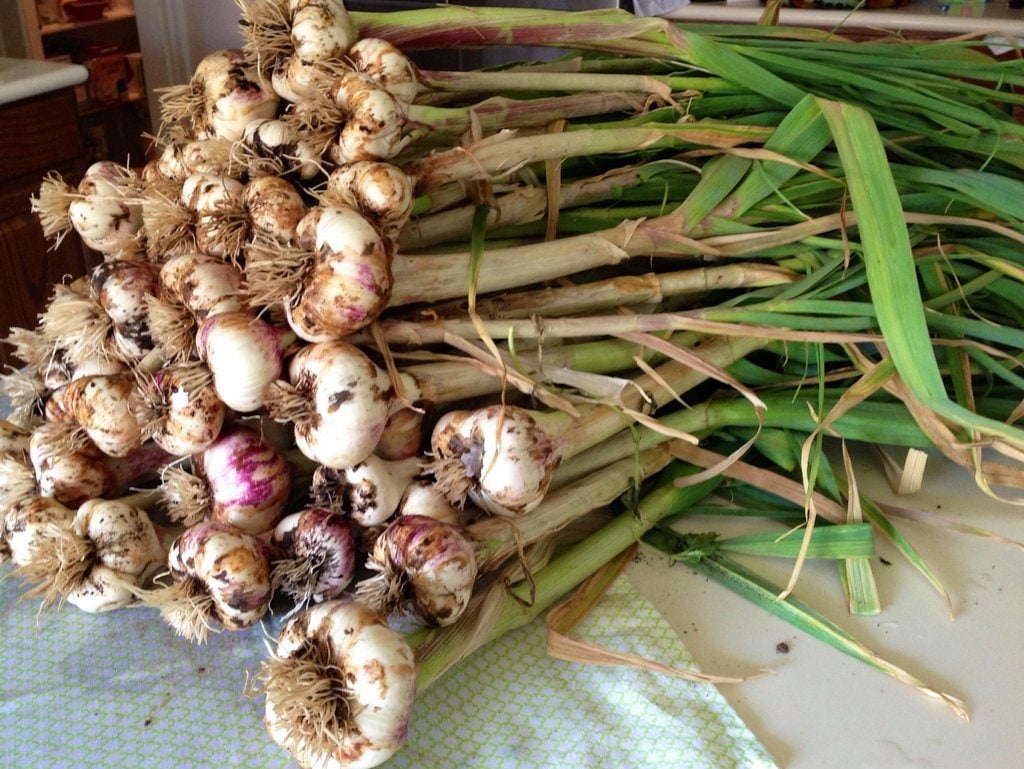
Even if you do not have fruit trees, growing garlic is fun and rewarding. Fall is the best time to plant your garlic, whether to keep bad bugs away or for eating later. Garlic bulbs last around 6 to 9 months after harvesting.
Do you like your home to smell nice and fresh?
What if you could create your own ‘natural’ air fresheners using herbs, fruit and spices instead of spraying artificial scents into the air? There are countless products on the market that claim to freshen up the air in your house. But often, their fragrances are overpowering, artificial smelling and expensive.
Imagine if your home could have the natural fragrance of citrus paired with your favorite herbs. Their fragrance is refreshing and not over-powering. Better yet, they are easy to create with items you may already have in your own kitchen.
Releasing the fragrance is done by adding the contents of your natural air fresheners with enough water to fill a small pot at least 1/2 – 3/4 full. Heat to boiling and then turn down to low and allow it to simmer. That’s it!
You can make up one air freshener at a time, or make a few and freeze them until ready to use. They will keep for at least a week in the refrigerator. Your natural air freshener can also be frozen – just make sure to freeze it in a freezer-safe container such as a wide-mouth jar, like I have.
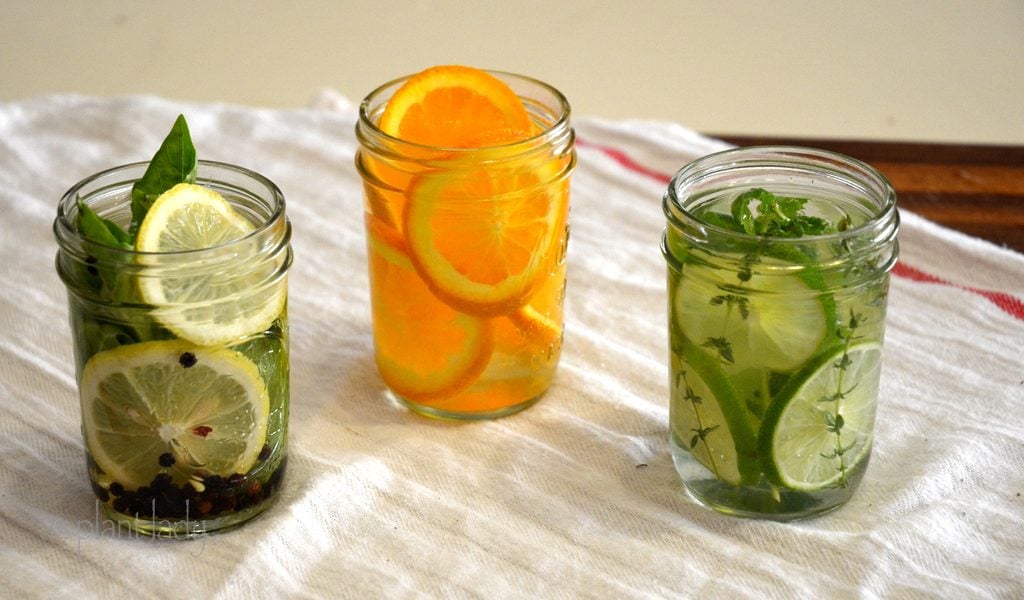
There are many different fragrant combinations. Here are a few of my favorites:
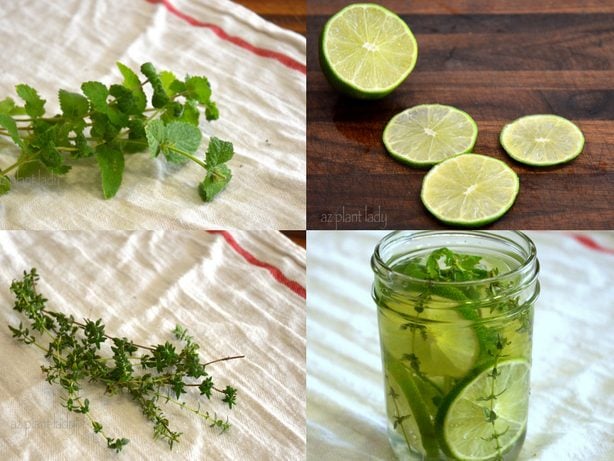
Lime with fresh thyme, mint and vanilla. For this natural air freshener, I cut some fresh thyme and mint from my garden and added a lime that I had sliced. I then added a teaspoon of vanilla extract and filled the rest with water.
That’s all there is to it. I told you it was easy to make DIY air fresheners from natural ingredients!
Here are some other ideas:
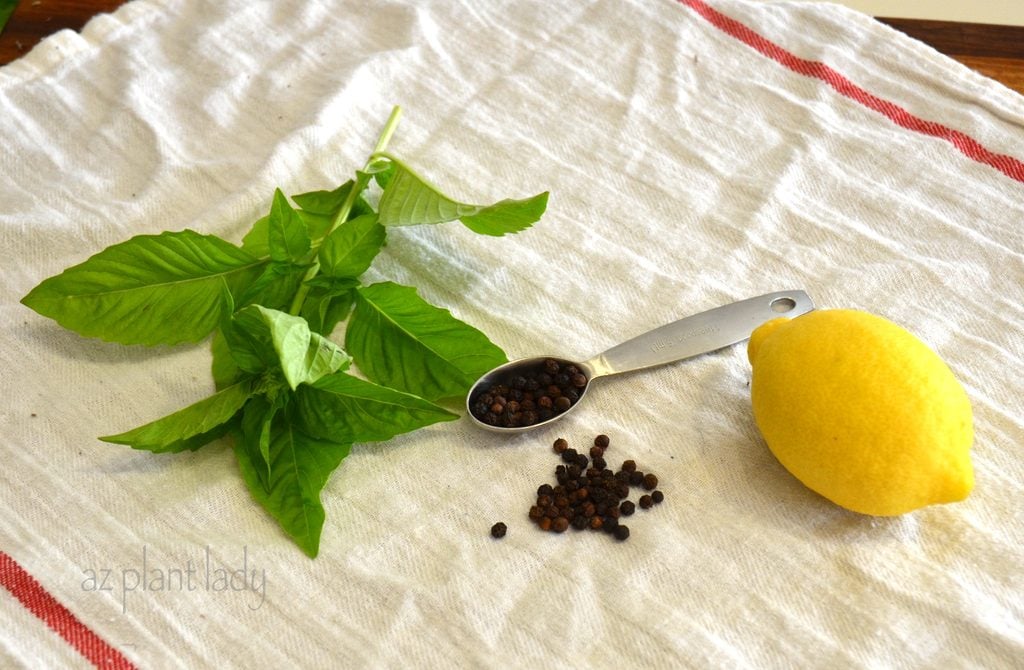
Basil, peppercorns and lemon. This combination reminds me of my childhood in Southern California where we had a large lemon tree. The basil came from my home garden, the lemon from the grocery store and the peppercorns from my pantry.
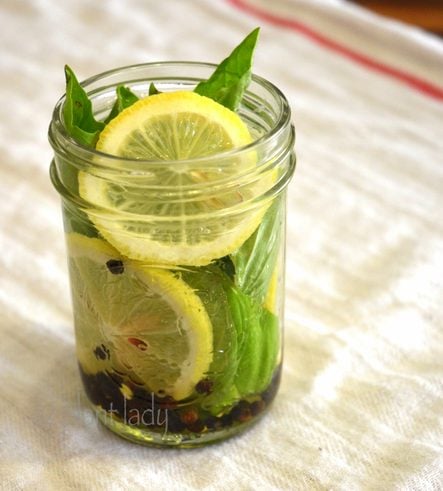
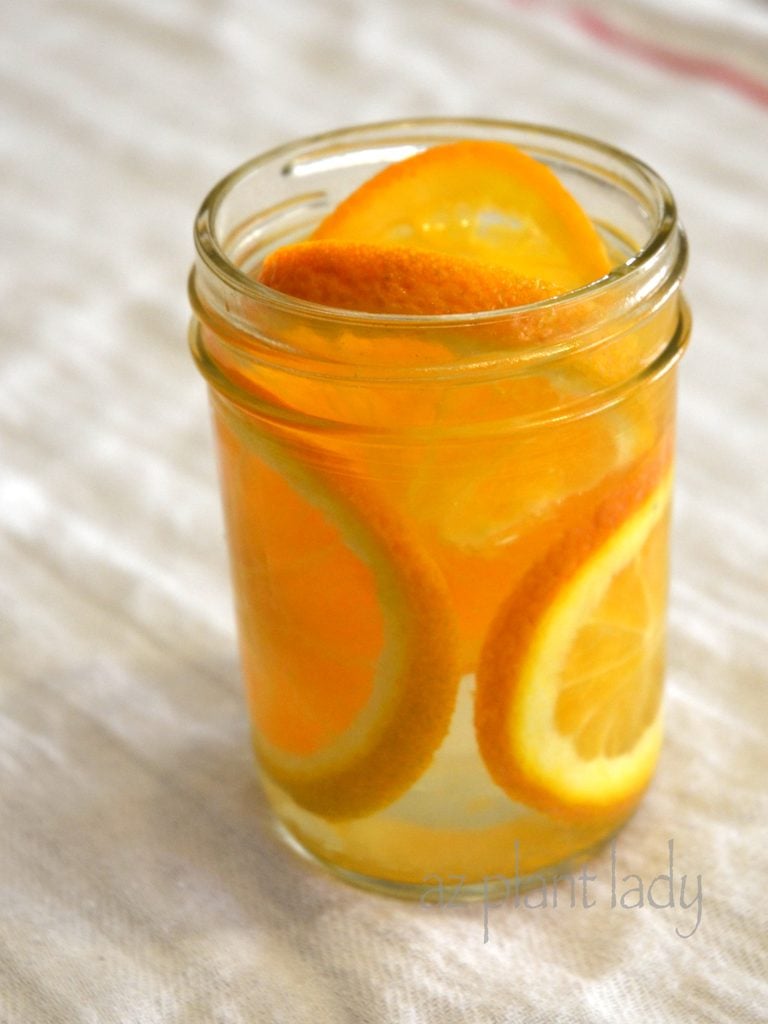
These natural air fresheners aren’t just fragrant, they look great in jars, don’t you think?
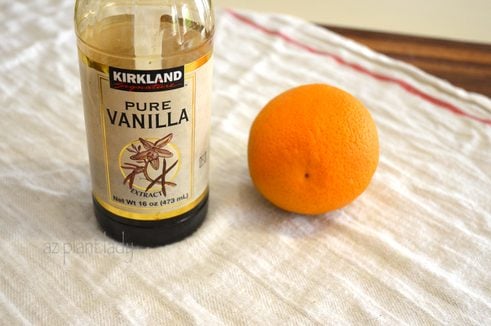
Orange and vanilla. I love this combination because it takes only two ingredients AND it smells like orange sherbet and vanilla ice cream mixed together, which was my favorite ice cream flavor as a child. To create this, simply add a few slices of an orange and 1 teaspoon of vanilla extract. You can add whole cloves and cinnamon sticks to spice the orange and vanilla, if you like.
As you can see, making your own natural DIY air fresheners is easy to do. In addition to the fragrant combinations that I have made, you can have fun and create your own combinations. In addition to the ingredients that I have used, here are some others that you can experiment with to create your own unique natural air freshener: citrus peels, apple peels, almond extract, peppermint extract, coconut extract, ginger, nutmeg, ground cinnamon, whole cloves, bay leaves, basil, sage, lavender, oregano and rosemary.
What combinations would you like to make?
Birdhouses are made to be adorned—at least, that’s my philosophy. I love repurposing old knobs, candlesticks and other odds and ends into accessories for birdhouses. I call the finished products “birdtiques,” and they look fantastic in the garden. Best of all, these birdtiques don’t cost a lot of money. All you need are a simple $10 birdhouse kit, a junk pile and a little imagination. Get ready to have the most stylish DIY birdhouse on the block—that is, if you can bear to put it outside.
I think of each DIY birdhouse as having four elements that make it distinctive: the base, the roof, the perches and the predator guards. You can customize each one -depending on the supplies you have on hand.
Bases. Old coat hooks, ceiling light canopies, tree branches, discarded candleholders, antique sink or shower faucet handles, ashtray stands—these and more make wonderful birdhouse bases.
Roofs. Metal, rubber or fabric – use any kind of flexible, water-impervious material as a roof. Even if all you have is a faded scrap of Sunbrella fabric, you can glue it over the roof, seal it and then add moss for a living roof. The birds will love pulling the moss out for their nests!
Predator guards. Predator-guard candidates come in all shapes and sizes. Just adding an inch can keep squirrel and raccoon paws from scooping out the eggs. And even more will protect bluebirds from crows, cats and snakes. When selecting a guard, keep in mind what size hole you need to attract certain birds. You don’t want it too big, or that will assist predators. Old porcelain light sockets, chrome radiator flanges and big rubber gaskets are a few handy options.
Perches. While sweet in appearance, perches give predators a leg up on stealing eggs and disrupting a nest. It’s always best to remove perches from store-bought birdhouses. Instead, think about using a perch on the side of the house, where it will double as a handle. Discarded cabinet knobs, tin wings, and spigot handles from sinks or hose bibs all make interesting side perches.
Psst! Learn how to make a DIY coffee can birdhouse, too.
Materials:
- Birdhouse kit
- Wire
- Base
- Roofing material
- Glue
- Paint
- Sealer
- Accessories (odds and ends, junk, etc.)
- Needle-nose pliers
- Assorted screws, roofing nails, finishing nails
- Cordless drill
- Coping saw (for clean-out door)
- Tin snips or sharp scissors
- Vegetable peeler or paring knife
Step-By-Step Instructions:
Step 1
Assemble and glue the house, excluding the bottom. (You can also recycle an old birdhouse.) Lightly sand and smooth the inside and outside using medium- to fine-grit sandpaper. Pay special attention to the hole where birds enter and exit.
Step 2
Drill holes in the bottom panel of the house for drainage and ventilation. Sand both sides of the bottom with a medium- to fine-grit sandpaper. Add the bottom to your house but don’t glue it yet. It will be easier to attach your base if the bottom stays free.
Step 3
Prime your house with exterior or interior-exterior primer. I like the eco-friendly low-VOC paints. Don’t paint the inside, though: Keep it natural for the birds. After the primer is dry, sand your house lightly with fine-grit paper to prepare the surface for the final coat(s) of paint.
Now attach a base and accessories. Choose your own design, or try one of these for inspiration!
Step 4
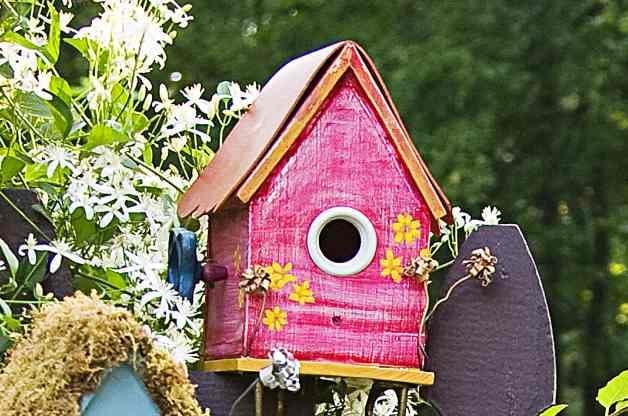
Liza
This dainty pink house takes advantage of several workshop castoffs. Coat hooks salvaged from old closets make wonderful birdlike feet, while a piece of orange rubber belting provides a water-impervious cover for the roof. Finally, an old blue spigot handle does double duty as a side perch.
Step 5
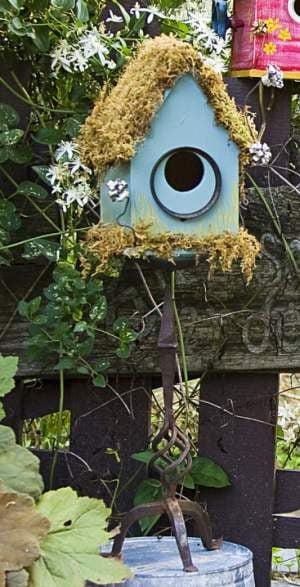
Gretel
The base of this Hansel and Gretel house was made out of an iron candlestick, which gives it a bit of panache. Before gluing the bagged moss to the roof, I made sure to fill the roof seam with caulk so little birdies would stay dry. The big, round predator guard lends a modern feel to an otherwise woodland cottage style. The tin flowers provide a delicate birds-only perch, keeping predators at bay.
Step 6
Margaret
Margaret is a little more tidy and together. A handsome copper roof, elegant copper flowers and a nicely proportioned light canopy for the base lend an air of refinement. I tinted the final coat of shellac to lend an antique quality to the finish. The front perch is a wooden button that’s dainty enough for a bird but not too much to help a squirrel.

Step 7
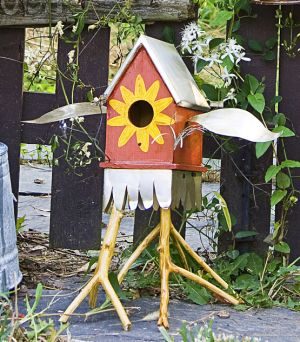
Sunny
It’s time to go for a walk in the woods! The legs of this fun house are sticks from the backyard. You can leave the bark on or whittle it away with a vegetable peeler, as shown here. Sunny has roof flashing that is thin and bendable enough to form a roof, wings and “feathers.” The result is a very birdlike house, with the wings doubling as a safe resting spot for feathered friends. Some fun painting and tin flowers add whimsy and color.
This discarded tomato cage makes a sweet DIY bird feeder! Add a few tin flowers, an arching plant and a colorful dish for birdseed, and you’ll soon have a bona fide work of art that’s also great for attracting birds.
Materials:
- Tomato cage
- Plastic pot, soil, and plants
- Plastic bowl or tray
- Metal flowers (optional, see below)
Step-By-Step Instructions:
Step 1
If you already have a location in mind, install your tomato cage there to start. You can either insert the tines into the earth as you would normally (the deeper and more even, the better), or bend the tines outward to form “feet.”
Step 2
Measure the circumference of the tomato cage ring that you want to use for holding up your plant. Arrange plants in a plastic pot with a top circumference slightly larger than the ring on the cage. Ease it down into place.
Step 3
Measure the very top ring of the tomato cage for a plastic bowl or tray to rest there, and then scout around for a colorful receptacle that fits your dimensions. Your kitchen, yard sales and thrift stores are great options.
Drop the bowl or tray into the top ring of the cage, and add birdseed. You’ll be attracting birds in no time!

Step 4
Want to add some colorful metal flowers to your feeder?
- Draw a simple flower shape on your choice of metal and cut 2 or more with tin snips or similar metal-cutting tool. Cut out 1 small center circle for each 2 flowers you cut.
- Spray-paint flowers and circles in the colors of your choice.
- Nestle 2 of the flowers together and place 1 circle on top in the center. Using a nail and a hammer, punch a hole in the center of the flower cluster with a whack of the hammer on the nail. Repeat for the rest of the flowers.
- Take about 12 in. of wire that is stiff enough to hold the flowers upright but flexible enough to bend easily. Using needle-nose pliers, twist a loop in the wire about 2 in. from one end. This will support the flowers so they don’t fall straight down the wire.
- Thread the flower cluster onto the short end of the wire to rest on the loop you made, and twist the wire above the flower into a spiral using needle-nose pliers. This will sandwich the flowers between loops so they are secure. Repeat for the rest of the flowers, and you’re ready to attach them to the tomato cage.
To attract birds this spring, I wanted to add another birdbath to my backyard. But like a lot of things, finding a birdbath that fits the bill and doesn’t break the bank isn’t as easy as it seems. I knew what I wanted: something easy to clean, affordable, distinctive and attractive. What I decided on is a simple and versatile homemade birdbath anyone can make.
Materials:
- 3 rods, each about 3 ft. long (either 1-in. doweling, ¾-in. metal electrical conduit or old broomstick handles)
- Exterior-grade paint
- Basin (preferably one with sloping sides, maximum depth of 3 in. and a textured surface for good footing)
- Hammer or mallet
- Piece of scrap wood
Step-By-Step Instructions:
Step 1
Cut the rods to the needed length, depending on how deep you need to sink them in the ground for stability. If you have loose, sandy soil, you will need to sink them deeper than if the ground is hard clay. I found the right length to be about 3 ft.
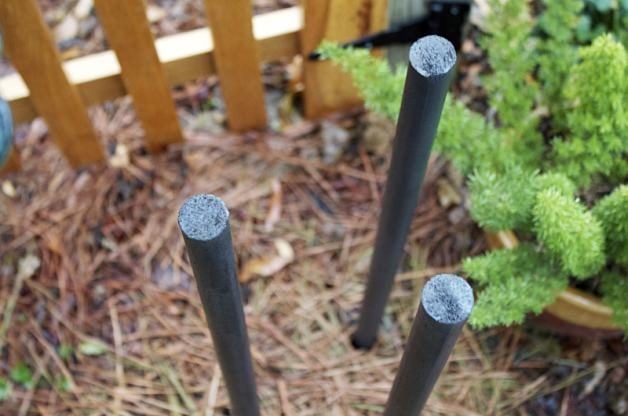
Step 2
Paint the rods. If you’re using metal conduit, be sure to wash them with a degreasing detergent to remove any oil and grime from manufacturing. Allow to dry completely.
Step 3
Choose the location of your birdbath. A shady spot with nearby shrubs or trees for safe cover is ideal. For maximum enjoyment, make sure you’ll be able to see the bath from your favorite bird-watching window.
Pound the rods into the ground in triangle formation to provide a stable base. The size of your chosen basin will determine the distance between rods.
Step 4
Place the basin on top of the rods. Fill the bowl with water and check to see if the base is level. If not, adjust the depth of the rods until the water is level. Place a stone or two in the water to provide an extra perch for birds and hold the bowl in place. Don’t forget to clean and fill your homemade birdbath regularly!

If you like the delicious taste of home-grown lettuce, then this is the project for you.
Lettuce is very easy to grow and fall is a great time to plant your own. You don’t have to have a vegetable garden plot – you can grow lettuce in a large container or even a recyclable grocery bag.
Would you like to join me with this fun gardening project? It is fun and easy to do!
Lettuce should be planted outdoors at least 2 weeks before the first frost in your area – but you can plant it sooner. To get a head start, you can plant your seeds indoors ahead of time while you are waiting for temperatures to cool and then transplant them out into the garden later.
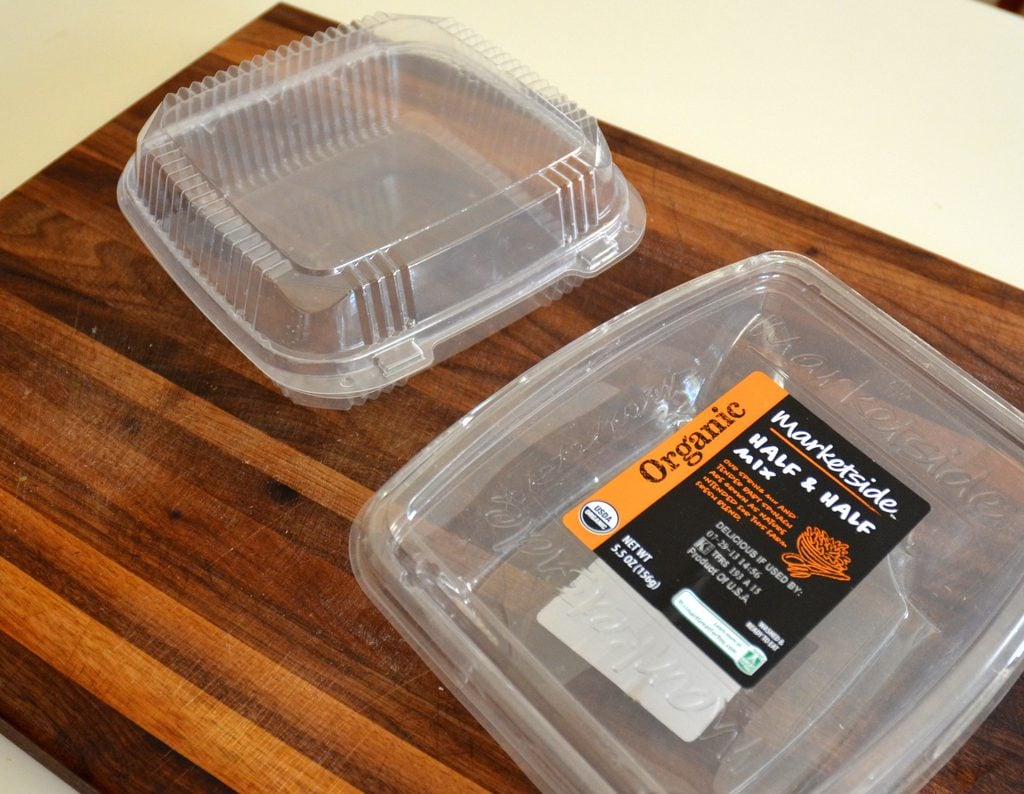
All you need for this project is potting mix, recyclable plastic containers and lettuce seed.
1. First, you must make holes for drainage on the bottom of your plastic containers.
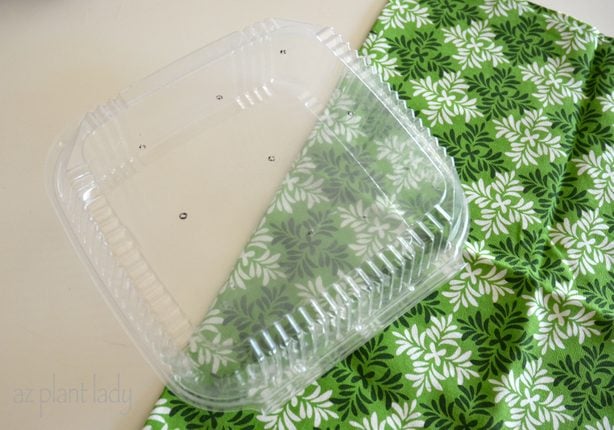
You can use any plastic container like those that produce are packed in or leftovers from your favorite restaurant.
2. To make the holes, I used a long nail. I heated up the sharp tip of the nail in a candle. It made it easy to melt little holes in the bottom. Add at least 6 holes.
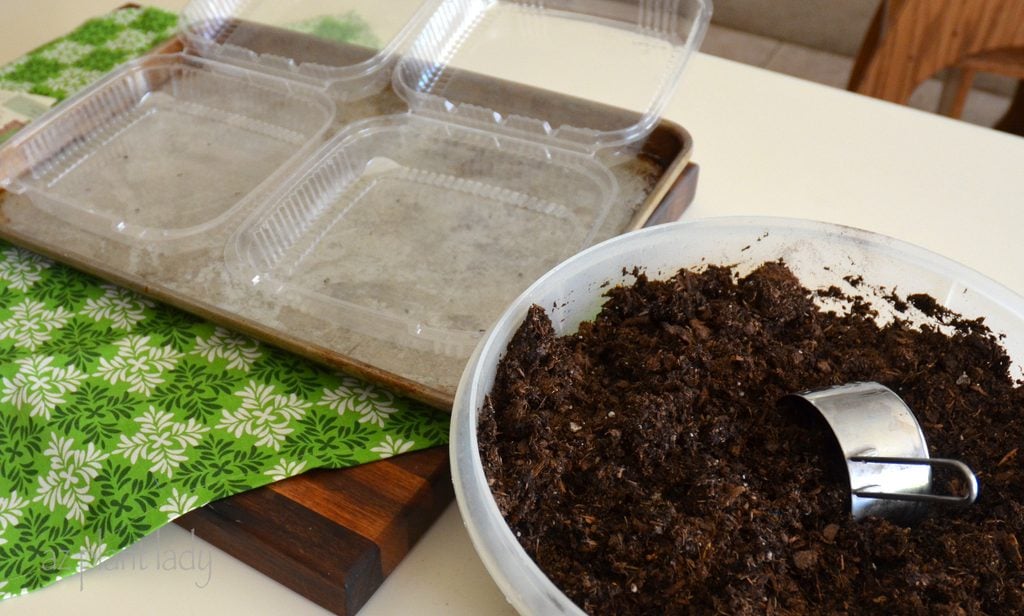
3. Moisten the potting mix before adding it to the containers. This is helpful because potting mix is often very dry and it can be hard to get it uniformly wet, after planting.
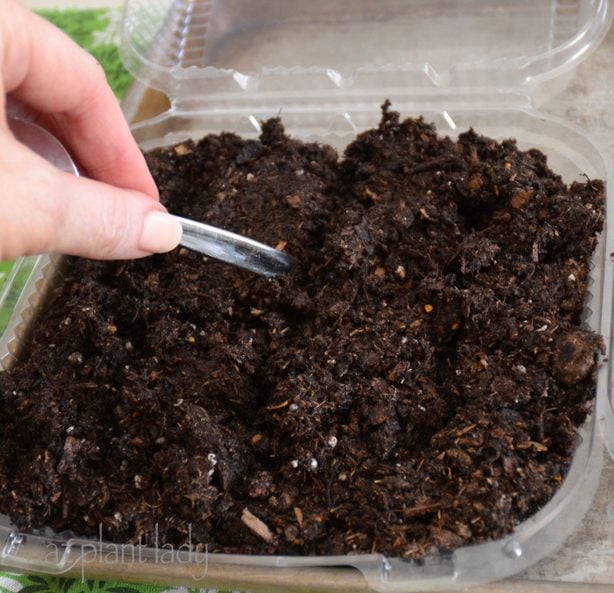
4. After adding the moistened potting mix, make little furrows 1/8″ deep in which to plant the seeds. I like the end of a spoon for this.
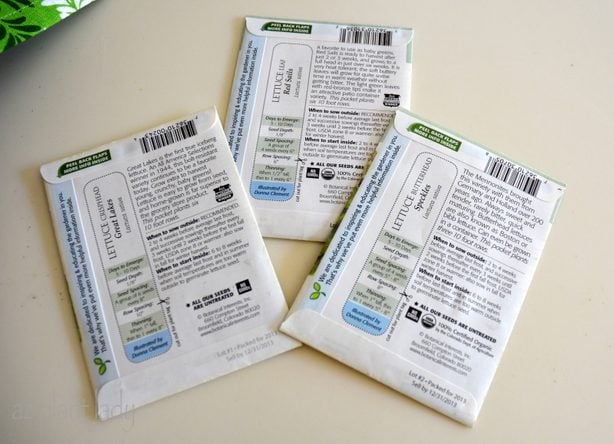
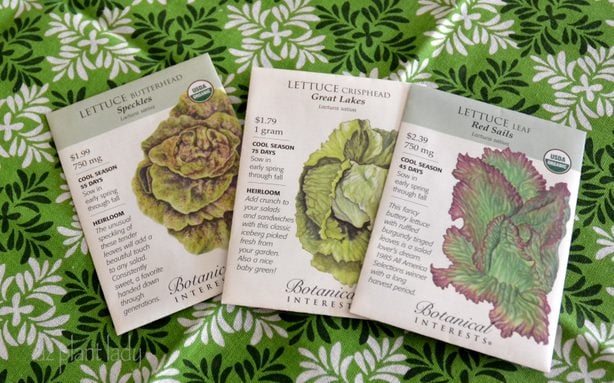
5. Before adding the seeds, read the back of the seed packet for instructions on spacing and how deeply to plant the seeds.
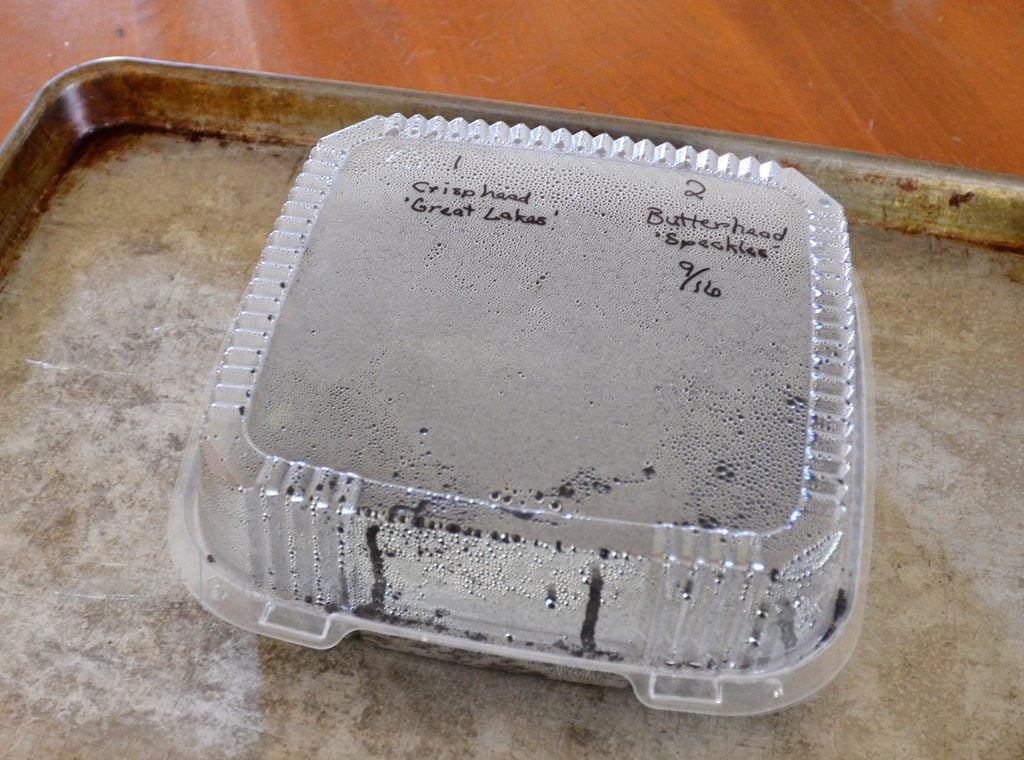
6. After planting the seeds, write down what type of lettuce you have and the date that you planted them. This will help you know how soon they will sprout – each seed packet will give you a range of days of when the seedlings will appear.
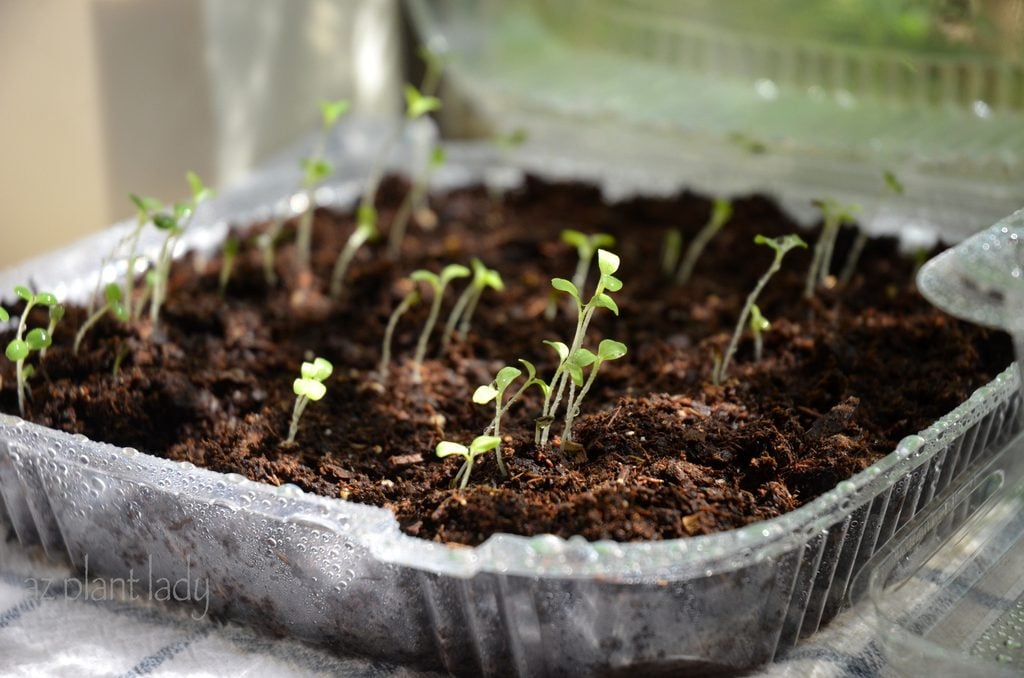
7. Keep the newly planted seeds covered, which keeps them moist – like a miniature greenhouse. Put the container in an area out of the sun, where the temperature is below 80 degrees or the seeds won’t sprout.
8. Open up your container daily and water using a spray bottle, if the soil begins to dry.
9. Once your lettuce seedlings sprout, place the container by a sunny window. Keep moist using a spray bottle.
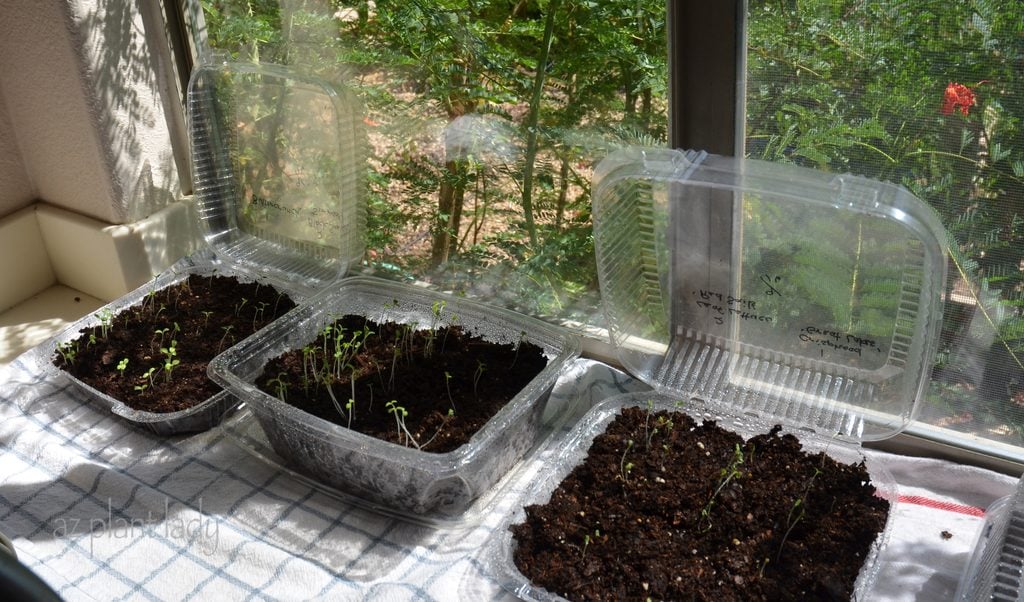
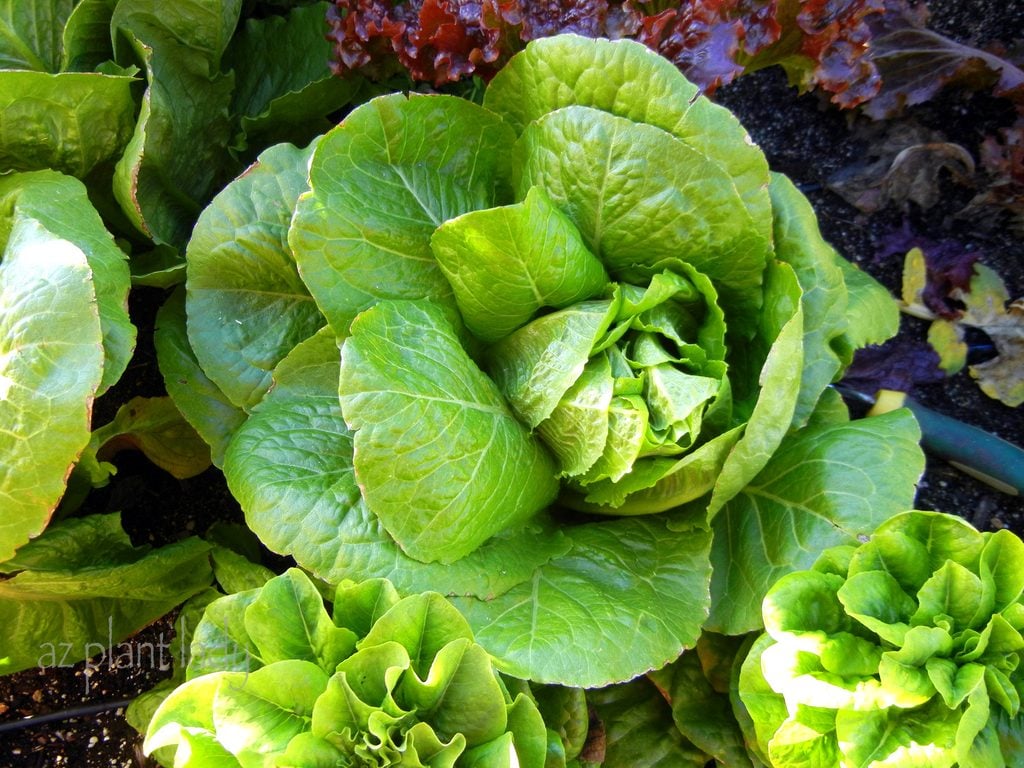
In a few weeks, your lettuce seedlings will be ready to transplant out into the garden.

Before you know it, you will be snipping fresh, delicious lettuce leaves for your dinner salad!
How about you? Would you like to grow your own lettuce along with me?
I’ll keep you updated on how my lettuce is doing and will show you how to harden the lettuce off and transplant it outdoors in a few weeks.