


How to Make a DIY Pie Pan Bird Feeder
Updated: Apr. 02, 2024
Turn an old pie pan into a DIY bird feeder. You don't need a lot of materials or time to put together a durable feeder with industrial flair.
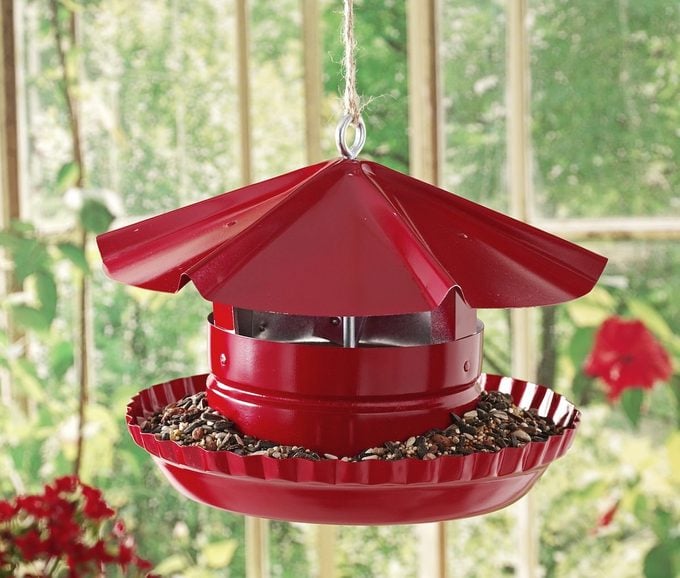
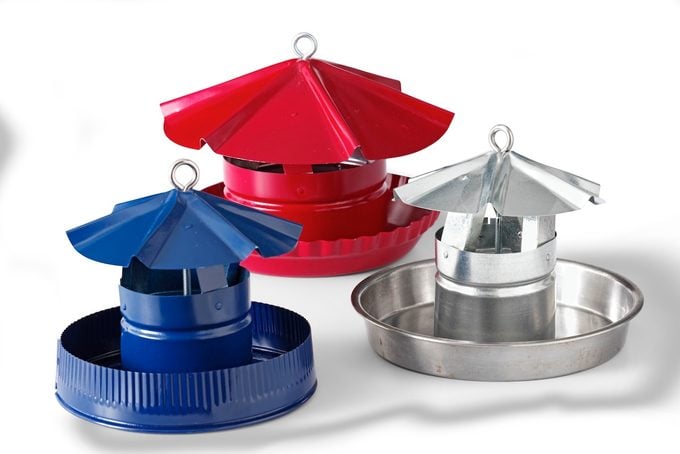
Looking for a sturdy, attractive bird feeder you can make yourself? Pick up an old pie pan at a yard sale, then hit the hardware store for a few basic supplies. Also look for vintage pie plates and cake pans at yard sales and resale shops. Then each feeder you make will be unique. Paint it a vibrant color to match your décor, or leave it plain for a vintage chic look. This DIY pie pan bird feeder is so easy, you may want to pick up some extra pie plates or cake pans to make a few for friends.
If you’re looking for a bird feeder will stand the test of time, this is the project for you. A vent (shanty cap) protects the food while a pie pan provides a picnic for your backyard birds.
Learn how to make a DIY muffin tin bird feeder.
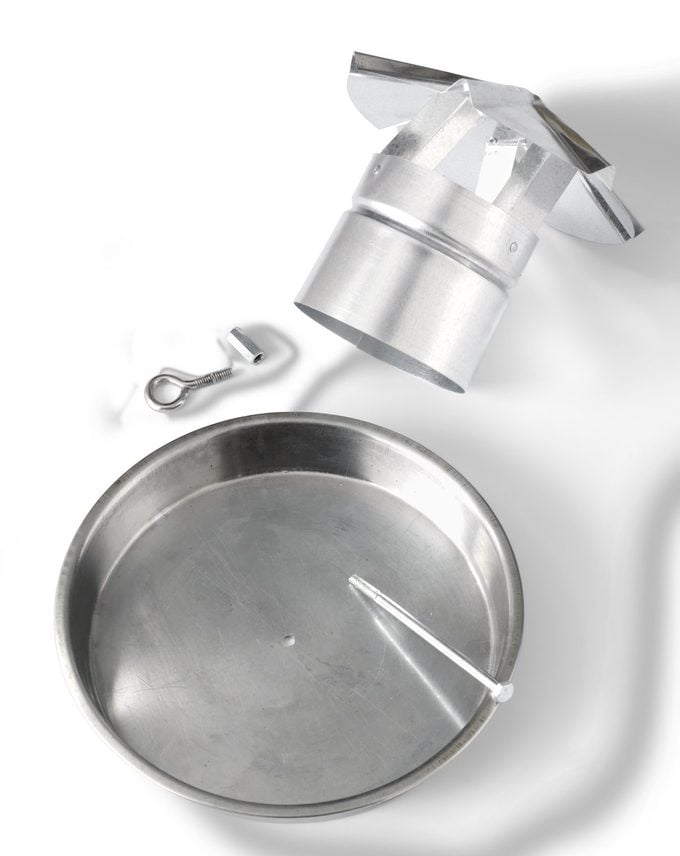
Materials:
- Vent (shanty) cap
- Aluminum pie plate
- ¼-in. eyebolt
- ¼-in. hex head cap screw
- ¼-in. coupling nut
- Exterior primer and paint (optional)
- Superglue
- Twine or wire for hanging
- Drill with 5/16-in. bit
Tip: Choose an eyebolt and cap screw that have a combined height of 1/8 in. to ¾ in. less than the height of the vent cap. That way, there will be just enough room for the coupling nut to hold the two together tightly.
Here’s how to make a DIY bird feeder for peanuts.
Step-By-Step Instructions:
Step 1
Wearing safety glasses, drill a 5/16-in. hole through the center of the vent cap and the pie plate. While you’re at it, drill a few small holes through the bottom of the pie plate to allow for water drainage.
Leave the vent cap and pie plate bare for an industrial look, or paint them to add a pop of color. I find that a latex-based exterior paint on top of primer adheres best to galvanized metal. Paint the vent cap and pie plate separately before assembling your feeder. Be sure to follow the instructions on your paint can and allow adequate drying time.
Step 2
Place the cap screw through the center hole in the pie plate with the threads facing upward. Give the coupling nut about 3 or 4 turns onto the threads of the cap screw to hold it in place.
Step 3
Next, center the vent cap over the pie plate while holding the cap screw in place.Place the eyebolt through the center hole of the vent cap and turn the eyebolt into the other end of the coupling nut. Using a wrench, hold the nut steady while hand-tightening the eyebolt. Seal the coupling with a few drops of superglue for extra holding power.
Step 4
To hang, slip twine or wire through the eyehole and tie. Hang from a tree branch. Then fill the platform with your favorite type of birdseed and watch the birds gather to enjoy your backyard masterpiece!
Next learn how to make a DIY simple platform bird feeder.