
Last week, my sister was in the backyard of her small farm when a killdeer started squawking at her. This kept occurring every time she venture out into the back lawn.
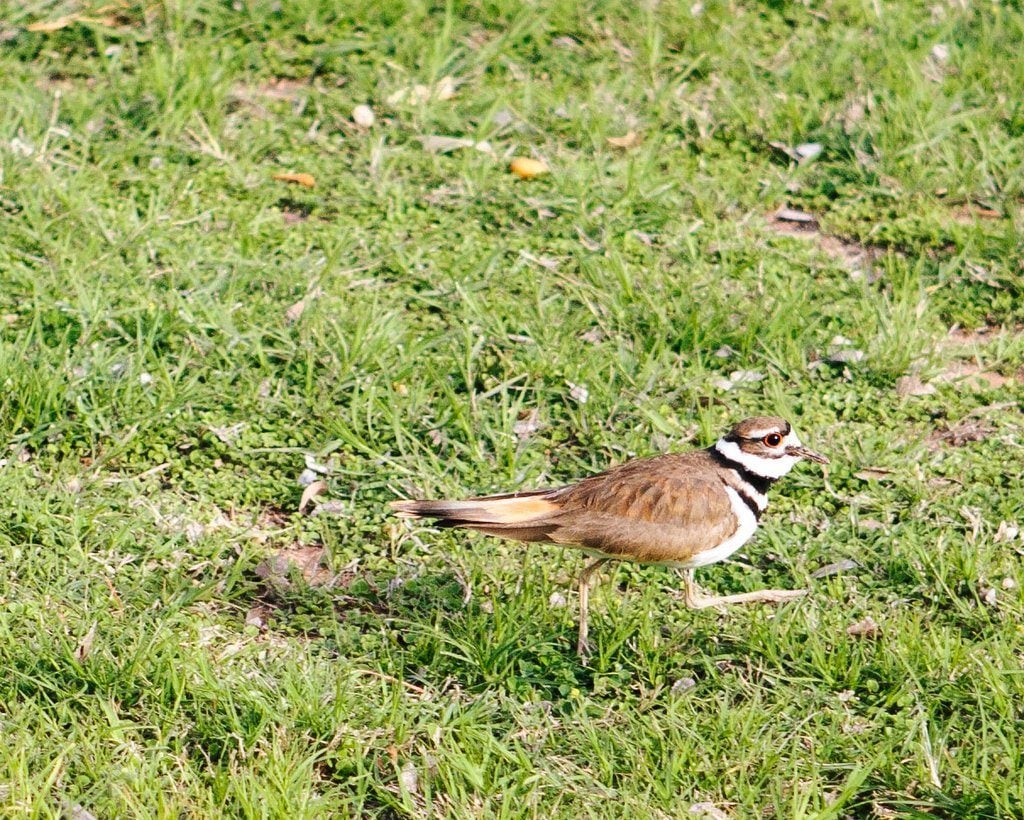
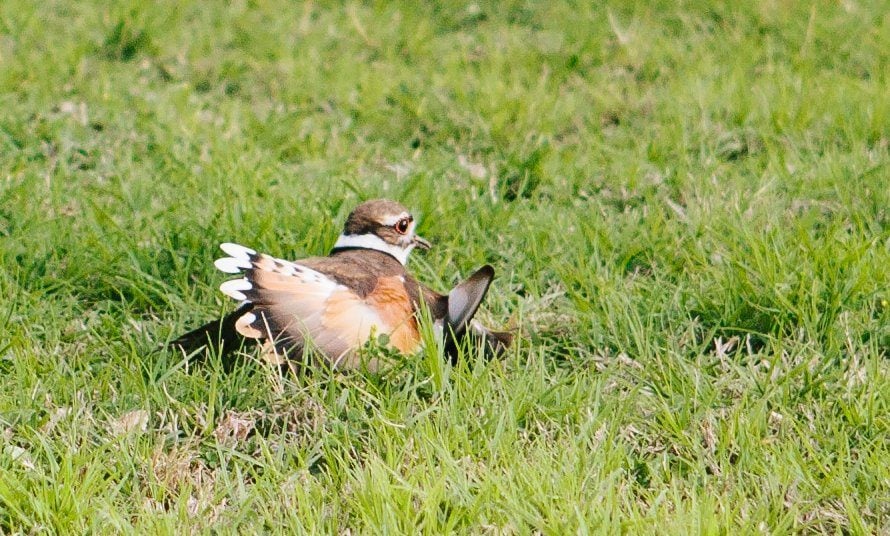
It wasn’t until the killdeer pretended to have a broken wing that my sister realized that there must be a nest nearby. Killdeer often pretend to be injured to lure intruders away from their nests.
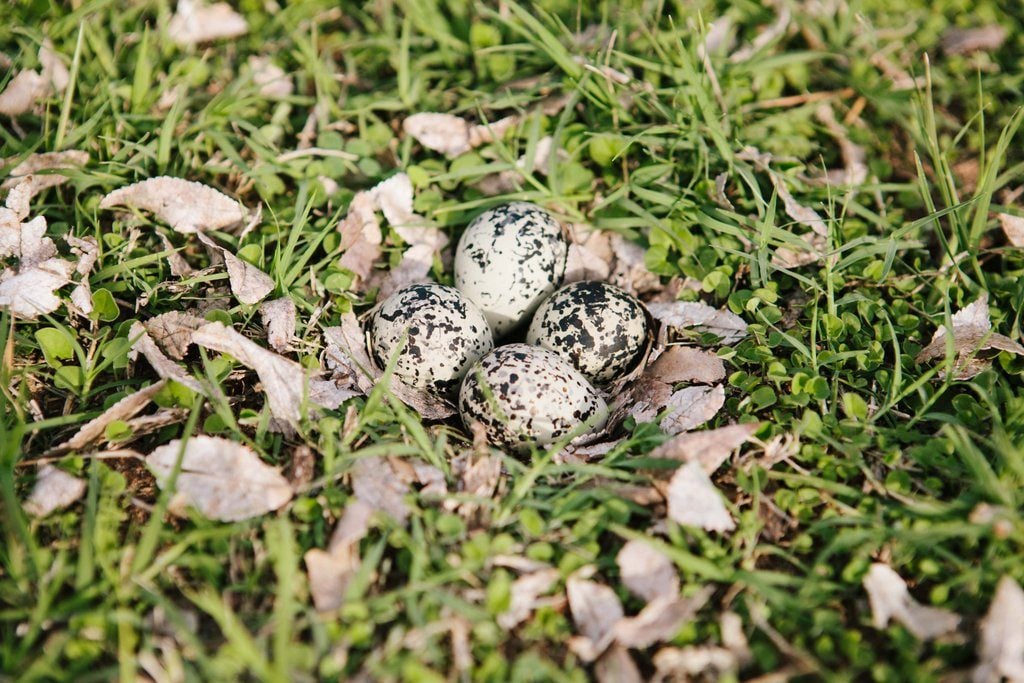
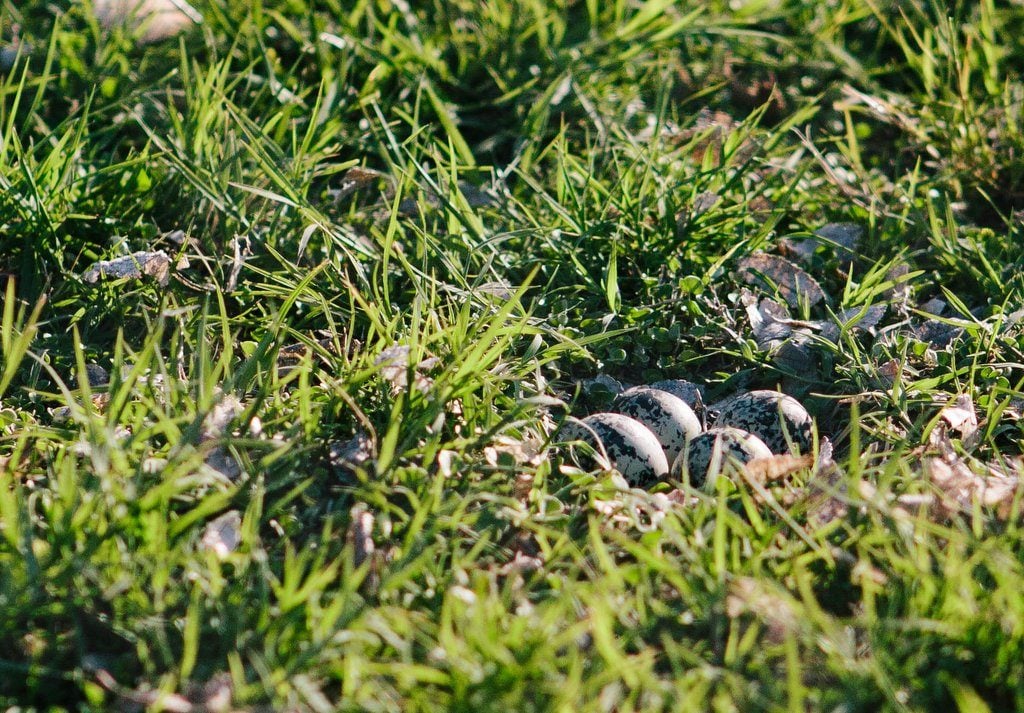
So, the hunt for the nest was on. It was quite hard to find because killdeer don’t really build nests. They often just lay their eggs in the middle of a field of grass.
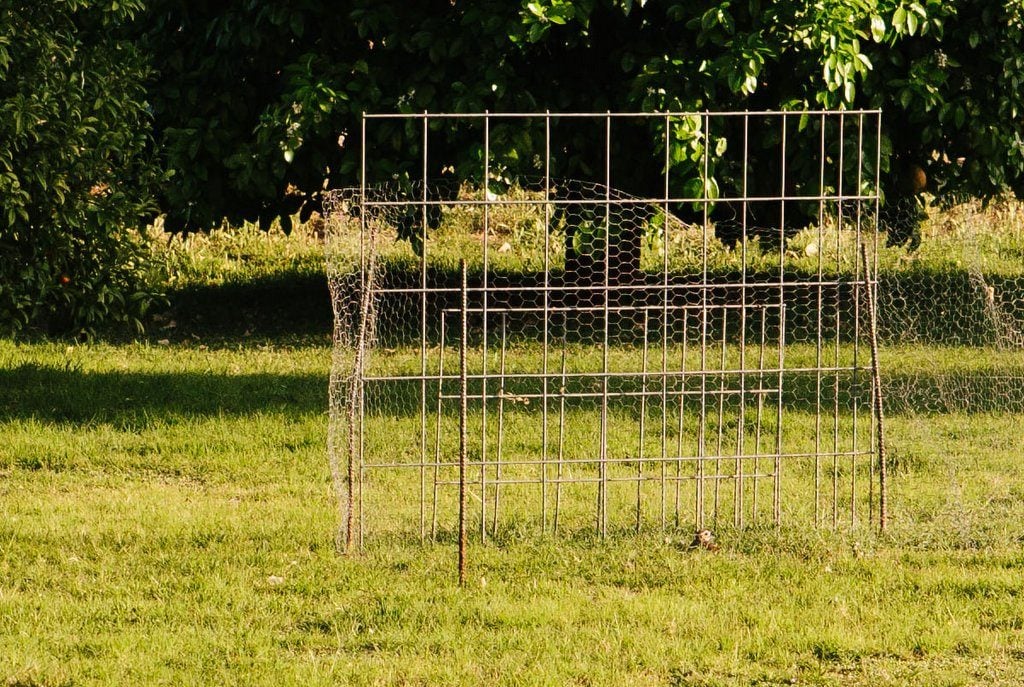
The nest was discovered in the middle of the back lawn. The mother seemed quite content with her choice of nesting spot. However, she could hardly have picked a more chaotic spot to lay eggs. The spot she chose is often populated by two rambunctious dogs, a flock of chickens and two energetic boys.
My brother-in-law built a fence to keep the dogs, chickens and kids away from the nest. You can barely see her sitting on her nest in the distance…
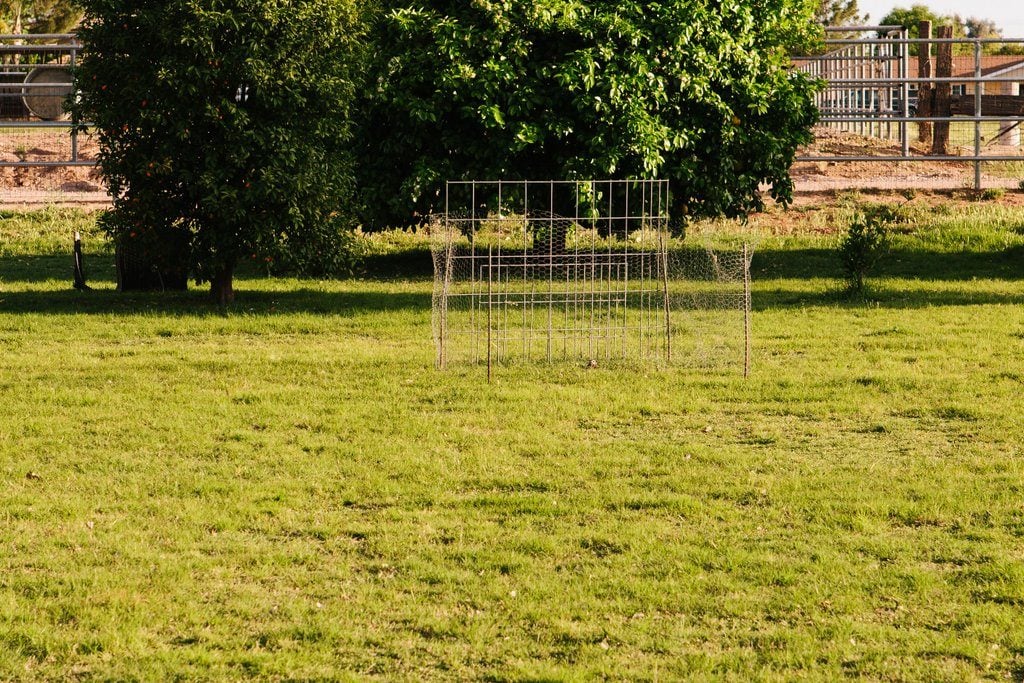
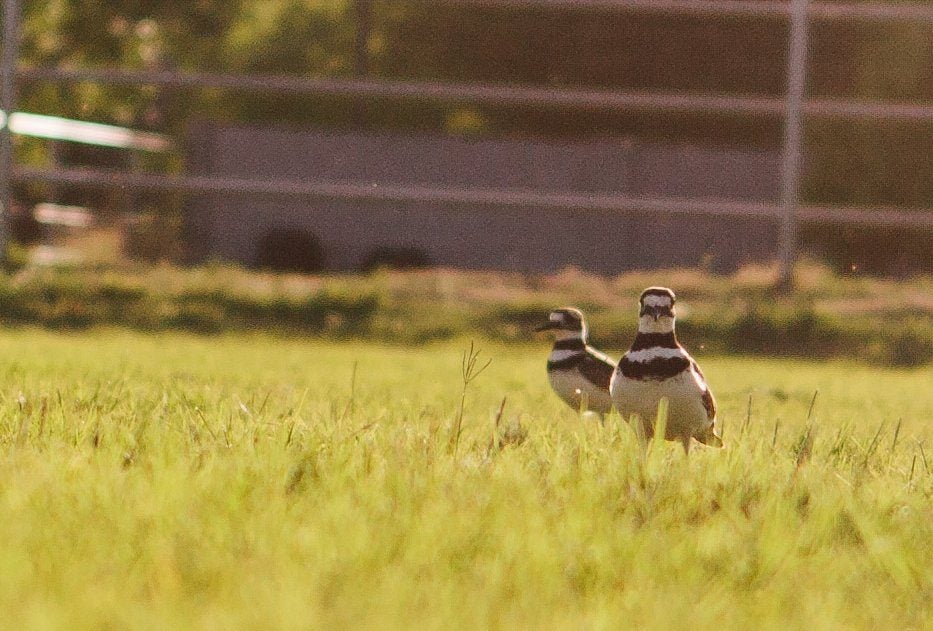
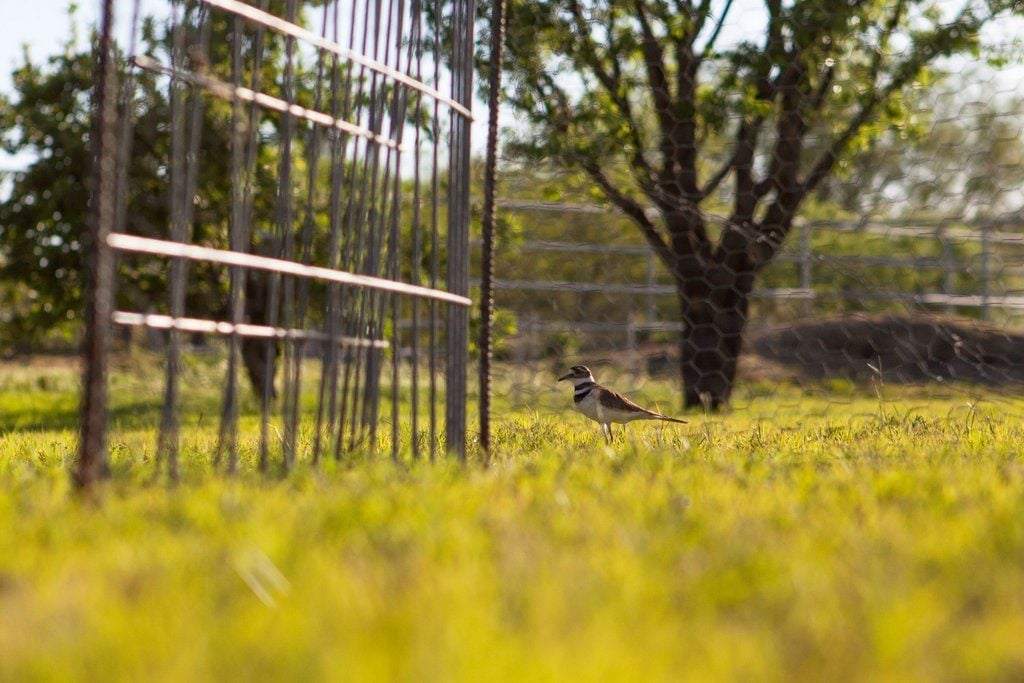
Here is a closer shot….
Occasionally, if a chicken or dog gets too close, she will call out and her mate will fly to her. One of the sounds that they make sounds like “killdee”.
Killdeer raise 2 – 3 broods in the south beginning in March. So, this is probably their first brood this year.
Killdeer are known to lay eggs in the middle of gravel, so I guess a nest in the middle of a busy backyard, isn’t all that out of the ordinary.
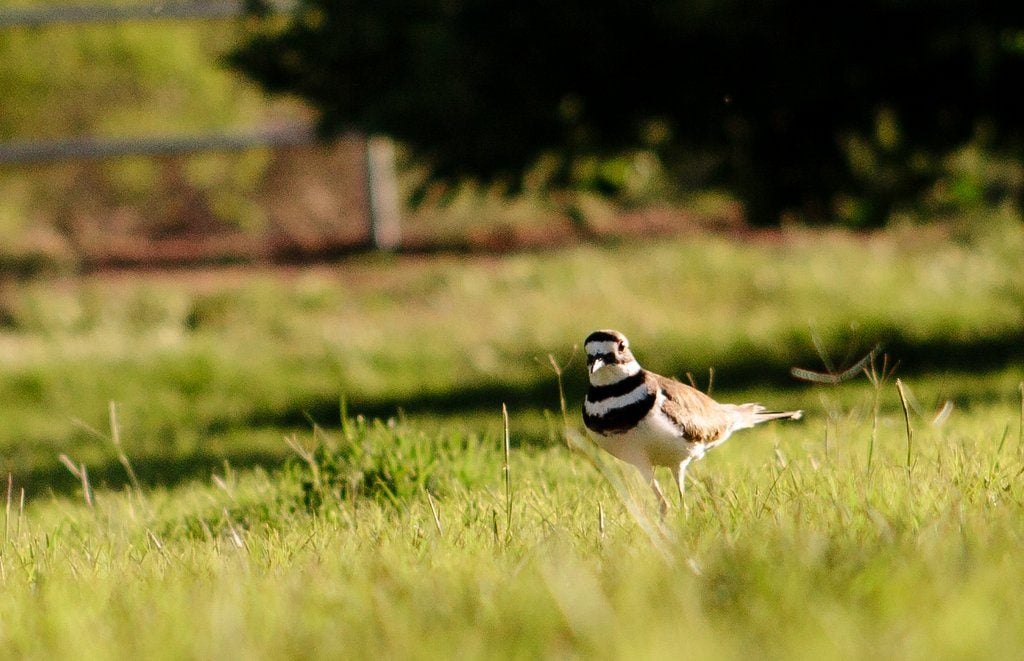
Killdeer are found throughout the entire United States. They are very vocal and found near human habitation. While they are technically shore birds, they are often found far away from bodies of water – these two have laid their eggs in the middle of the desert where there aren’t too many large bodies of water.
Killdeer eggs take 24 – 28 days to incubate. This may seem like a long time, but when young killdeer hatch, they are able to scurry about right away and forage for food with their parents. As a result, they spend twice as long inside the egg maturing as opposed to other birds such as robins and sparrows, which are born helpless and naked and have to rely on their parents to feed them.
I promise we will keep a close eye on this killdeer pair and their nest (from a distance, of course, so we don’t bother her). As soon as the chicks hatch – I’ll be sure to let you know and post pictures!
How about you? Have you ever seen a killdeer nest? Tell us where it was.
For more information on this interesting bird, check out this article by Birds & Blooms.
I noted in my last blog article that “mealworms are the best food to feed bluebirds” according to the Michigan Bluebird Society. So this article will focus on mealworms—when to feed them mealworms, how to do it and especially how to do it in a way that is safe for the birds.
If you are not aware of them, the North American Bluebird Society is “a non-profit education, conservation and research organization that promotes the recovery of bluebirds and other native cavity-nesting bird species in North America.” They are a great resource on all things bluebird and their website has a number of ‘Factsheets’ including ‘Getting started with bluebirds’ and ‘Nestbox Plans.’ They also have a Facebook page.
One of the North American Bluebird Society’s ‘Factsheets’ is all about mealworms–their care and how to feed them to bluebirds. They list the following times/reasons that mealworms can be fed to bluebirds:
- Entice them to use a nestbox
- Help the incubating female find food quickly so she does not have to leave her eggs unattended for long periods of time
- Act as supplementary food for nestlings if food becomes scarce—e.g., when weather conditions prevent the parents from finding insects
- Help birds survive during spells of severe weather
- As supplemental food when one parent is attempting to raise young because the other parent is missing.

The North American Bluebird Society also offers the following note of caution regarding feeding mealworms:
- “Because they do not provide complete nutrition, mealworms should be used as a supplemental food only. They are calcium depleting, which can leave young birds with weak bones or cause egg binding in laying birds. To counter this, put the mealworms in a plastic bag with calcium carbonate or calcium citrate powder, and shake it gently to coat them. Both forms of calcium are available at health food stores or online.
- Offer mealworms in limited quantities just once or twice a day unless poor weather conditions dictate more frequent feeding. A hundred or so worms offered morning and evening would be more than adequate for a pair with a box of nestlings.” [note: bolding for emphasis is blog author’s]
The North American Bluebird Society is a great group to join. A number of states and provinces (even Bermuda!) have bluebird organizations that are affiliates of the North American Bluebird Society and you can find them at the NABS Affiliates site.
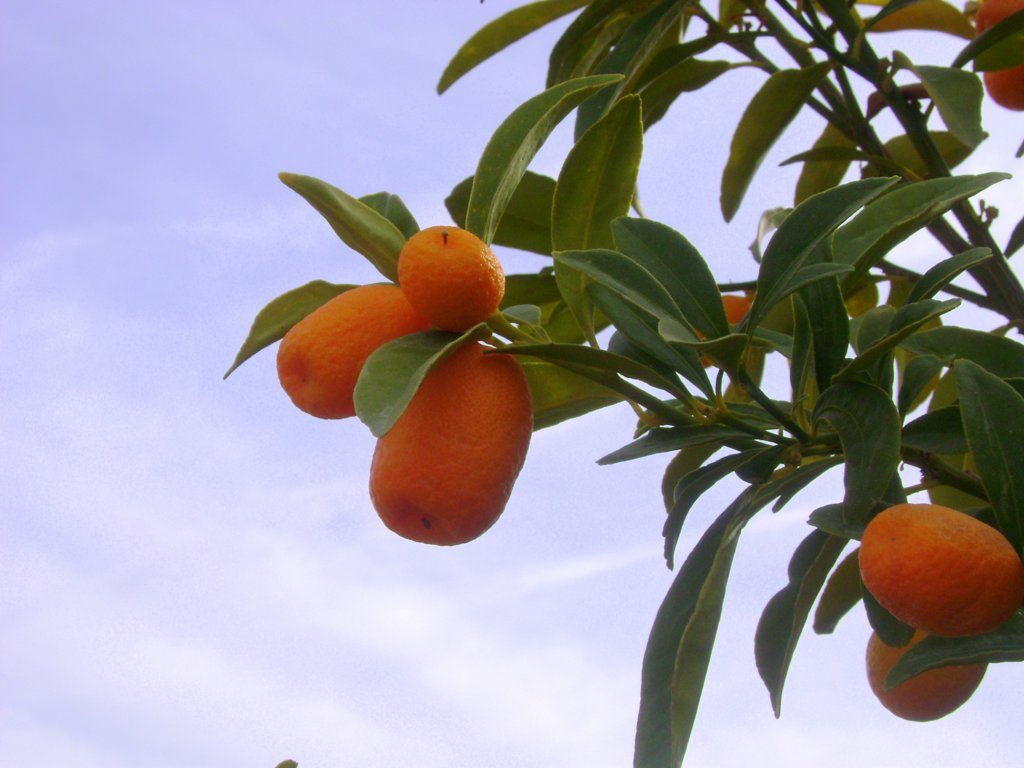
Growing up in Southern California, we always had lemon and orange trees in our backyard. Later, after moving to Arizona, our first home had a huge grapefruit tree along with a orange tree. In our current home, I have a young orange tree that is growing nicely.
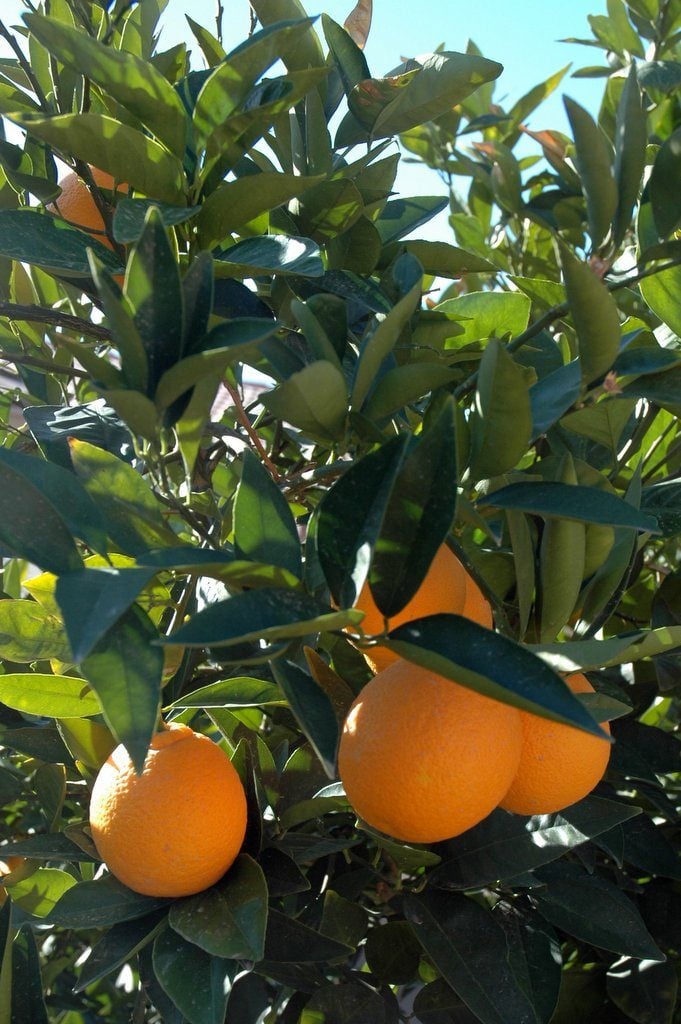
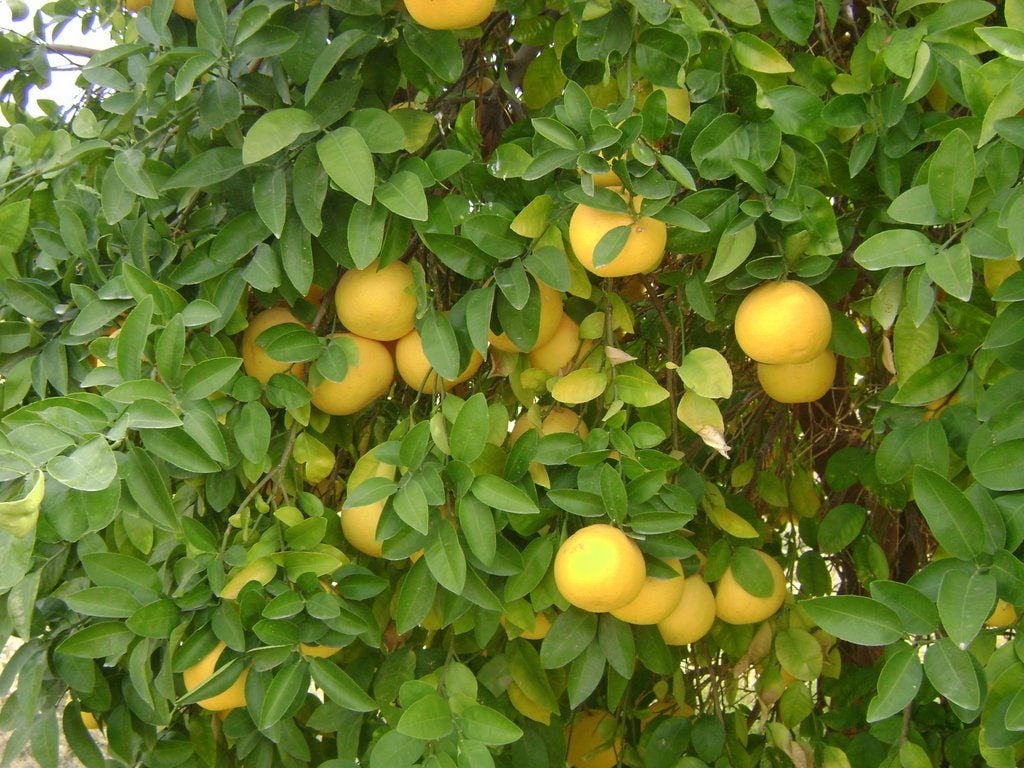
This time of year most citrus fruit is ripe for eating. Often, your citrus tree gives you more fruit than you can eat, so if you are lucky, your neighbors are most likely generous with sharing their bounty. Between my mother’s lemon tree, our friend’s blood orange tree and our neighbor’s grapefruit – we have a lot of citrus in our kitchen right now. Thankfully, we all love to eat it. (The only problem with enjoying a bounty of citrus in winter is that you get spoiled. Later this summer, it will kill me to have to pay up to a $1 per lemon at the grocery store when all our fruit is gone 😉
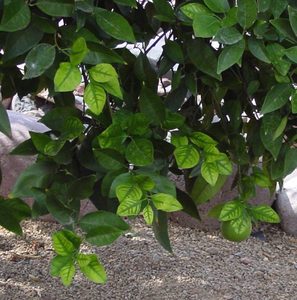
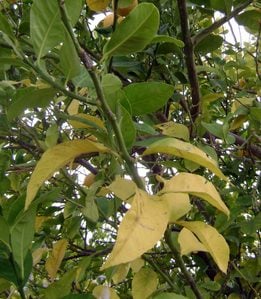
If you have citrus trees, you want them to be healthy so that they bear delicious fruit. In order to achieve this, a regular fertilization program is needed.

Citrus need to be fertilized 3 times a year with the most important nutrient for citrus being nitrogen. Other nutrients needed by citrus trees include iron, zinc and manganese which are all micro-nutrients.
The best and easiest way to get these nutrients to citrus trees is to use a fertilizer specially formulated for citrus, which should contain all these nutrients.
Because citrus need to be fertilized 3 times a year – the timing of when you apply fertilizer is important. The first application is in the winter, the second in late spring and the last in late summer. Sometimes, it can be hard to remember when to fertilize, but there is an easy way to remember…
**Fertilize your citrus trees on or around VALENTINE’S DAY, MEMORIAL DAY and LABOR DAY.**
How you fertilize your citrus trees is as important as when you fertilize.
HERE ARE SOME GENERAL GUIDELINES:
– Fertilizer should not be applied to newly planted trees – wait until they have been in the ground for 1 year.
– Water the soil around the tree before and after you apply fertilizer.
– Follow the directions on the fertilizer bag. Be sure that you divide by 3 the annual amount of fertilizer needed by your tree – do not apply all at once!
– When in doubt, apply slightly less fertilizer then you think you need. You don’t want to over-fertilize and end up with fertilizer burn. Smaller trees require less fertilizer than larger trees.
– Apply granular fertilizer around the perimeter of the tree, extending just past the drip line. Rake into the top few inches of soil.
– For mature Grapefruit trees, (over 6 years old), apply only 1/2 the amount of fertilizer recommended on the fertilizer label because high amounts of nitrogen promote a thick rind (peel).
If you choose to use only organic fertilizer for your citrus, there are some organic products available or you can use composted cow manure, working it into the top few inches of soil and watering it in afterwards.
For more detailed information on how to fertilize, including how much nitrogen to apply, check out this helpful link.
A few years ago, a new style of feeder started appearing in wild bird supply stores and catalogs. It’s basically a wire spring bent into a wreath shape, which you fill with peanuts for birds and squirrels. Around the same time, I started seeing lots of people pinning it their Pinterest boards, saying things like “Make this feeder with a Slinky and a wire hanger – so easy!” But when I looked around on the web to see if anyone had actually attempted this DIY bird feeder craft, the only examples I could find all looked very, well… inexpertly homemade. I wanted to see if it was possible to create this feeder inexpensively but attractively. And the good news is that it definitely is!

What You Need:
- Regular-sized metal Slinky (I got mine for $3 in the bargain bins at Target)
- 12″ metal macrame ring (Available at your local craft store for about $2)
- 1″ loose-leaf ring (available at office supply stores, about 50 cents)
- Fishing line
- Scissors
- Bolt Cutters

What To Do:
- There are two ways you can start. I believe the feeder is easier to fill later on if you begin by cutting the macrame ring open in one place. To do this, you’ll definitely need bolt cutters, since the ring is very sturdy. If you can’t cut the ring, or don’t want to, skip this step.
- If you cut the macrame ring open, slide the Slinky around it now. If you chose not to cut the ring, you’ll have to twist the Slinky onto the ring a loop at a time, starting at one end.
- Pull the Slinky around the ring and hold it closed temporarily with a twist-tie or piece of wire (see top right photo).
- In order to make the feeder look neat and attractive, you’ll need to attach the Slinky to the ring about every fifth loop or so. Do this by tying the Slinky very firmly with fishing line to the metal ring and trimming the excess. Continue to do this all the way around the Slinky and ring, including the first and last loops.
- Hold the ring up and see if the Slinky “droops” at all. If so, tie that section to the ring. If not, you’re all set!
- If you cut the macrame ring open, you’ll now need to hold it closed once it’s filled. Use the 1″ loose-leaf ring by looping it around two or three rings on each side (see lower right photo above).
Fill the feeder with peanuts (in the shell) through the openings at the top, and hang outside for the birds (blue jays are very fond of peanuts) or squirrels. Once my local squirrel found it, he spent the rest of the day emptying the feeder of peanuts one-by-one – and leaving my sunflower feeder alone!

Have you attempted to create this DIY bird feeder by another method, or do you have one of these peanut wreath feeders already? Do you have any tips for others? Drop by the comments and tell us about it!
It is hard to believe that it almost time to start thinking of starting seeds, but before you know it, spring will have arrived. Growing flowers and vegetables from seed is both fun and rewarding. You can start planting your seeds before it is warm enough outdoors.
How? Well, you can plant your seeds in small containers and grow them indoors for 6 to 8 weeks. Then, by the time temperatures have warmed up enough outdoors, you will have a good head start when your transplant your 8-week old seedlings out in your garden.
Typically, seeds are planted in spring once the last frost date has past. So, if you want to get a head start, then you need to start your seeds indoors before the average planting date for your zone. Warmer zones (like mine) mean that you start seeds indoors earlier in the year then those of you who live in cooler zones.

I took a look at the calendar yesterday and realized that I had better get my tomato seeds started. An early start to planting tomatoes is essential in my garden because the heat of summer stops all tomato production. So I gathered my seeds and Starbucks coffee cups that I had been saving (along with some other household items that could also be used as plant containers). Check out the top 5 expert tips for growing tomatoes indoors.
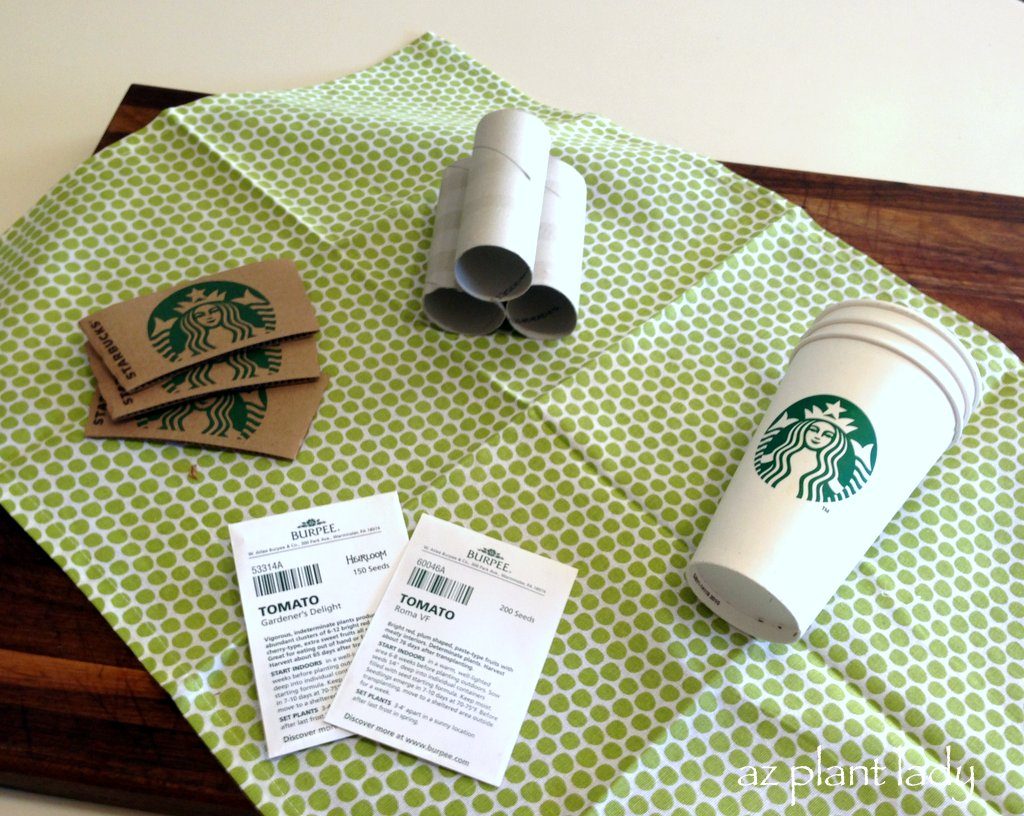
I like using saving coffee cups because they make great containers for starting seeds. I cut off the bottom portion of the cups with a knife. Coffee sleeves also work great as containers. Other household items that you can use to grow seeds inside of are toilet paper rolls (cut in half), egg shells and even newspaper folded into cups.
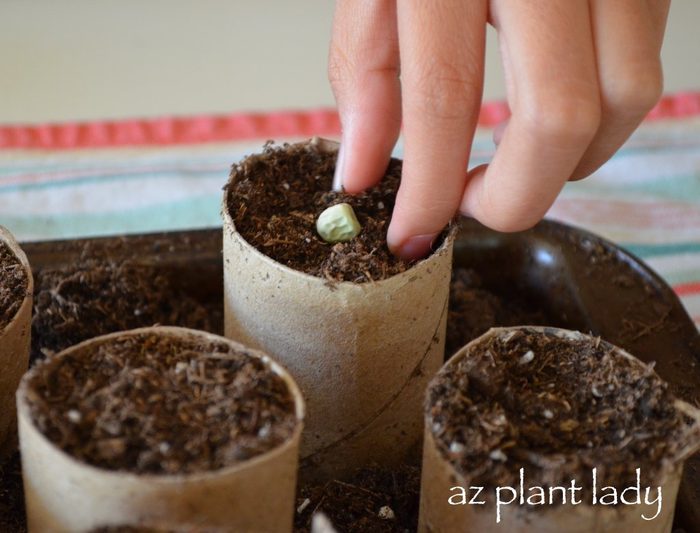
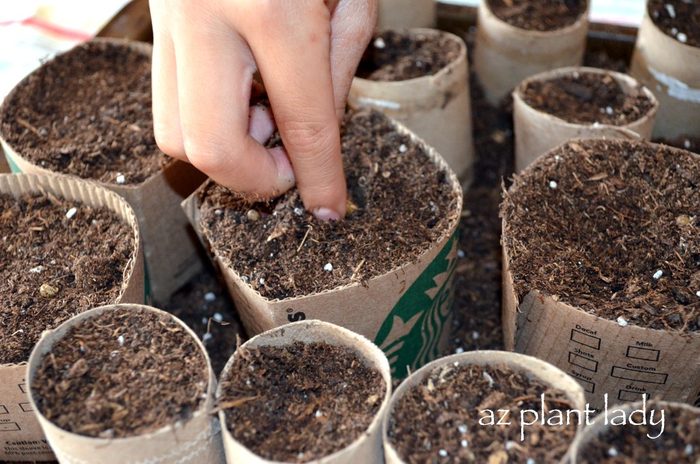
If you start your seeds in biodegradable toilet paper rolls, coffee sleeves, egg shells or newspaper, you can plant the seedling—container and all in your garden. Any of these containers will decompose in the soil. When using coffee cups as containers, I don’t plant them in the ground because their waxy coating will keep them from decomposing. So, I simply cut along the side of the cup and remove it before planting my seedlings.
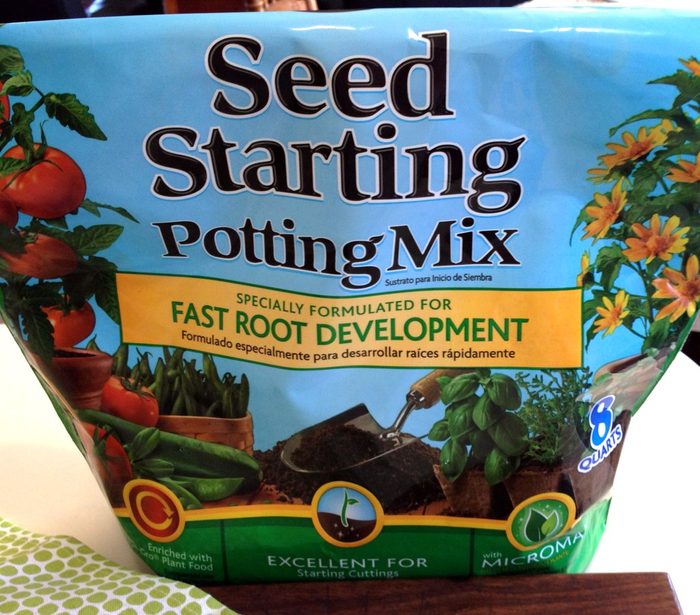
In addition to seeds and containers, you also need a good quality potting mix. Choose a type that indicates it is suitable for starting seeds.
Are you ever faced with going away for a few days only to return to dried out, thirsty plants? Or maybe your house-sitter ‘forgot’ to water your container plants.
Well, I have the perfect solution for you using something many of you probably have lying around the house…
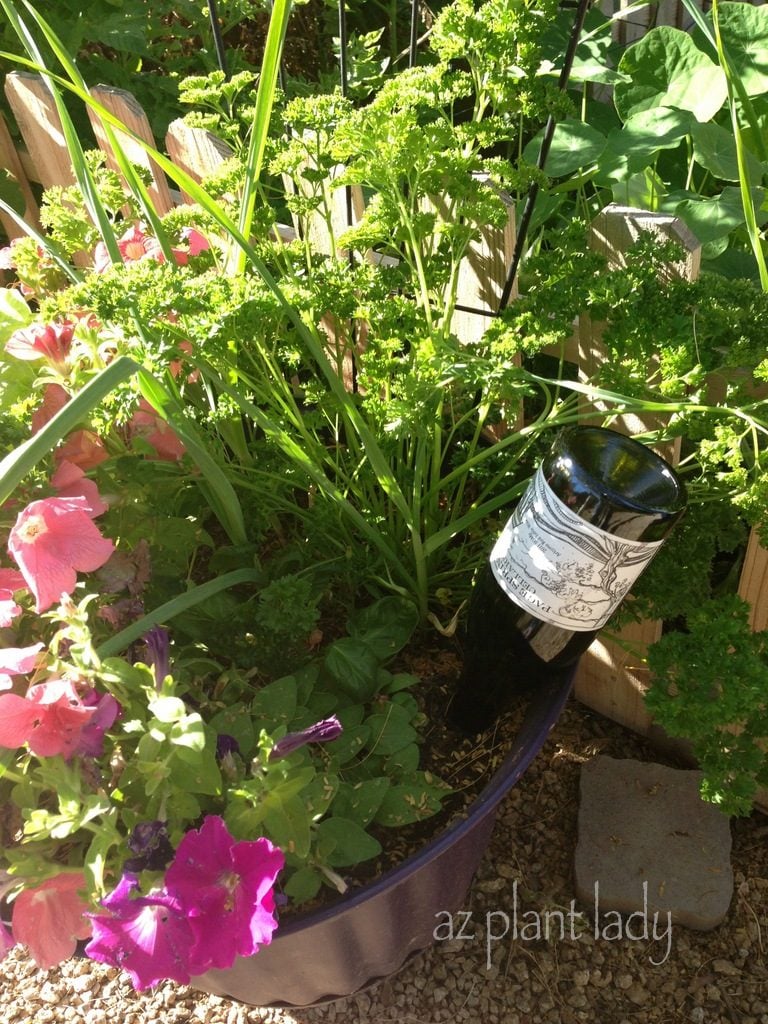
An empty bottle of wine makes the perfect ‘self-watering’ solution for your plants when you have to leave for a couple of days.

With holidays here, you will probably have the pleasure of enjoying a good bottle of wine, such as this one from a local winery.
To create your own plant watering bottle, the process is very easy.
First, drink and enjoy your wine. Then wash it out and bring it out to your container filled with plant(s).
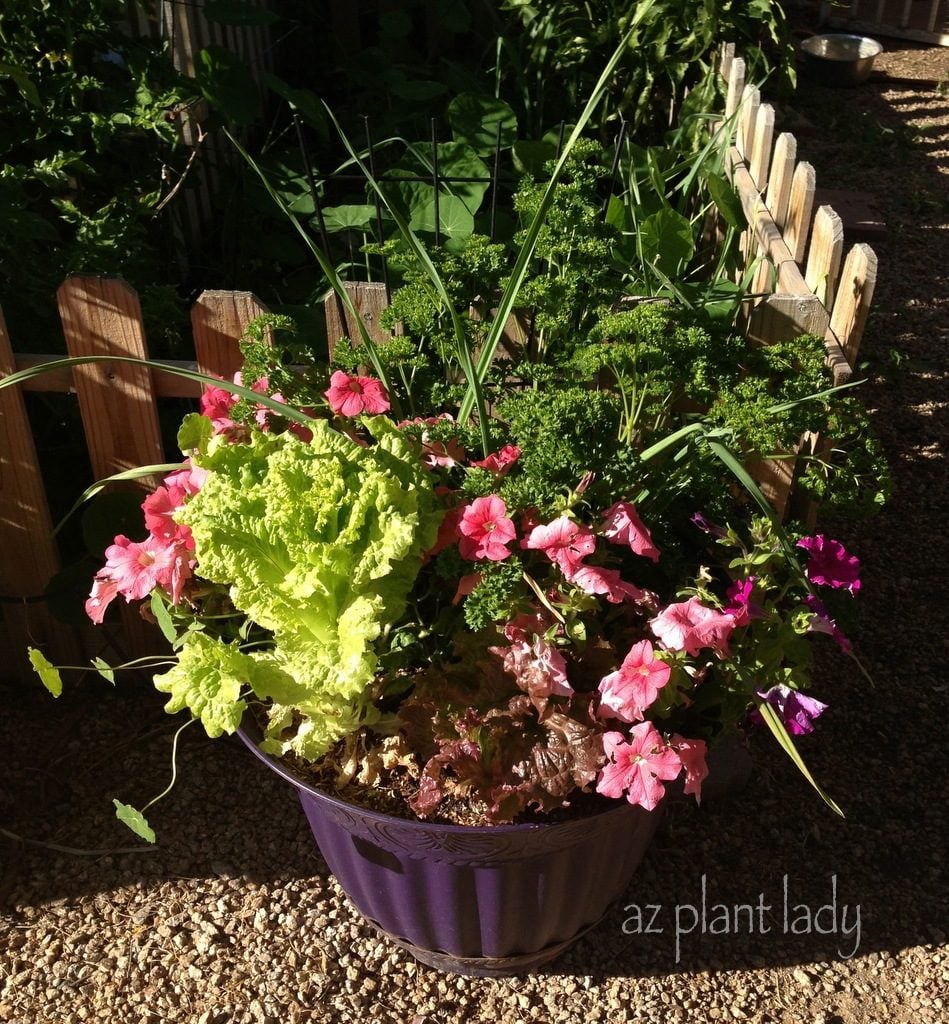
Here is one of my containers that is filled with petunias, lettuce, parsley, nasturtiums and garlic. Now, I certainly don’t want it to dry out when I leave for a couple of days. But, my empty wine bottle should help me out.
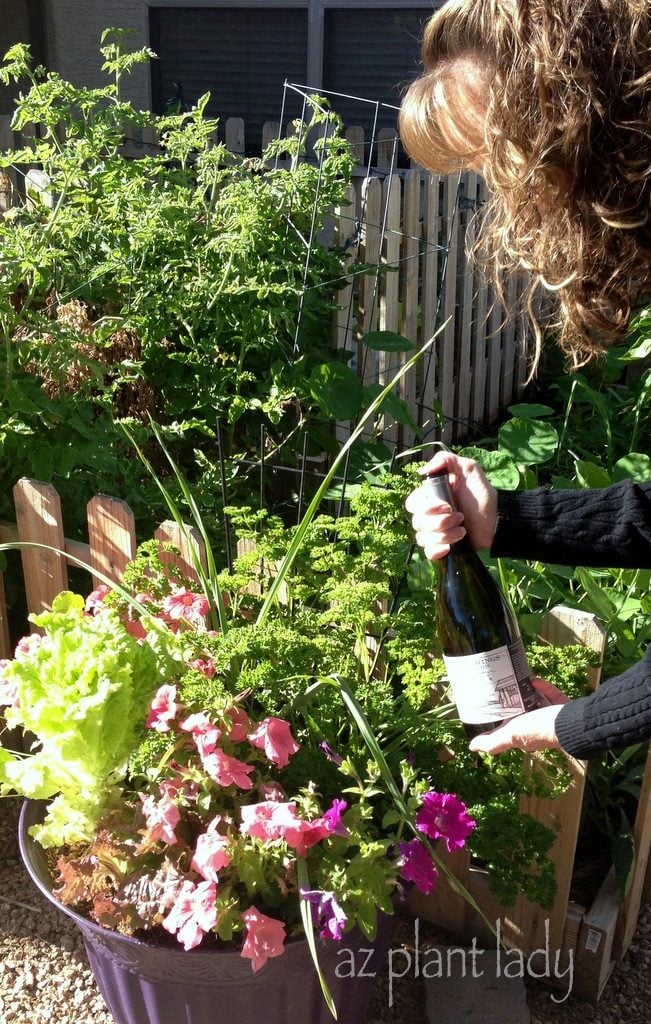
I filled my wine bottle with water and then held my thumb over the top.
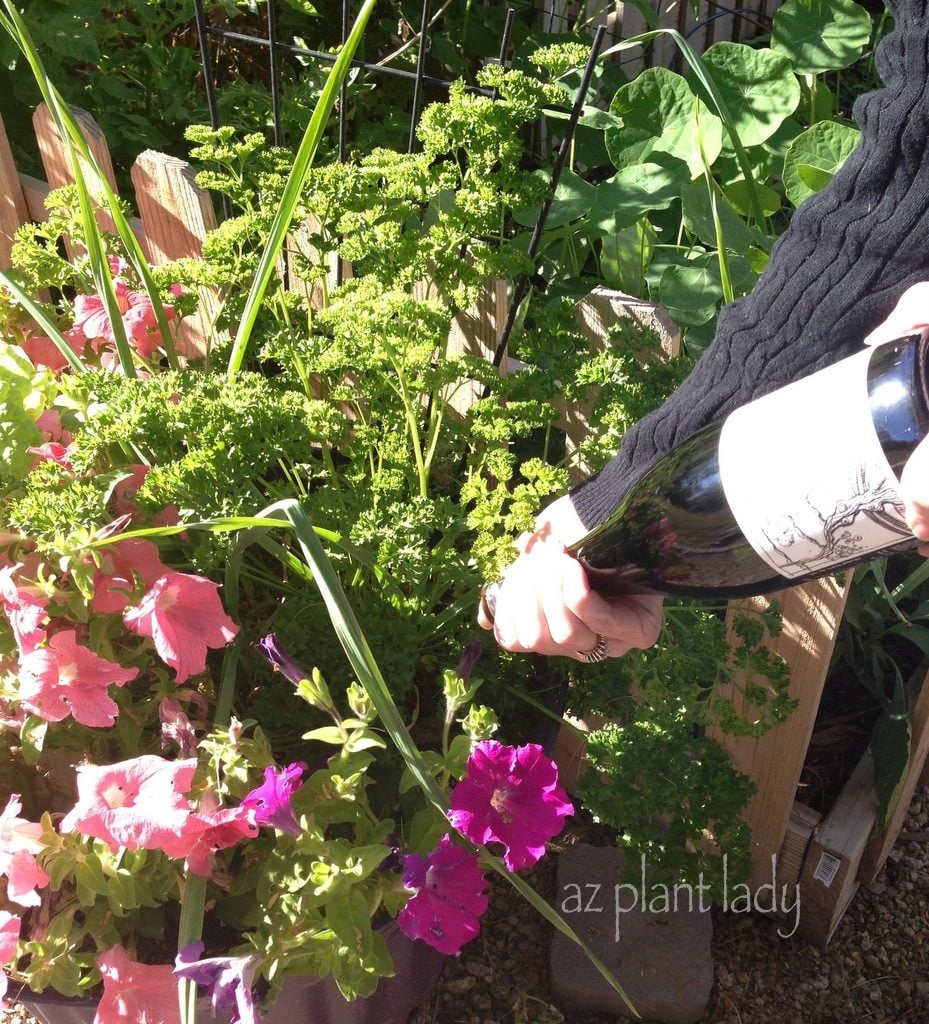
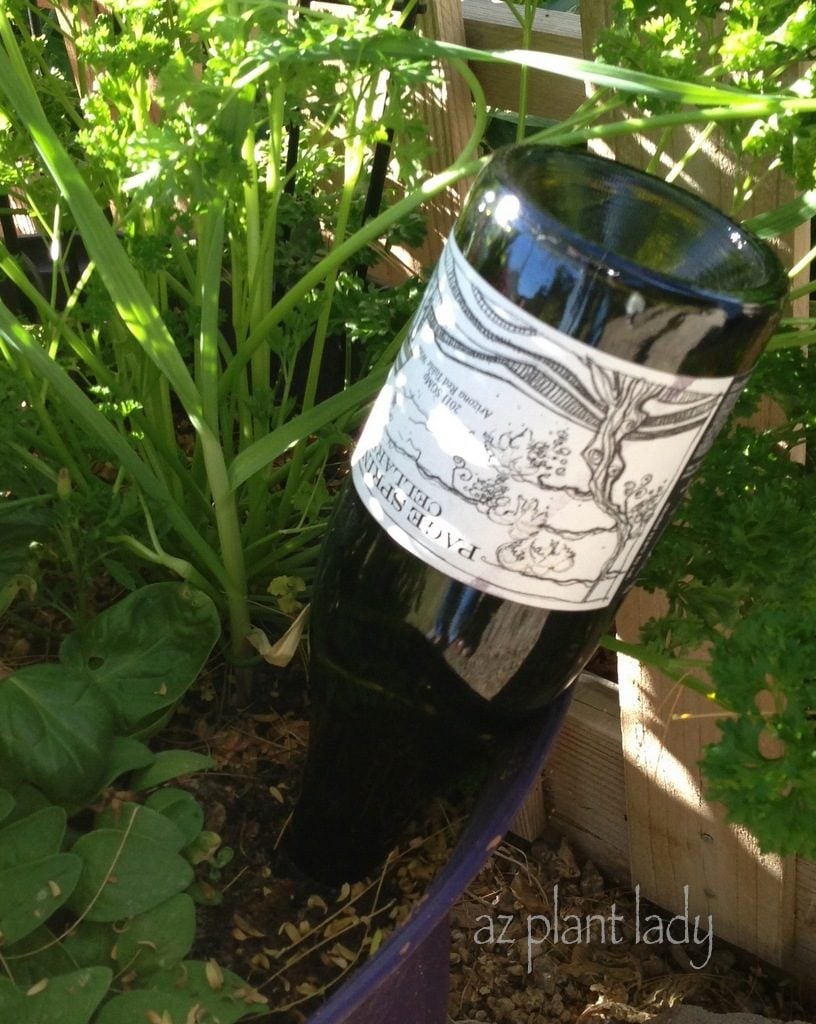
I turned the wine bottle upside down and inserted the mouth of the wine bottle into the soil about 2 inches deep into damp soil. (If the soil is too dry, the water will run out quickly.)
Water will slowly be released from the wine bottle, watering your plants. This can take hours or even a day or two. For a large container, such as this one, you may want to add another bottle so that all the plants receive water.
You aren’t limited to only using wine bottles – any glass bottle will do. Glass soda bottles work well for small containers.
This works not only for outdoor container plants, but for houseplants, and perennials/shrubs out in the garden. **Just make sure to bring the bottles when temperatures dip below freezing or they may burst as the water expands**.
You can also make the bottles more of a permanent fixture in your container garden. They can be decorated with colored tiles or even painted so that they add an artistic flair to your garden.
So, if you receive a gift of wine this holiday season, after you have finished enjoying your wine – be sure to save the empty bottle for your plants.
This DIY bird feeder wreath idea is simple and classic – a different twist on the once so popular popcorn and cranberry strings on trees.

 DIY Bird Feeder Wreath Supplies:
- Wire wreath form (I used an 8″ form. You can get these at craft stores.)
- Fishing line or stout thread
- Long needle with a fairly small eye
- Floral wire (optional)
- Scissors
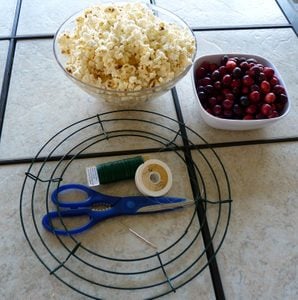
- 1 package cranberries
- About 4 cups popped popcorn
- For the sake of birds’ health, use unsalted, unbuttered popcorn only. It’s best to use air-popped popcorn with minimal added oils. If you use pre-packaged microwave popcorn, choose only “Plain” or “Natural”.
Author’s Note: I had several readers who commented they were concerned about the use of fishing line in this project. I actually chose it over thread because it is very strong and much less likely to break or come loose and get tangled in bird bills or feet. Fishing line usually causes problems when it is loose and a bird becomes tangled in it, such as when a fisher discards a broken line along the shore instead of in the trash. Fishing line is actually pretty hard to break, and if tightly tied around the wreath is unlikely to cause problems for the birds. However, if you are concerned about using fishing line, use strong thread instead.
DIY Bird Feeder Wreath Instructions:
- I found it was easiest to work in shorter sections around the form. Cut a three-foot length of fishing line and knot it to the wire wreath form. Thread the needle and begin stringing the popcorn and cranberries. I used three popcorn kernels, then one cranberry, and so on.
- Once you have about a foot of popcorn and cranberry strung, carefully wrap it around the wreath form. Continue stringing and wrapping until you reach the end of the line. Tie it off firmly to the wreath form.
- Repeat steps one and two until you have covered the wire form.
- If you like, you can use any leftover cranberries to create a “bow” at the top. Cut a length of floral wire about 3 feet long. String it with cranberries, twist into a bow shape, and attach with additional wire at the top of the wreath.
- Use floral wire to add a hanging loop to the top of the wreath, and hang it out for wildlife to enjoy!
I like old things. So, when I spotted an old, galvanized watering can at an antique shop – I knew it had to be in my garden.
However, I wasn’t going to use it for watering my plants…
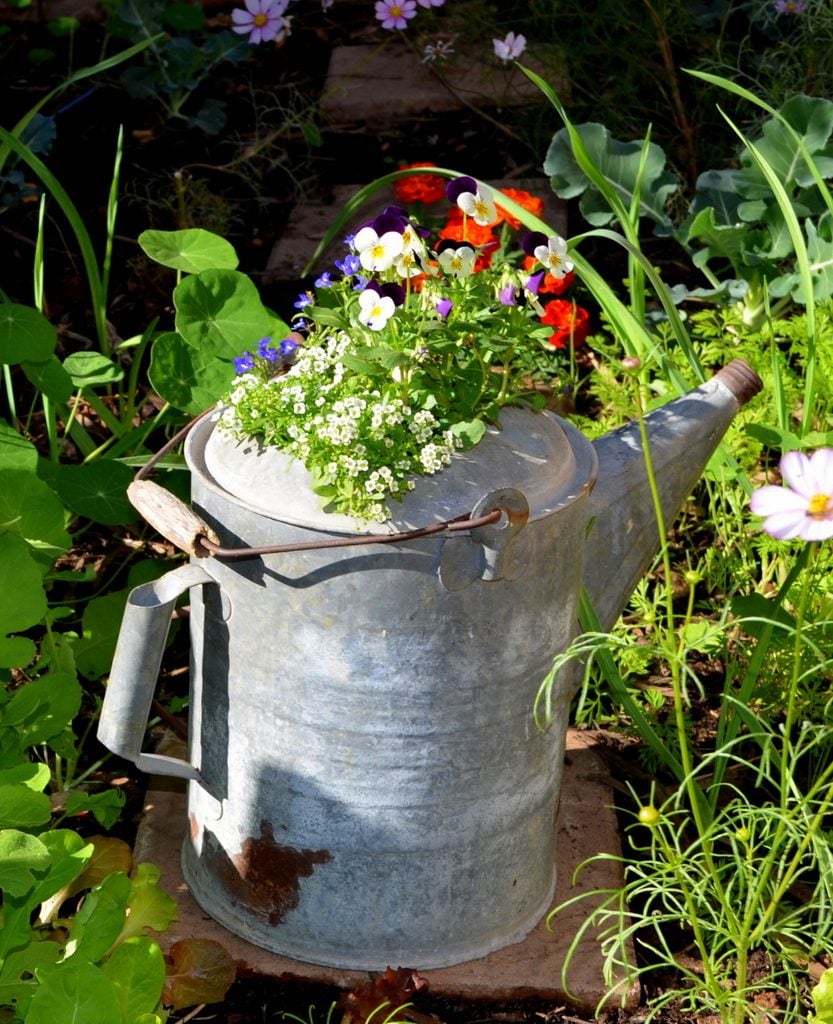
I decided that it would make a unique container for annual flowers.
My old watering can made the perfect container, once I made a few holes on the bottom for drainage. It sits in the middle of one of my vegetable gardens where I can view it from my kitchen window. (You can see radishes, carrots, broccoli and nasturtiums surrounding my newest planter. I think vegetable gardens should look attractive, so I always have some flowers growing nearby).
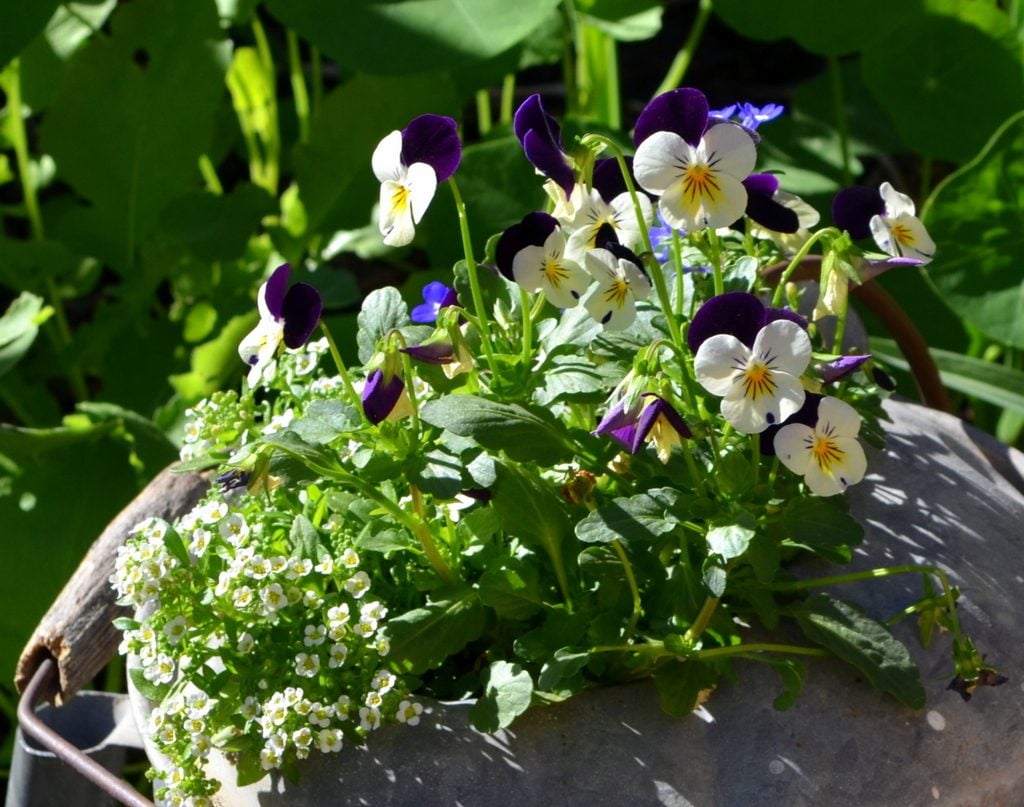
Violas, Alyssum and Lobelia are just a few of my favorite cool-season annuals.
Do you have any unusual containers in your garden?
Please share them with us!
Need some ideas for winter containers? Check out this great Birds & Blooms article.
Have you ever had a favorite damaged by a storm or severe cold temperatures? Was the damage so bad that the tree had to be cut down?
This is the story of a beautiful tree that was growing tall and strong in the backyard of my sister’s farm.
That is until abnormally cold winter temperatures hit.
This normally, evergreen Sissoo tree suffered severe frost damage.
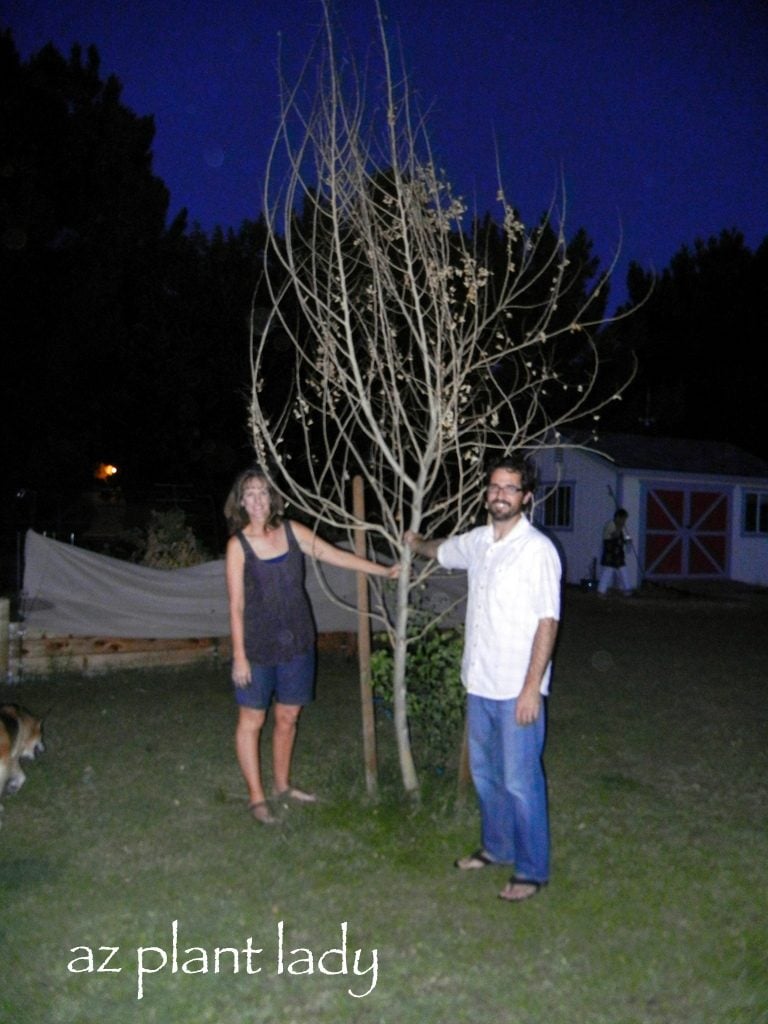
In fact, the frost-damage was so bad that the entire tree had died. (You can see my brother-in-law and I holding onto the dead tree in the picture, above).
We waited a couple of months before we took down the tree, hoping that part of it had survived. But, when spring arrived, there was no new green growth on the tree trunk or its branches.
BUT there was some green growth. A few small tree suckers (branches) were growing up from the base. You see, the entire main part of the tree was ‘crispy’ and dead. But, the base of the tree, underground, was alive and sending up small sprouts (suckers).
Since this tree wasn’t grafted, I knew that the new branches had a chance to grow into an new, beautiful tree, identical to the first. So, I talked my sister and brother-in-law into simply cutting off the dead tree and keeping the largest of the small branches that were growing from the base…
It was tiny compared to the original tree. But, we were hopeful that it would grow and replace the part of the tree that we had lost.
**You may wonder why we didn’t just replace the tree with a new one? Well, there are two reasons.
1. Why spend money for a new tree if we didn’t have too?
2. The small sucker (branch) had the large root system from the original part of the tree, while a new tree would have a smaller root system that would take awhile to to grow. And so, a brand new tree would actually take longer to grow then the small sucker left from the original tree.
Hard to believe?
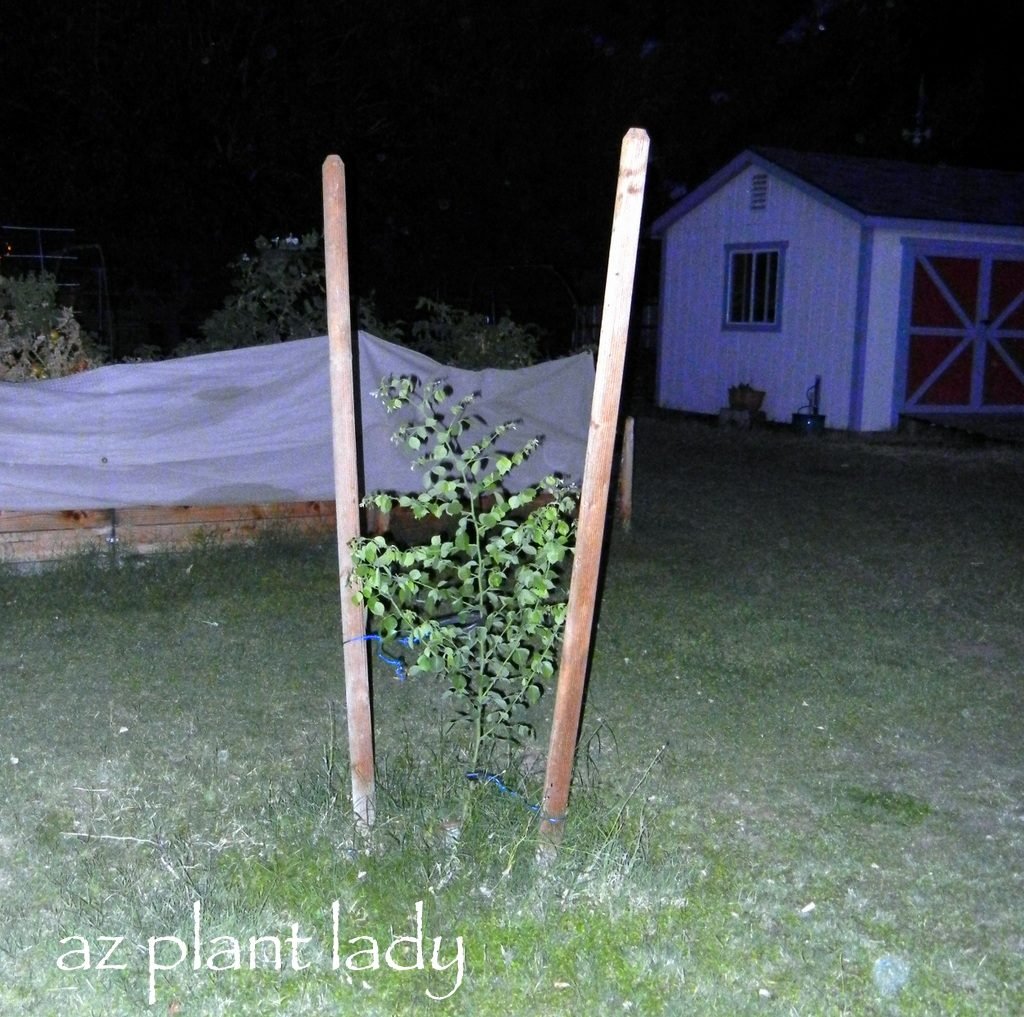
This is what the little branch looked like after we staked it…
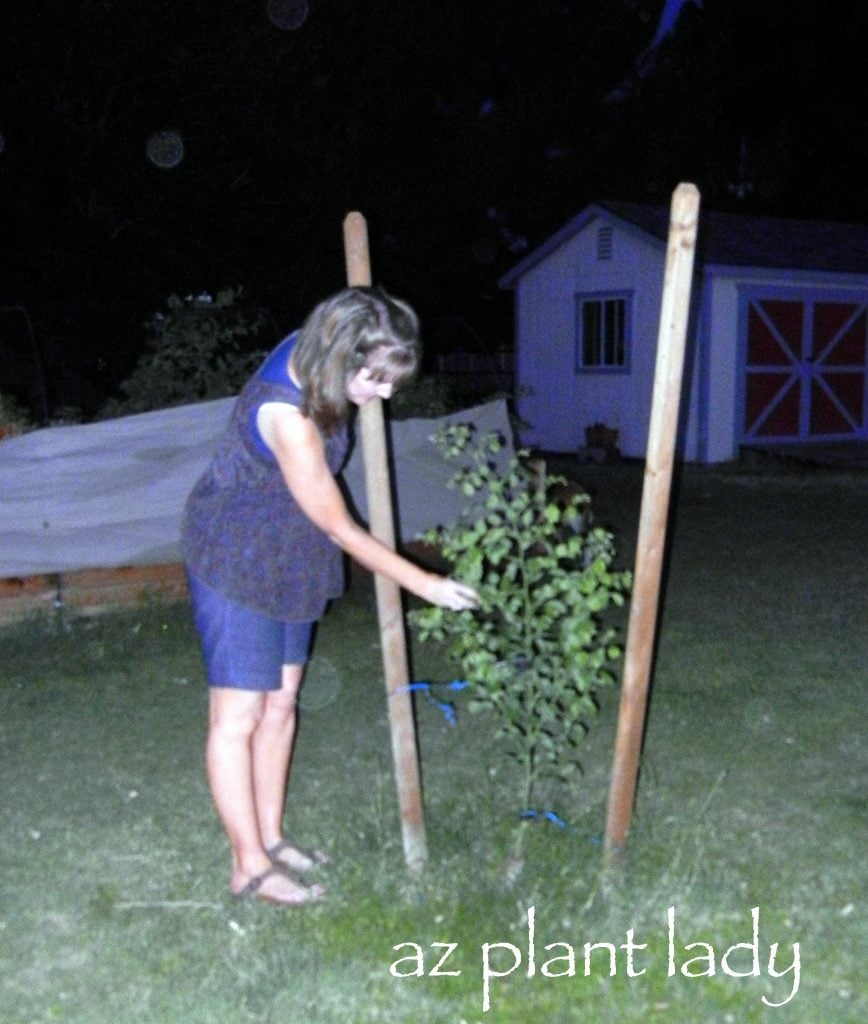
Look at the little branch 14 months later…
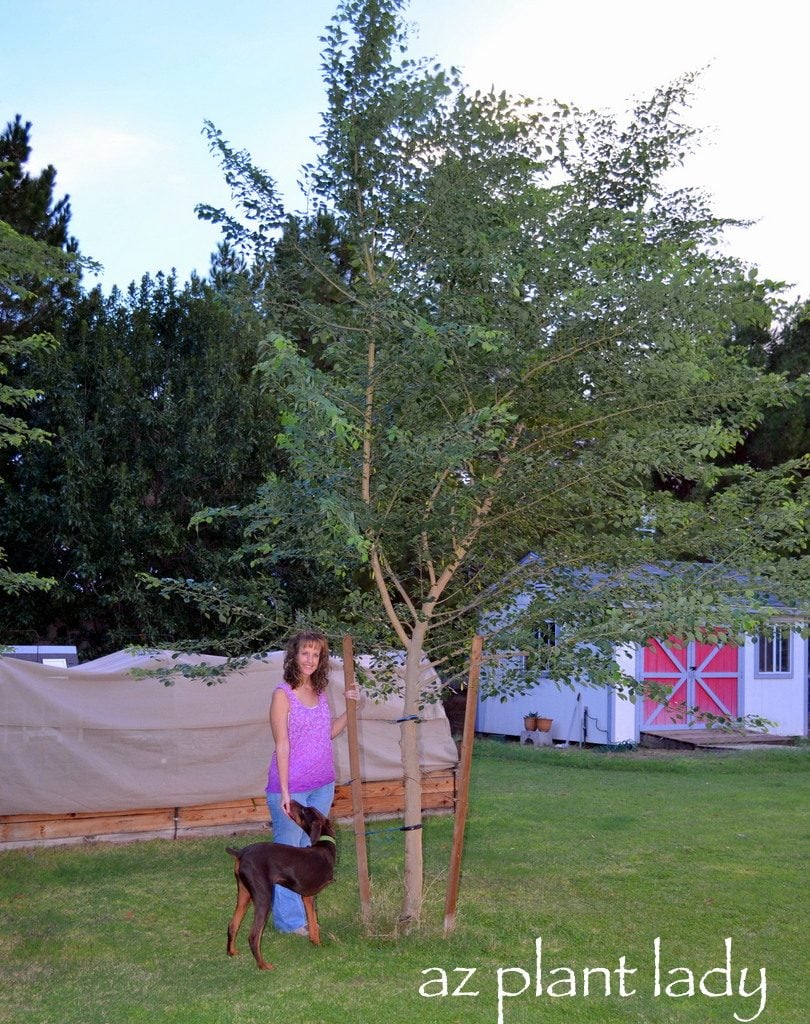
Isn’t it incredible? You would never know that the original tree had been cut down just 14 months before.
So, if you have a damaged tree that has been cut down with the roots still intact – wait to see if any suckers (small branches) begin to grow. Then select the largest one and stake it and wait for it to take off and grow. **This only works for trees that have not been grafted onto rootstock. Suckers that occur below the base of the graft, will grow into a completely different tree then the original one.
One of the things that I love most about gardening are the ‘victories’ like this one. How about you? What kind of ‘victories’ have you experienced in your garden?