
How to Make a Tipsy Pumpkin Planter
Updated: Sep. 16, 2020
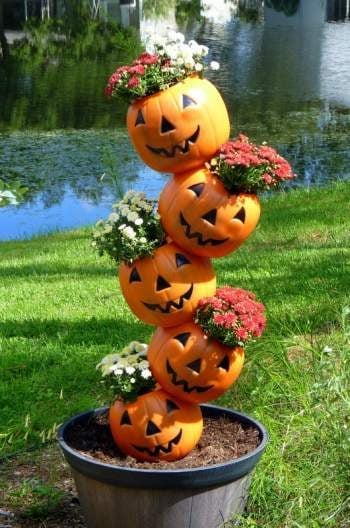
This adorable and affordable fall decoration is easy to make with a few plastic pumpkins and colorful potted mums.
I’ve always been a fan of the “tipsy pots” planters, with their whimsical style and endless opportunities for customization. They can be used as address markers and as bases for birdbaths, and a while back I created a miniature version with succulents perfect for your desktop or dining room table. When I recently came across a bin of $1 plastic pumpkin candy buckets, I knew I had to give this project idea a try.
This is fairly inexpensive project. You also need a sturdy garden stake or metal rod at least 4 feet tall and a power drill with a 3/4 inch spade bit. If you’re using live plants, you’ll need potting soil to fill the pumpkins, too. Or if it’s too late in the season for live plants where you live, try using artificial flowers and some styrofoam inserts to hold the flowers in place.
How to Make a Tipsy Pumpkin Planter
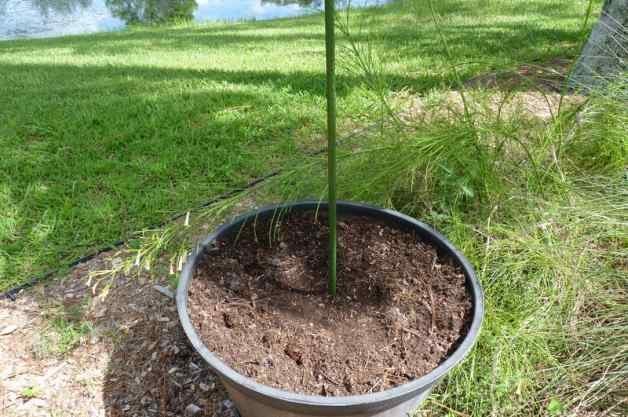
Start by finding a stable place to insert the stake. I used an empty whiskey barrel planter in my backyard. If you’re doing this project in a pot on your front porch, consider placing it in a corner so it doesn’t get knocked over. The pumpkin stack is reasonably sturdy, but it’s best to be cautious.
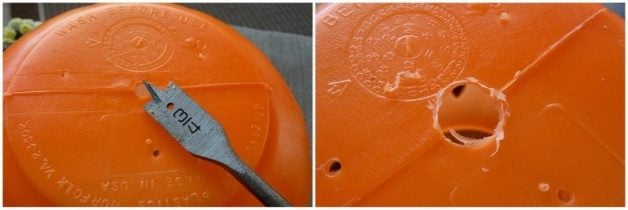
Next, cut the plastic handles off the pumpkins. Using a 3/4 inch spade bit, enlarge the holes on the bottoms of the pumpkins (or add one in the center of each if there isn’t one already). You’ll also be expanding one of the handle holes on each pumpkin. The side depends on which way each pumpkin will tip. (See below.) Go slowly with the drill at first, so you don’t crack the pumpkin. After drilling, make sure the holes are large enough that your pumpkins will slide easily down over the stake.
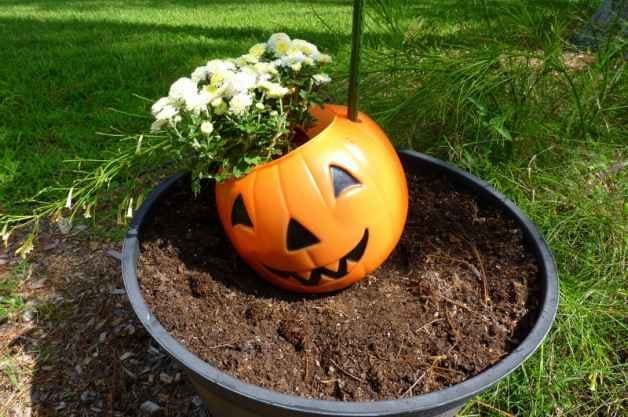
Take your first pumpkin and slide it down over the stake, going through the middle hole in the bottom and the enlarged handle hole. Nestle the pumpkin firmly down into the soil. Fill the pumpkin with potting soil and add plants.
Repeat with the next pumpkin, this time sliding the stake through the opposite enlarged handle hole. Rest it on the pumpkin below it, then fill with soil and plants. Make sure that everything is still sturdy as you continue to add the rest of the pumpkins and plants.

Though this planter is reasonably steady, it’s not quite as sturdy as those made with terra cotta pots. Use care when watering, and consider disassembling or moving inside during very high winds. At the end of the season, this planter is easy to take apart and store for next year.

I think I’m going to add some additional mums around the base of the pumpkins in the pot, for a more finished look. Now it’s your turn to add this easy decoration to your garden for Halloween.