Recycled Backyard: Slinky Flower Pot Stakes
Updated: May 07, 2020
Recycled Backyard: Slinky Flower Pot Stakes
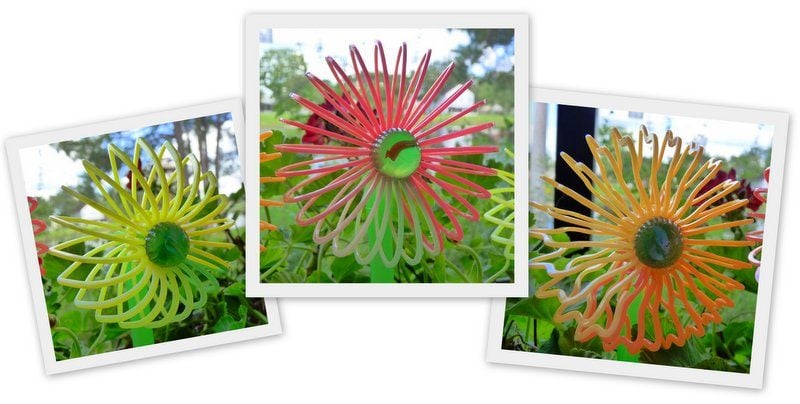
One of my favorite websites to visit for craft and project ideas is Dollar Store Crafts, where everyday the editors share new ideas for projects inspired by items found at the dollar store. Every once in awhile, I hit my local dollar store to see what I can come up with from the items available. Today’s project was sparked by a miniature plastic slinky I already had on hand. I found more of these at the dollar store (they’re also available at party supply stores and online sites), along with some other simple items to create colorful decorations for my potted plants at a cost of less than 50 cents per stake.
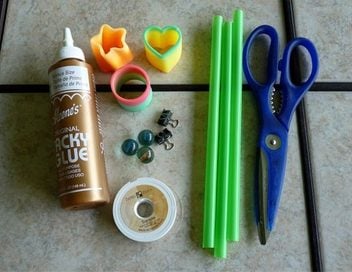 Slinky Flower Pot Stake Supplies:
- Miniature plastic slinky (1 per flower) – These are often sold as “Magic Springs” so as not to infringe on branded products. Use the miniature ones made of plastic for this project, as larger and metal springs sometimes don’t hold their shape quite as well. You can try a variety of shapes to get interesting “petal” variety.
- Glass marbles (1 per flower)
- Colored straws – I used wider straws sometimes sold as “smoothie straws” to get the effect shown here
- Craft Glue – Avoid hot glue in this project, as it may melt the plastic. Plus, you are almost bound to get some glue on your fingers here, and hot glue hurts like the dickens (I speak from experience)
- Fishing Line – You can also use clear jewelry beading line, shown here
- Binder clips (paper clips can work too, if you’re careful)
- Scissors
Slinky Flower Project Time: About 4 hours, including drying time
Slinky Flower Instructions:
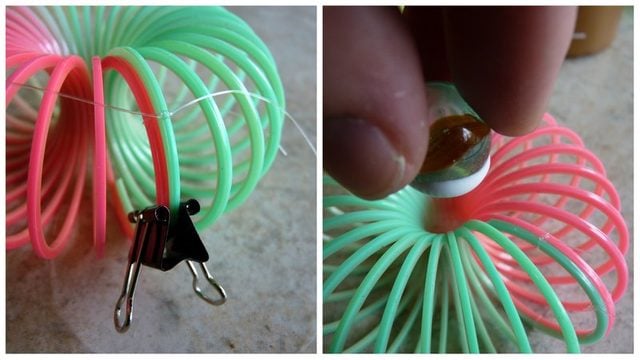
- Begin by bending the spring around to meet itself, and using a binder clip to hold it in place, as shown below.
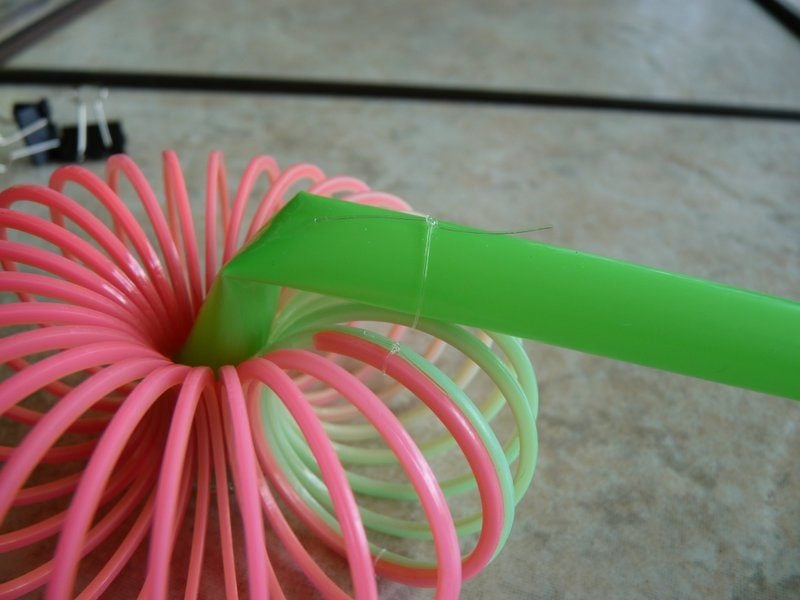
- Use a piece of fishing line to tie two “rungs” of the spring together, as shown. Trim excess. Repeat in several spots to secure the spring firmly. (NOTE: You may be tempted to try superglue or another adhesive here. DON’T DO IT! All you’ll do is glue your fingers together and the slinky will still probably spring apart in your hands.)
- Apply glue to a marble and press it down into the center of the spring as shown. Some shapes, like hearts and stars, will provide a natural “nook” for the marble, while others, like plain circles, will need to be held in place for a few minutes so it stays properly.
- Apply glue to the straw or into the center of the spring as shown, and insert a straw so it is standing up straight, as shown.
- Allow glue to dry completely. If you skip this step, you’re likely to find the straw slipping out of place in the final step.
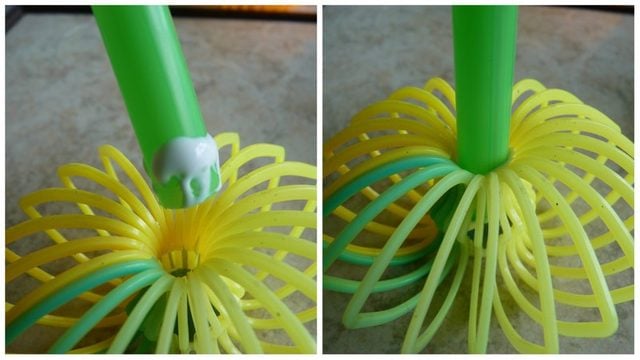
- Once the glue has dried completely, pinch the straw close to the center and bend it at a 90 degree angle. Use a piece of fishing line to secure it to one or more of the “rungs” of the spring.
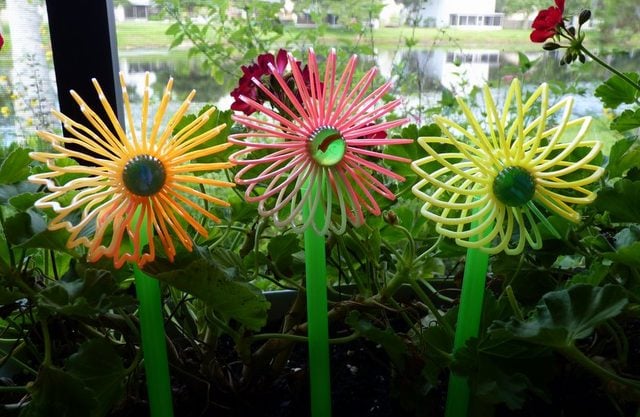 These stakes would be a fun project for the grandkids, or as favors for baby or wedding showers. Can you see yourself creating these cute pot stakes? How would you use them?