
I enjoy welcoming birds to my garden. I usually have bird seed available for them and grow a few sunflowers just so they can enjoy their seeds.
What I don’t particularly enjoy is when birds descend upon my fruit trees and start to eat my ripening fruit. Faced with this problem, many gardeners will head to their local garden center and buy fine mesh netting to cover their trees with in order to protect them from birds. BUT, this is not a bird-friendly option. Often, birds can find their way into the netting and get caught without being able to escape and eventually die.
So, are there any options available that won’t harm birds? Absolutely! What is even better – you probably already have what you need to deter birds from eating the fruit from your trees.
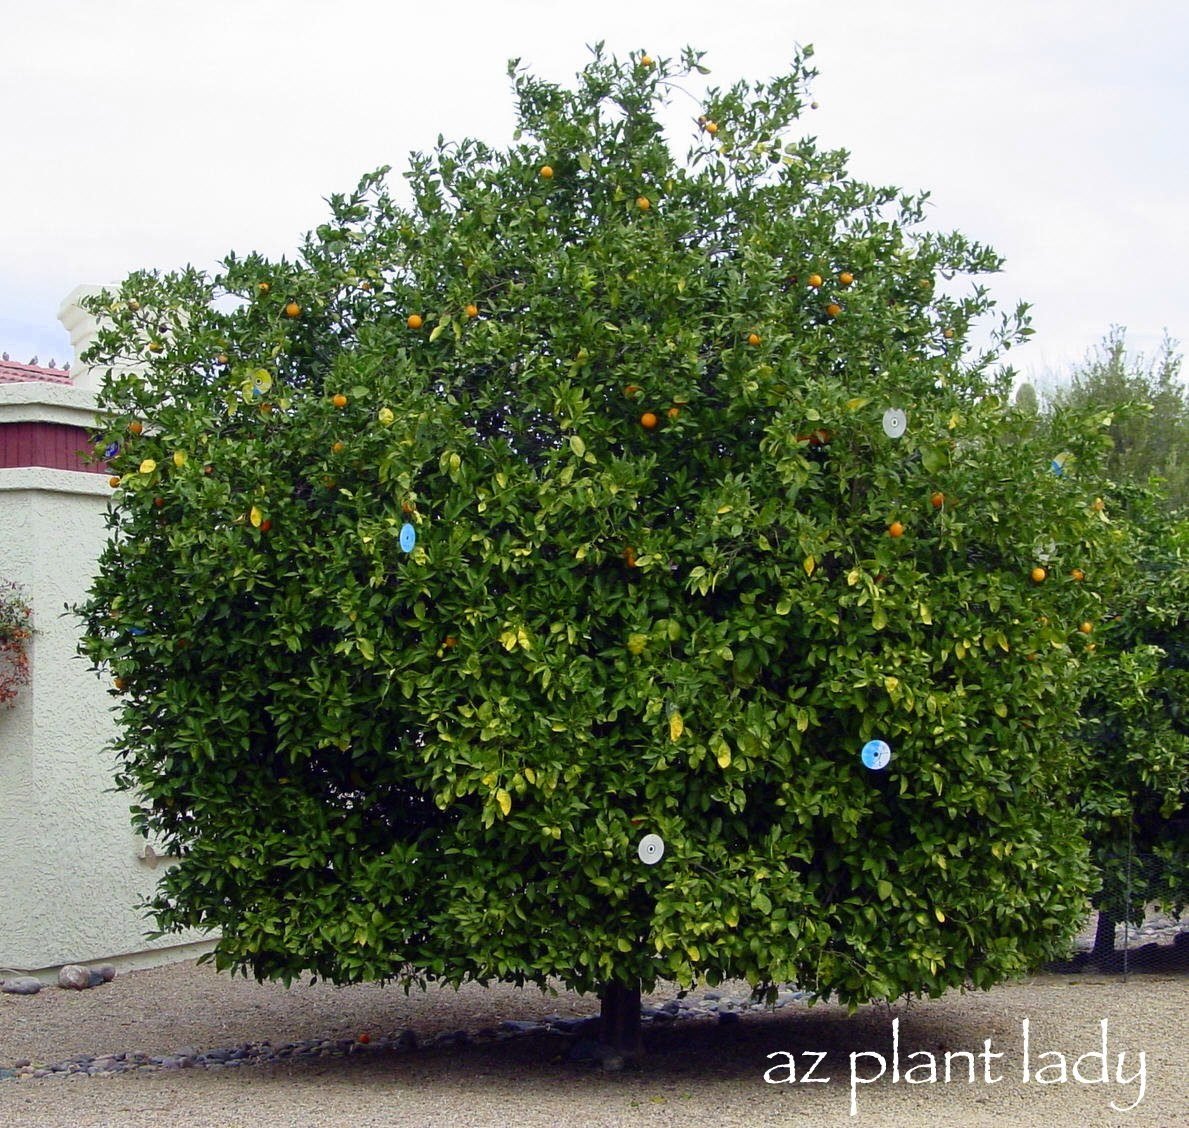
Yes, those shiny circles are CD’s hanging from a citrus tree and believe it or not, they do help keep birds away from the fruit. You see, birds don’t like reflective surfaces, like those on CD’s. Pie plates and foil strips also work well when tied in a tree.
When my newly planted peach tree started producing peaches, the birds soon started eating the fruit. So, I headed indoors and grabbed some old CD’s that I no longer listen too and tied them to my tree.

It worked like magic. I never saw another bird near my peach tree and I later had a nice harvest of delicious peaches.
Once you harvest your fruit, remove your shiny objects and save them for the next year. This is a great solution to deterring birds while not harming them using items you already have.
If you don’t want shiny things in your fruit trees, you can try offering them an alternative food source like bird seed in another are of your garden, far from your trees.
How about you? Do you have problems with birds eating your fruit? What bird-friendly methods have you tried to keep them away?
At the butterfly exhibit where I work, our guests frequently point out pairs of butterflies that seem to be “stuck together”, and ask something like, “Are those butterflies doing what I think they are?” We cheerfully answer, “Yup! They’re making more butterflies!”, an appropriate answer in an exhibit full of kids. For those guests who are interested, though, we share a few additional facts about butterfly mating, and now I’m sharing them with you.

Before mating, buttterflies often seem to dance together, whirling around each other into the sky. The male is releasing pheremones from scent glands in an effort to entice the female. Several males may try to romance a female at once, and if she’s not interested, she will use her wings to cover her abdomen and attempt to fly off.

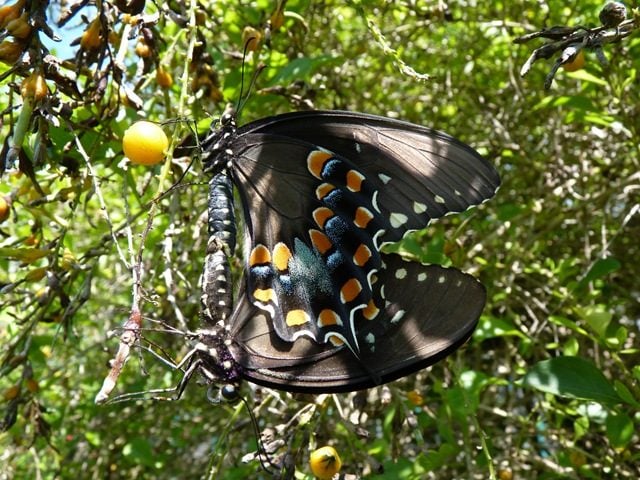
The male butterfly has a pair of claspers at the end of the abdomen used to hold onto the female abdomen during mating. Males and females lock together at the ends of the abdomens, and butterflies may stay attached for anywhere from an hour up to twelve or more! In this way, males can make sure that they are the only ones who fertilize the female’s eggs. Females sometimes fly off during the mating process to feed or find a more sheltered location, while the male stays attached.

The genitalia of each species has a specific shape, and they fit together rather like a lock into a key. Cross-breeding between species is nearly impossible and extremely rare.
During mating, most males provide a spermatophore, a sort of “package” of sperm and nutrients the female needs to produce and lay eggs. The female will lay eggs within 2-3 days of mating, and lays between 300 and 700 eggs in her short life (usually a month or less).

If you’re interested in the technicalities of butterfly courtship and mating, click here for a great detailed site with plenty of information.
We were in town attending my daughter’s graduation from Navy basic training.
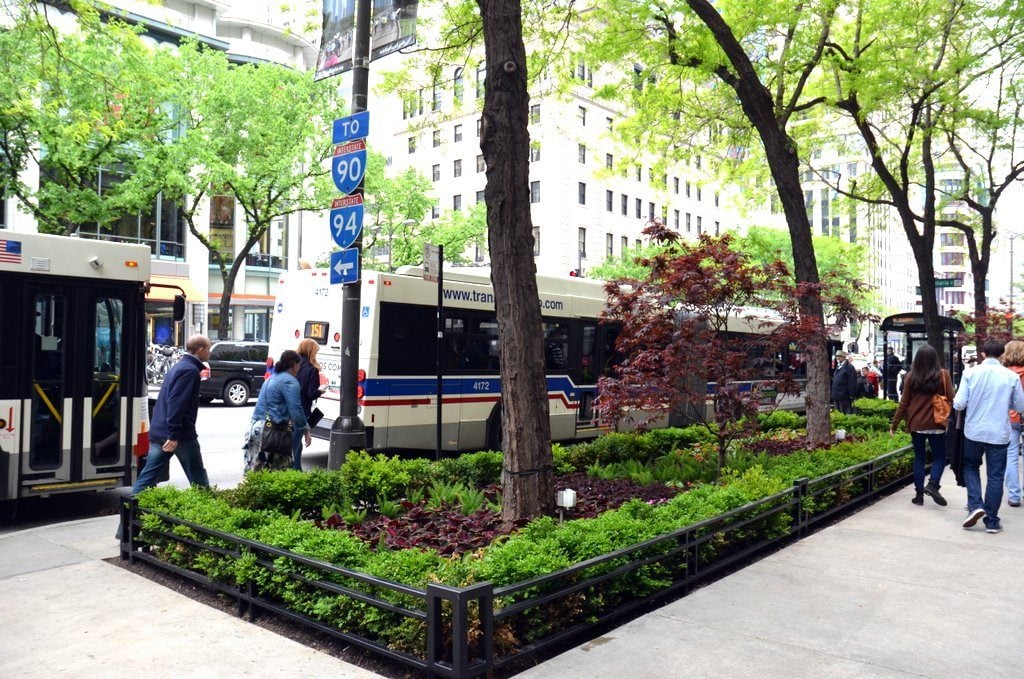
I had a few hours before our flight left for home and couldn’t think of any better way to spend it then walk down Chicago’s famous Michigan Avenue with its beautiful architecture, shops and of course, green spaces.
I love being inspired when I see different plant combinations. Now, I may not be able to grow all of the same kinds of plants in my desert climate, but I can find plants that look similar so that I can reproduce the same look.
Here are a few of my favorite plantings…

Blue hydrangeas held aloft on raised platforms above a sea of boxwood.

I love this look – surrounding street trees with flowering annuals and perennials.
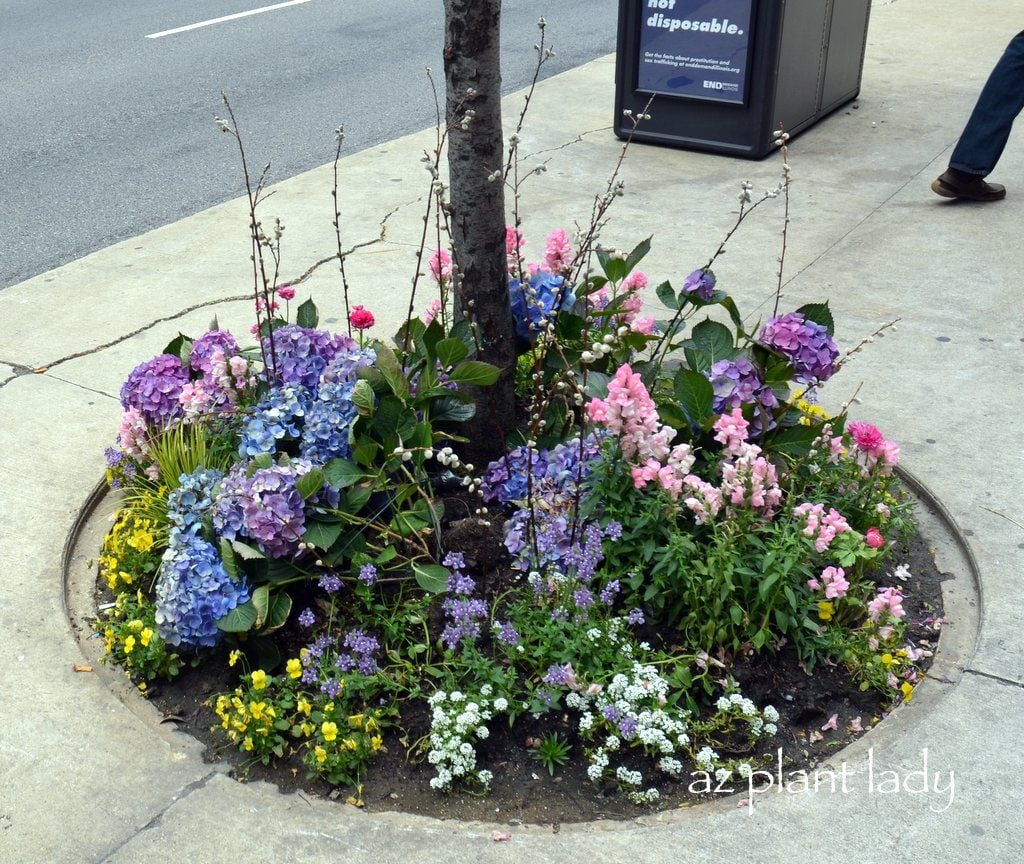
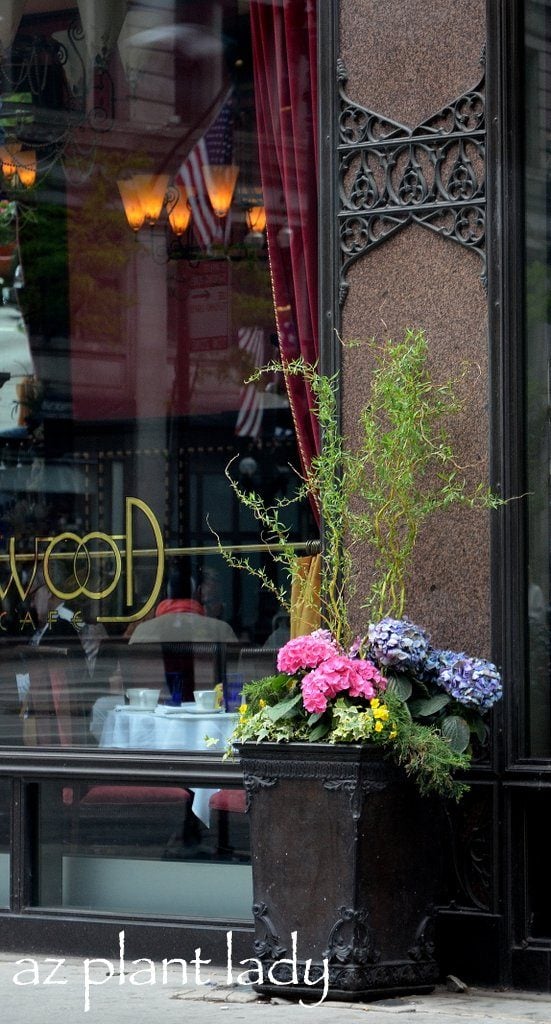
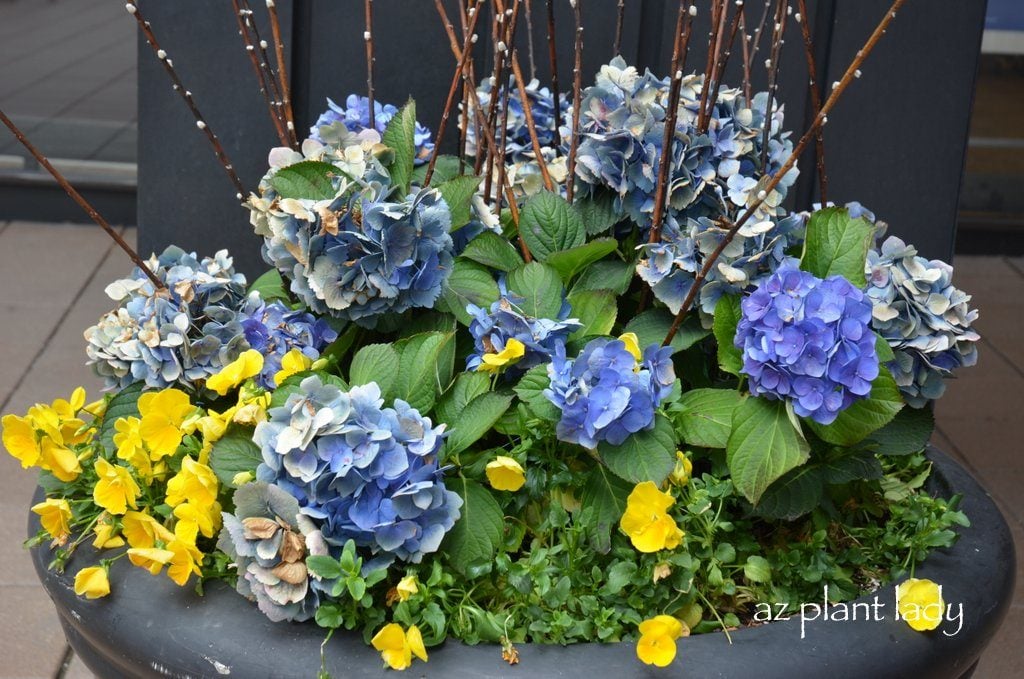
Purple and blue hydrangea are planted with yellow violas, sweetly scented white alyssum and pink snapdragons. Pussy willow branches add a welcome vertical accent.
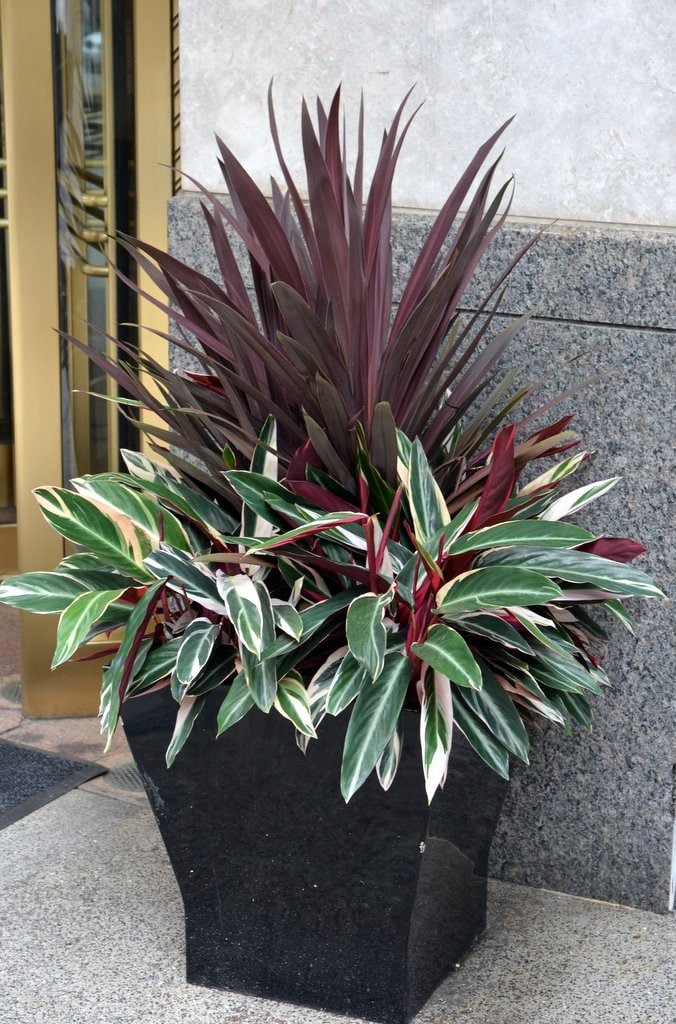
Container plantings don’t have to be limited to flowering plants. Colorful foliage makes a striking statement in this container. I love the burgundy foliage of New Zealand flax.
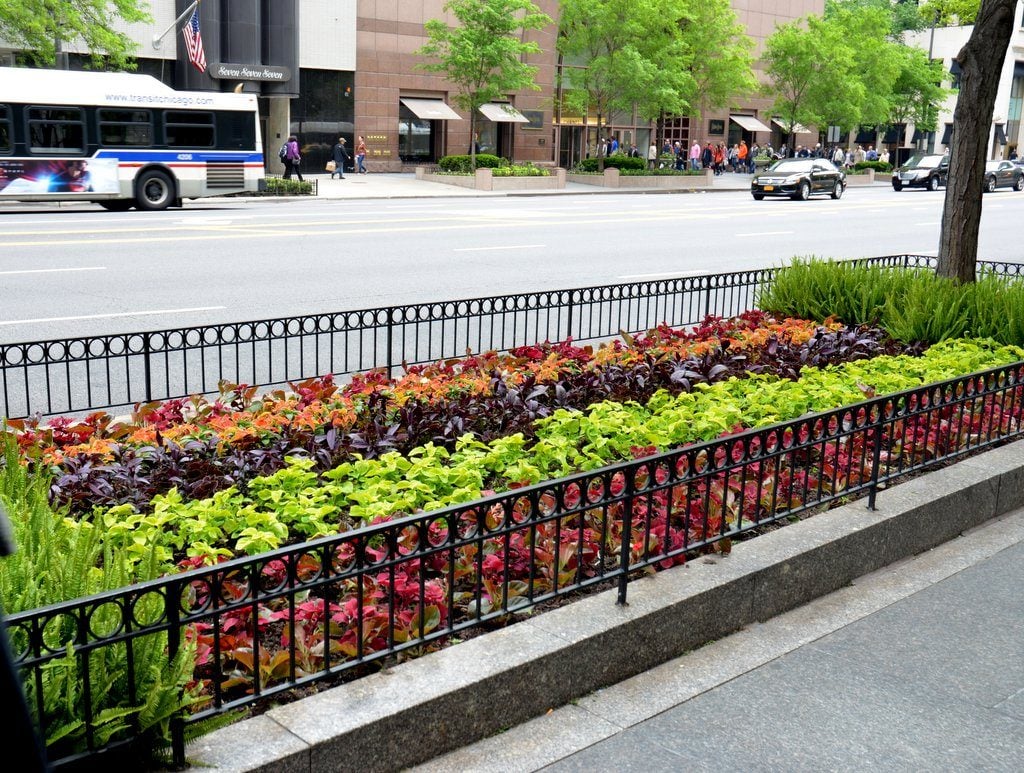
This bed of gorgeous colors is created by plants with contrasting, colorful foliage.
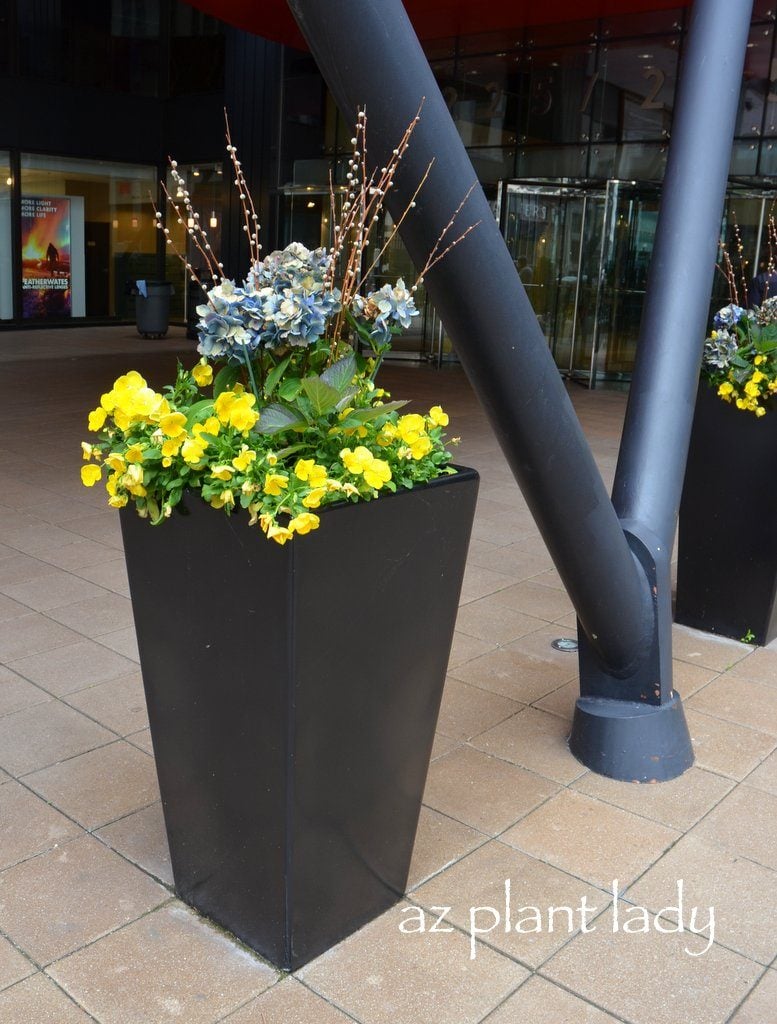
This container uses the bright yellow color of violas to contrast with the cool blues of hydrangea.
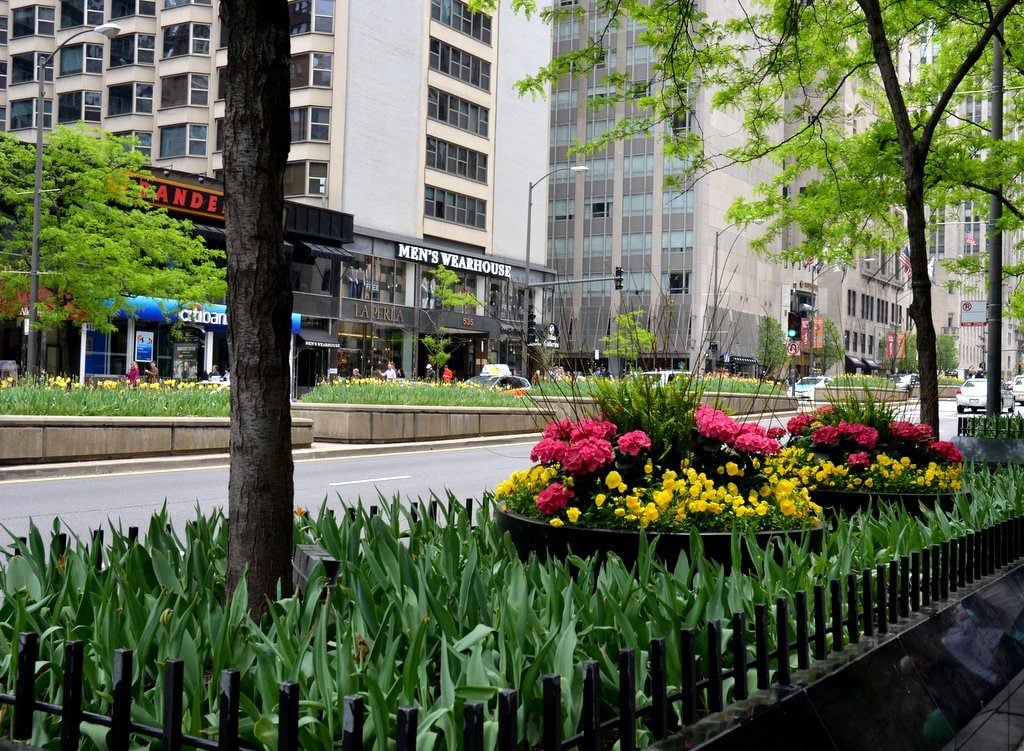
This bed is filled with tulips that have finished flowering. Bright pink hydrangeas are held aloft on raised platforms. Yellow pansies provide a great contrasting color. Boston ferns and branches complete this striking container combination.

Palms make great container plants. This pygmy date palm takes center stage with sweet potato vines surrounding it.
I really like how pink and blue hydrangeas look next to each other. It’s too bad that you can’t get both colors to grow together in a garden setting. In areas with acidic soil, hydrangeas will be a bluish shade. Growing up in California, were alkaline soils are the norm, our hydrangeas were pink.

While I am not a huge fan of formal pruning, I like how the shrubs are pruned in the same shape as this container filled with different shades of pansies, don’t you?
A border of boxwood shrubs surround the burgundy-colored coleus. Japanese maple trees provide a beautiful mid-height planting underneath tall trees.
I hope you have been inspired to recreate these beautiful plant combinations in your own garden. Don’t worry if you can’t find the exact same plants – you can easily use plants that have a similar shape and color to create the same look.
If you would like inspiration on creating beautiful window box plantings, check out my post about the window boxes of Charleston, SC.
Where have you seen beautiful plantings? Please share them with us!
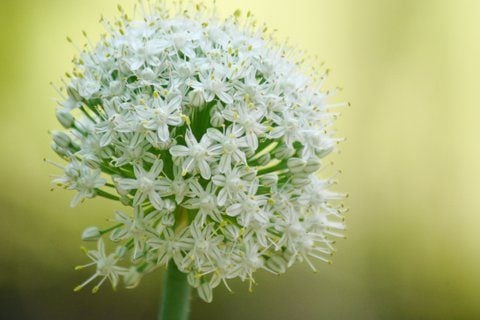
On our Facebook page yesterday, we featured a “mystery photo” of a flower bloom head and asked readers to identify it. Anyone who reads this blog regularly would have recognized it, because it was the bloom from fellow blogger Noelle’s not-so-successful onions, which she featured in a post last week. The onions might not have turned out the way Noelle hoped, but there’s no doubt blooms from onions, which are members of the Allium family, are downright gorgeous, and many other species in this family are grown just to enjoy the lovely flowers.
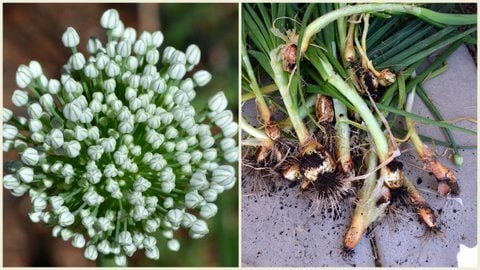
Noelle’s Bloomin’ Onions
Plants in the genus Allium usually grow from bulbs. Some species have been cultivated over the centuries for their edible properties, giving us onions (Allium cepa), chives (Allium schoenoprasum), and garlic (Allium sativum). Others, such as Allium gigantea, have been prized and grown specifically for their beautiful blooms. Either way, the flower heads are umbels, made up of a globe of short-stalked small tiny blooms. They come in a variety of colors, and create a striking show in the garden.

An ornamental variety of Allium
Allium bulbs are planted in the fall for spring or summer blooms, and can be grown in almost any garden. Flower heads and stalk heights range widely, from varieties like ‘Graceful’ which grow 12 – 16 inches with two-inch bloom heads, to those like ‘Globe Master’ which grow to almost four feet and have blooms the size of your head. They like well-drained soil and full to part sun, and are considered very deer-resistant. Most are very attractive to butterflies and other pollinators.
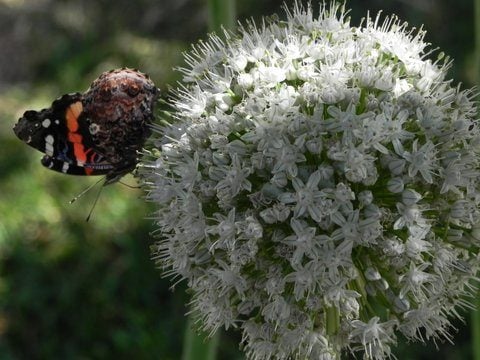
An accidental onion bloom by Birds & Blooms reader Bella Hooks, who said, “Took an onion out of the vegetable bin in the refrigerator and planted it once it started to sprout leaves. Never thought it would produce such a beautiful flower and a drive-by dinner for so many butterflies!
For those trying to grow big onion bulbs for harvest, the sight of an onion flower is a disappointment. Once an onion puts up a flower stalk, the bulb usually ceases to grow, even if the flower stalk is removed. This is generally triggered by cool temperatures at the wrong point in the growing season. Click here to learn more about growing onions for harvest instead of flowers.
The unexpectedly lovely bloom of a garlic bulb, photographed by Birds & Blooms reader Faedawati Vermillion
Do you grow alliums or ornamental onions, scallions, or chives to enjoy their blooms? Give us your growing tips in the comments below!
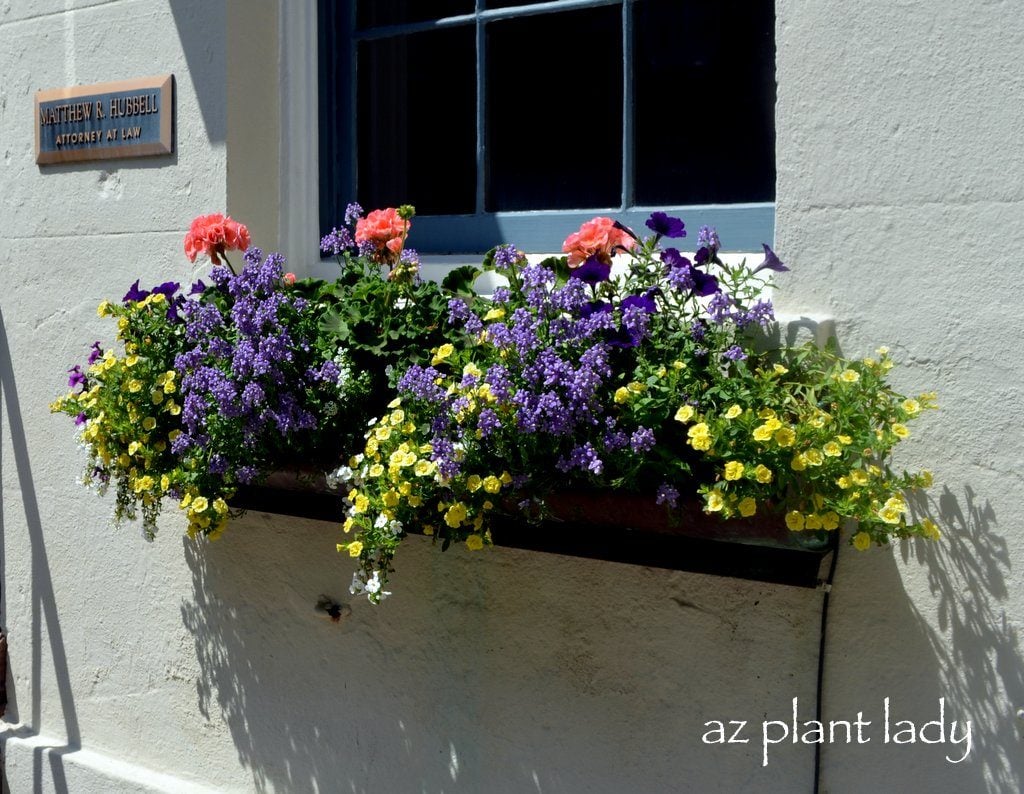
As I walked the historic district, my attention was drawn to the beautifully planted window boxes in front of homes and businesses that dated back to the 1700’s. Here are a few of my favorites…

The purple ‘Wave’ petunias contrast beautifully with the gray foliage of dusty miller in this arrangement, don’t you think?
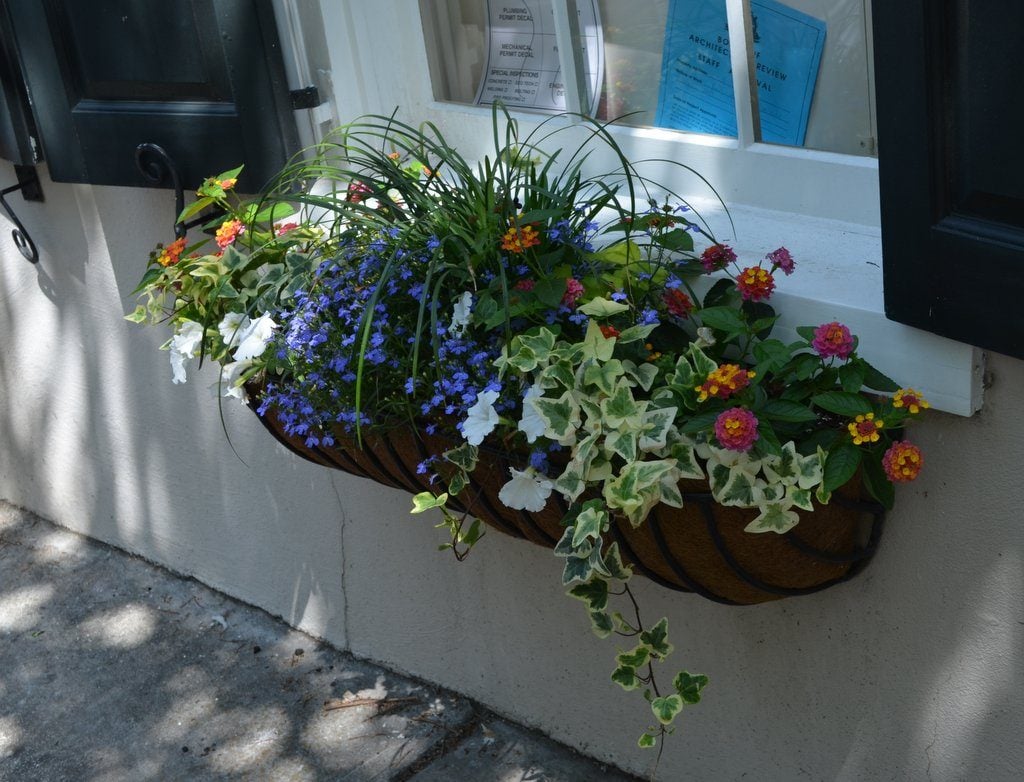
The colors of this window box really struck my eye. Blue lobelia, white petunias with the multi-colored flowers for ‘Radiation’ lantana look great with the variegated ivy.
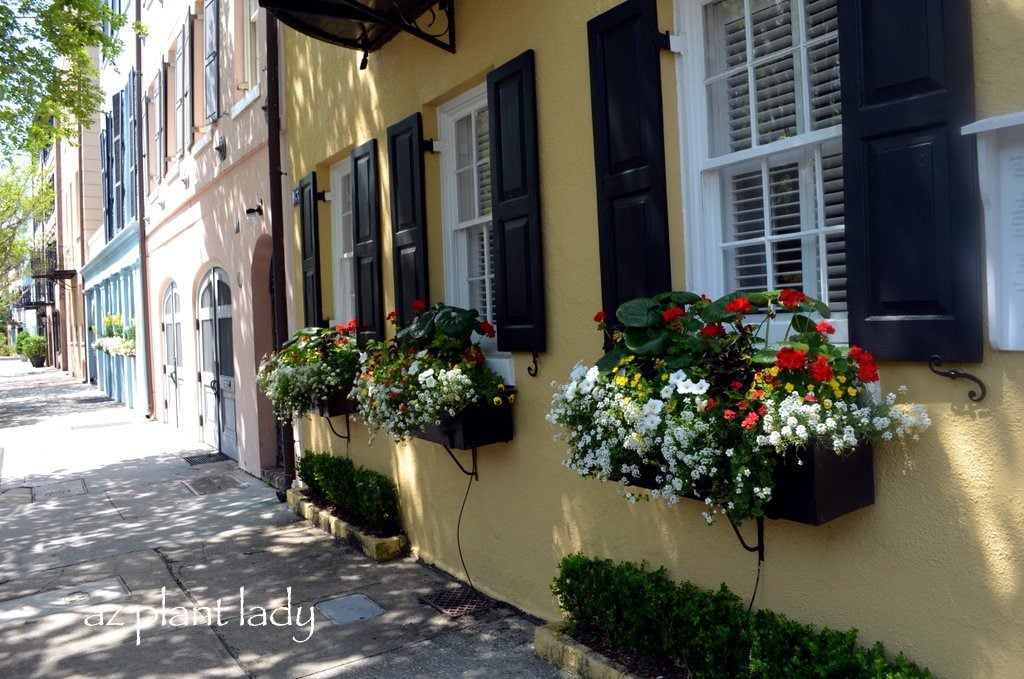
The warm colors of yellow violas and red geraniums complement the yellow wall of this residence. Candytuft is also one of my favorite white-flowering plants – I like how it trails over the edge of the planter.
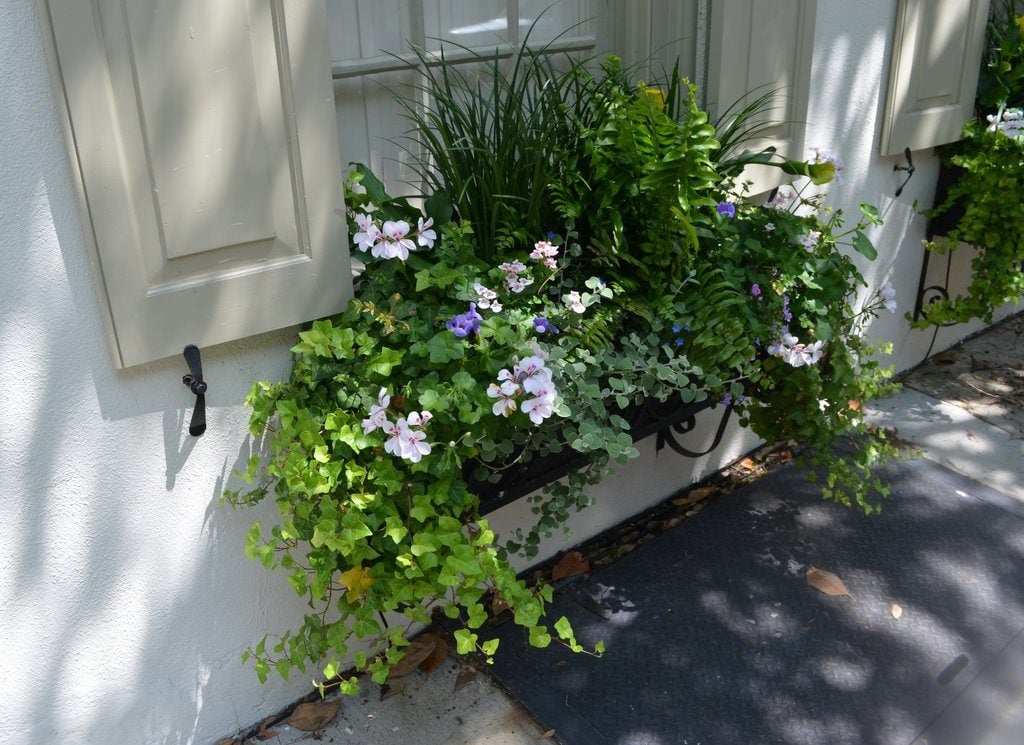
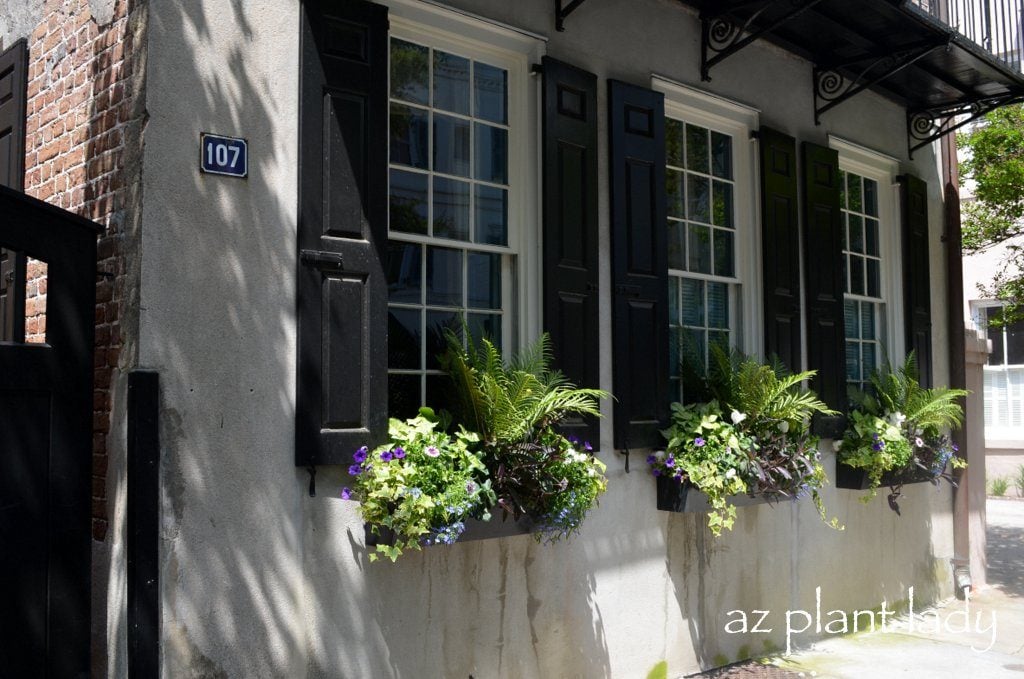
This shady window box is filled with lush, green plants that do well in filtered shade, including trailing ivy, white geraniums, Boston fern and vinca minor.

Shades of purple with white make a striking statement in this pair of window boxes. Blue/purple violas, purple & white ‘Wave’ petunias, verbena, candytuft and white snapdragons help to create this stunning arrangement.
Yellow petunias, purple angelonia and salmon-colored geraniums thrive in this sunny spot.
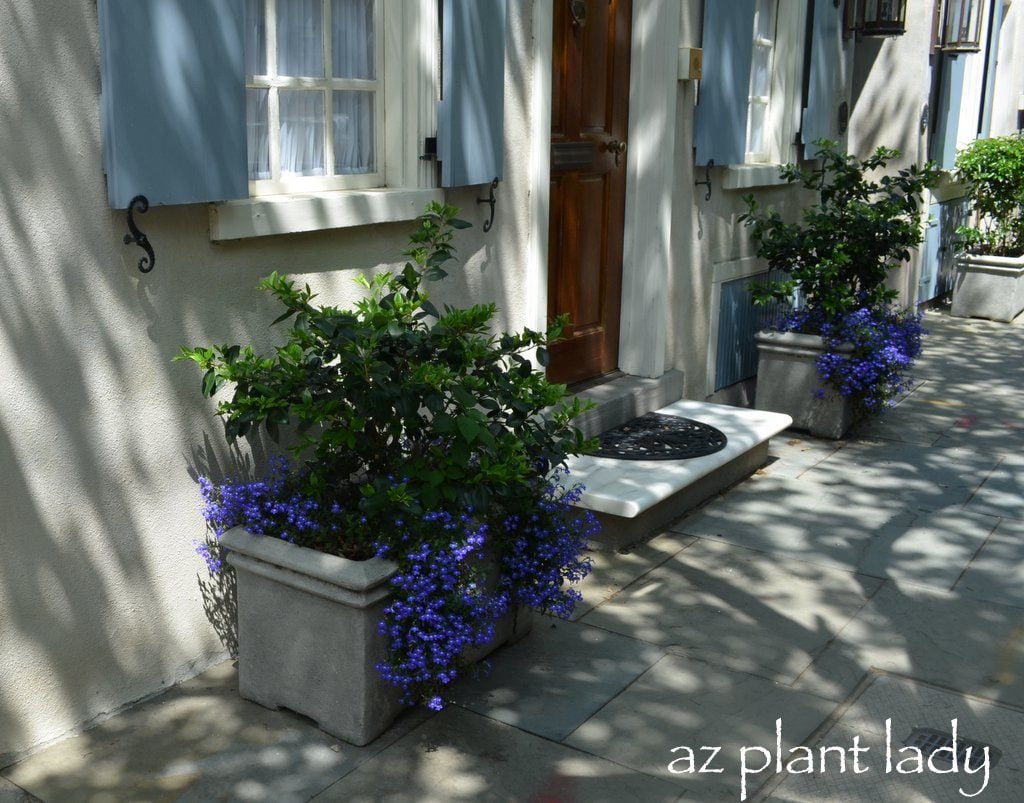
This building did not have window boxes , I was drawn to the striking containers filled with only two plants. An evergreen shrub surrounded by blue lobelia.
Plants with contrasting foliage are the focus in these window boxes. Trailing ivy, purple heart, ferns and caladiums are paired with purple ‘Wave’ petunias and light-blue lobelia.
Do you have window boxes? What plants do you add to them?
I hope you are inspired to create your own beautiful window box combinations. If you are ever in Charleston, be sure to take some time to stroll the historic district and view their window boxes for yourself.
For more great window box ideas, check out “Window Box Container Recipe” from Birds and Blooms.
I am sure that you have heard or seen some strange places where birds have made their nests. Well, a friend of my mother’s discovered this bird’s nest in an unusual place:
On her front door!
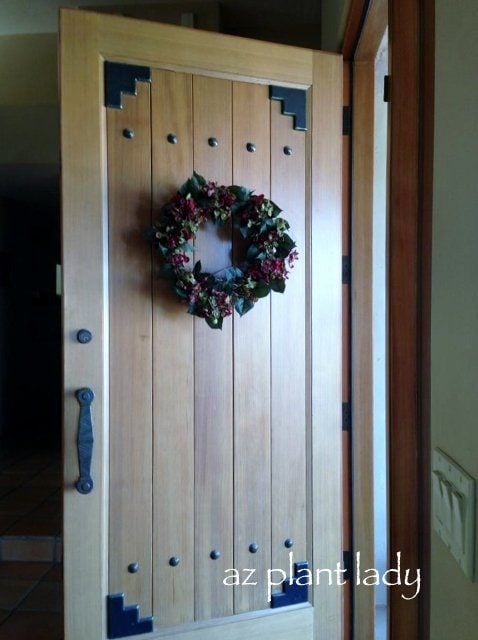
A mourning dove had built her nest inside of their artificial wreath hanging on the front door.
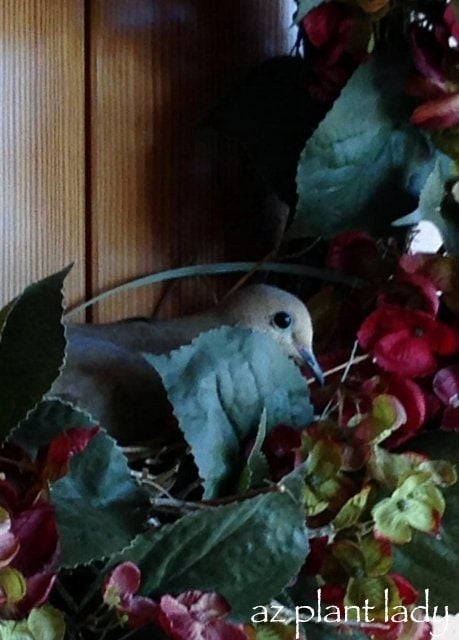
Now, you might think that this would be a strange place to build a nest with people coming and going through the front door. But, for the residents who live here – this is their second home and they had been away for awhile.
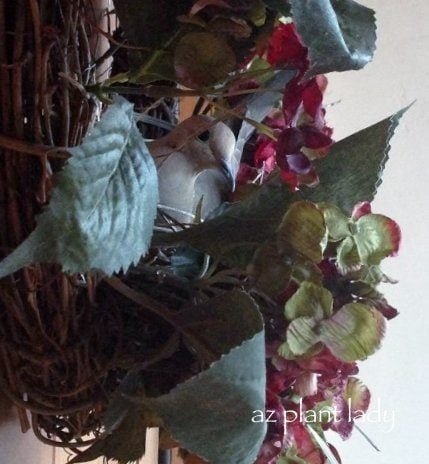
I am sure that mama dove thought that this was the perfect place in which to lay her eggs and raise her babies.
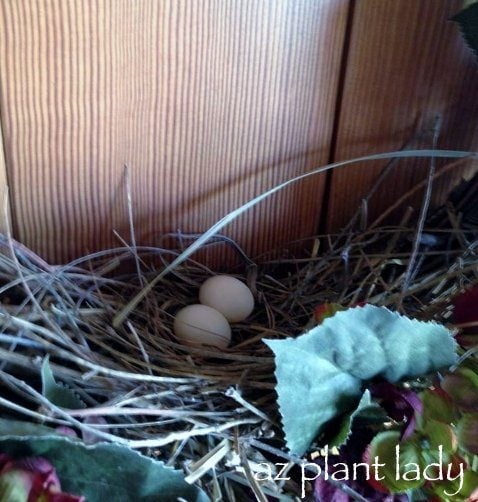
Thankfully, the homeowners have another door to use to get into the house so that mama dove can be left undisturbed.
What strange and unusual places have you seen bird’s nests built?
Nesting birds use a variety of materials to create the perfect place to lay their eggs. You can help attract them to your yard by providing the items they need. This decorative project would make a great gift for a bird-loving mom or grandma on Mother’s Day. It’s easy enough for little hands to help out, so get the kids involved too!

What You Need:
- Grapevine Ball, available at your local craft store (about $4 each)
- Raffia or twine
- Scissors
- Pencil or Chopstick
- Nesting Materials – Click here for ideas (I used natural cotton, seed heads and clippings from ornamental grass, and Spanish Moss. Be sure to avoid materials that have been treated with chemicals, including dryer lint if you use fabric softener.)

What To Do:
- Cut off any tags from the grapevine balls. Using your fingers, force open a small hole in one side of the ball. Push some nesting material inside, using the pencil/chopstick as needed.
- Use the pencil/chopstick to push additional materials into the ball through different holes. You can fill the balls as full as you like.
- Tie a piece of raffia or twine to the top for hanging, and add a small bow if you like.

That’s it! Now you can hang the balls in a nearby tree, from shepherd’s hook in the yard, or anywhere the birds can find them. You can re-fill them as needed, too. What materials will you put out for your nesting birds this year?
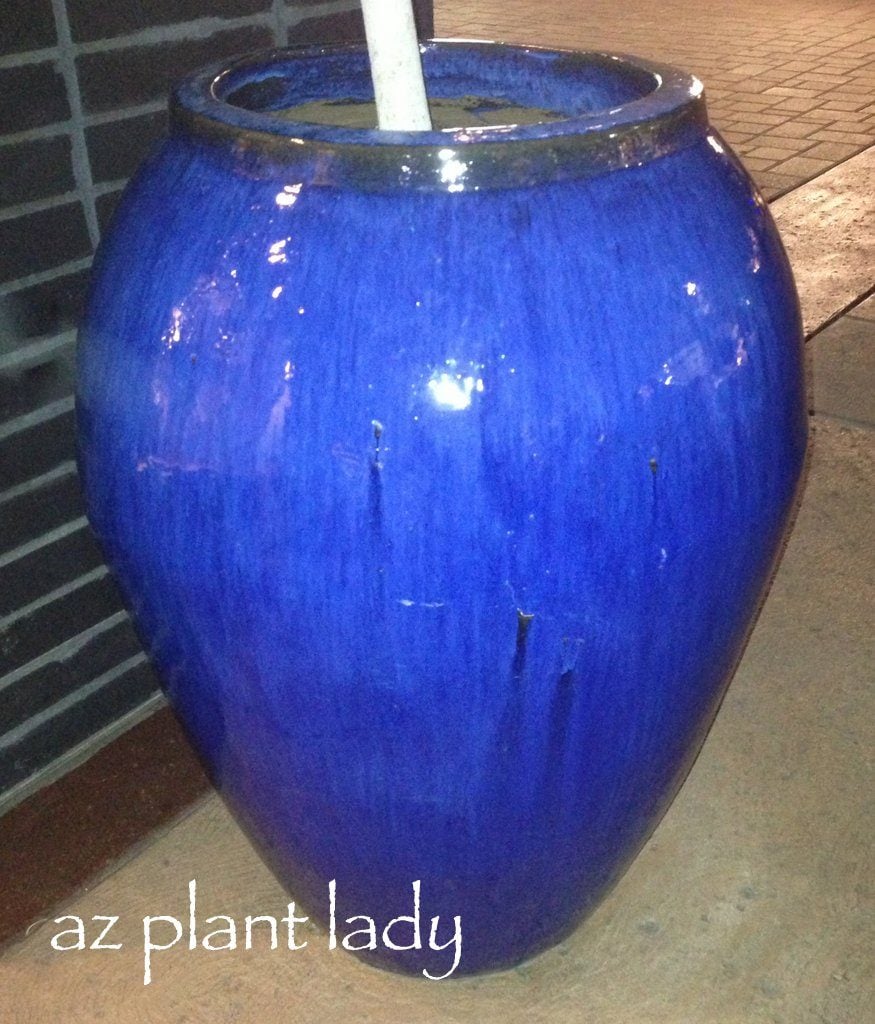
Do you like to grow ornamental plants in large pots? I do. Especially brightly-colored pots that add color to the landscape.
What I don’t like about large pots is the amount of potting mix that I have to add to fill it up. In large pots, my plants aren’t likely to use the soil at the bottom of my pot. In addition, potting soil/mix is expensive and makes pots even heavier than they already are.
So, is there a solution to this problem? What do the experts do?
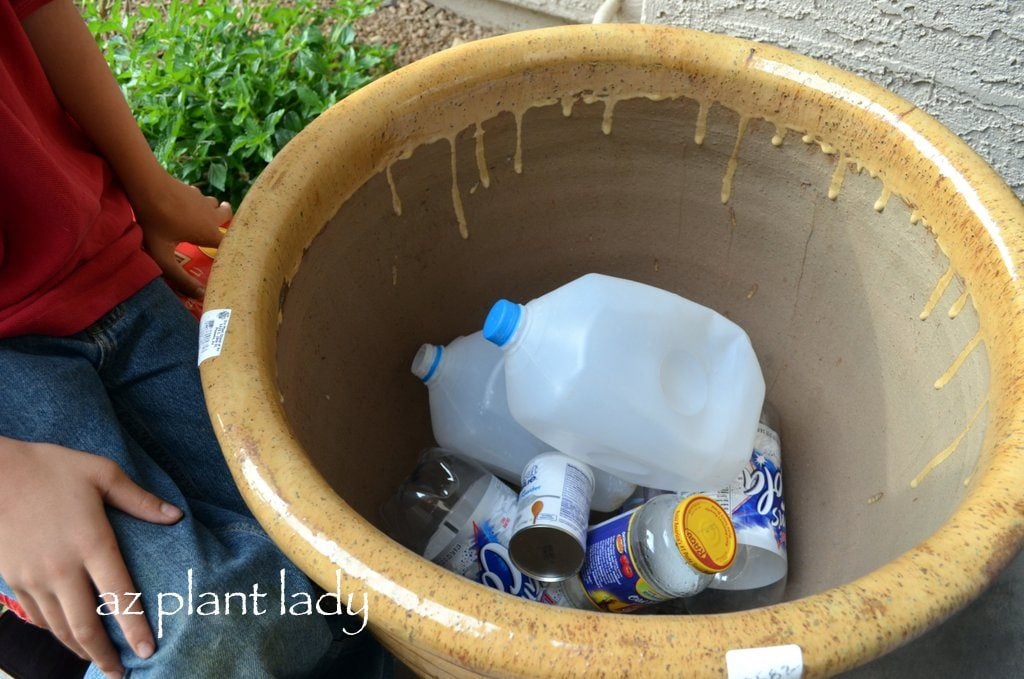
They add items to the bottom of containers to fill up unused space.
Foam packing peanuts work great for filling up the bottom of pots, but plastic containers work just as well.

To fill up unused space at the bottom of your large container, simply add plastic recyclable containers or foam packing peanuts.
How much should you fill your container? That depends on what you plant and how deep the roots will grow.
Flowering annuals – 12 inches of soil.
Perennials – 12 – 18 inches of soil.
Shrubs – 2 ft. of soil.
Trees – 3 ft. of soil.
Clean your containers thoroughly before adding them to your pot and then put in your potting mix. (I don’t advise doing this for growing edible plants since there can be chemicals/dyes in the containers that may be harmful if eaten).
I recently shared this helpful tip when I was asked to put on a potting demonstration.

I also shared some other helpful tips for creating beautiful container plantings and how to care for them.
I’ll share the rest of my tips with you next Tuesday!
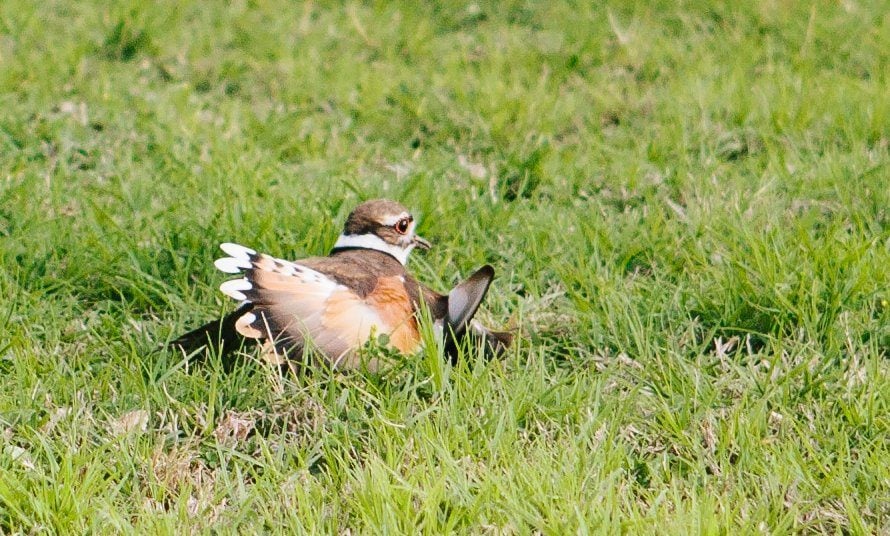
Last week, my sister was in the backyard of her small farm when a killdeer started squawking at her. This kept occurring every time she venture out into the back lawn.
It wasn’t until the killdeer pretended to have a broken wing that my sister realized that there must be a nest nearby. Killdeer often pretend to be injured to lure intruders away from their nests.
So, the hunt for the nest was on. It was quite hard to find because killdeer don’t really build nests. They often just lay their eggs in the middle of a field of grass.
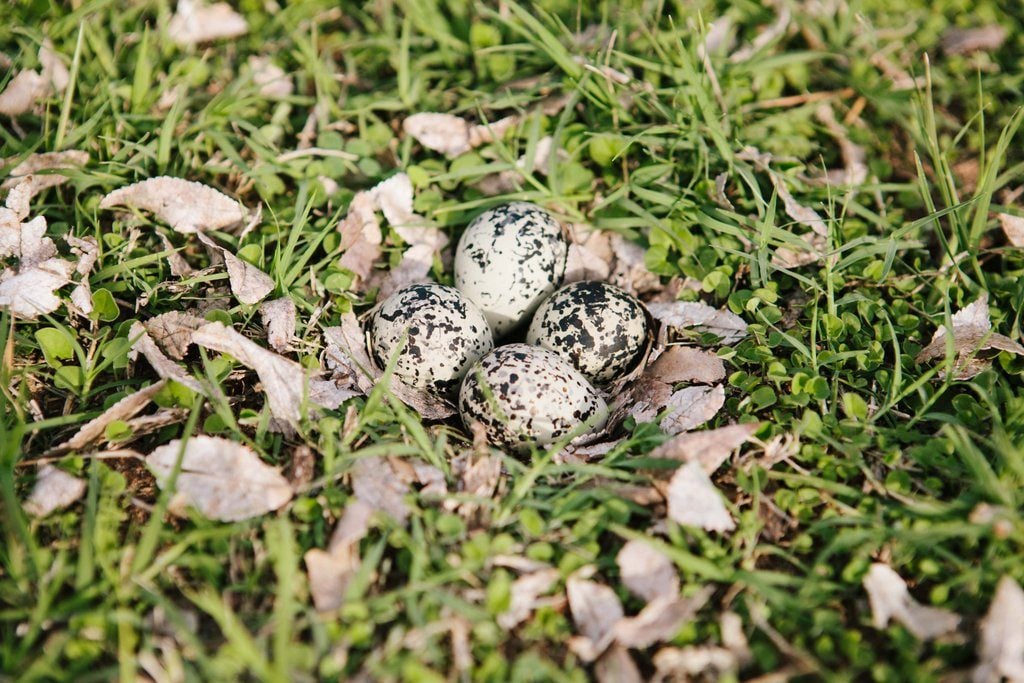
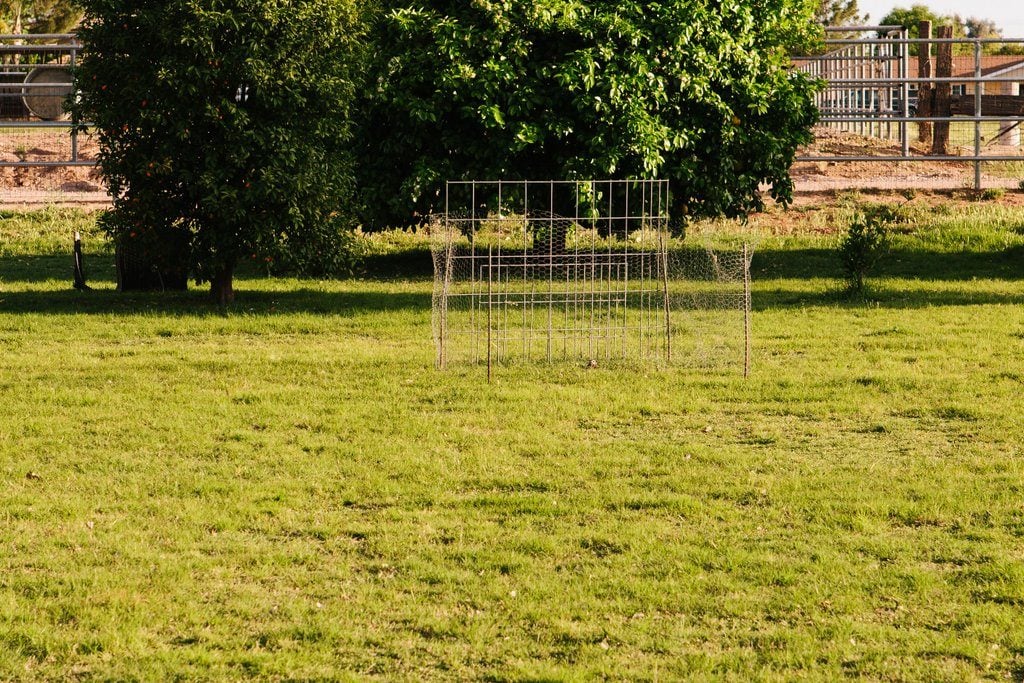
The nest was discovered in the middle of the back lawn. The mother seemed quite content with her choice of nesting spot. However, she could hardly have picked a more chaotic spot to lay eggs. The spot she chose is often populated by two rambunctious dogs, a flock of chickens and two energetic boys.
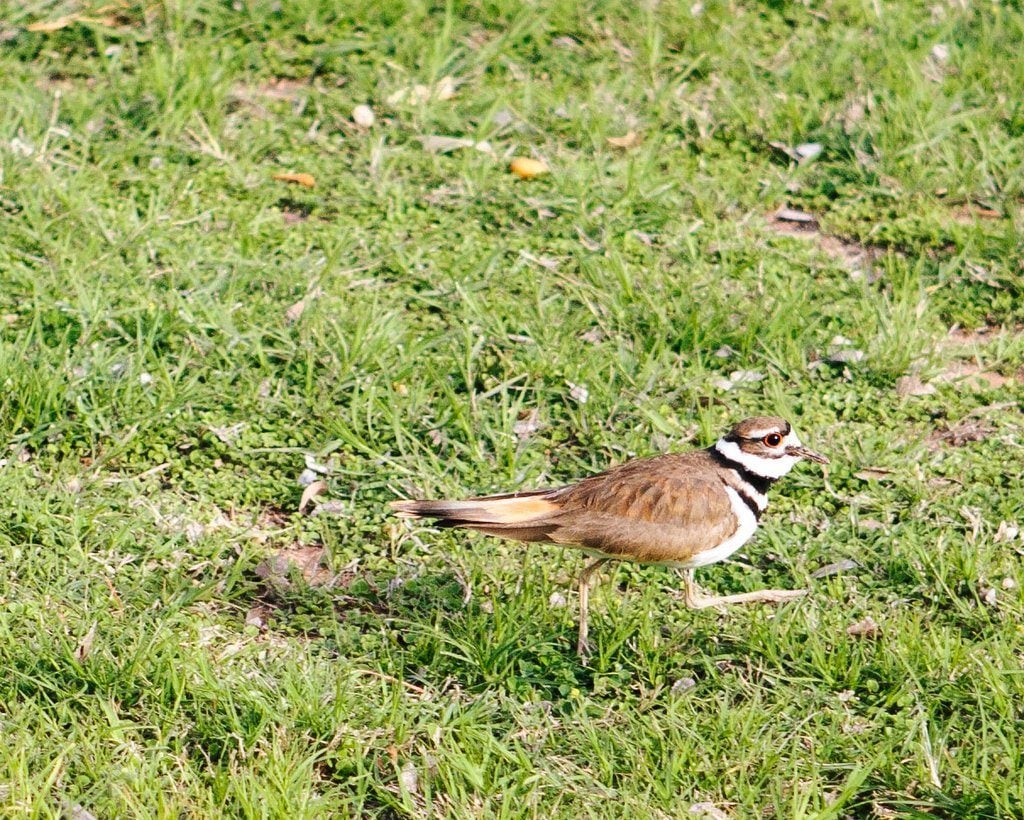
My brother-in-law built a fence to keep the dogs, chickens and kids away from the nest. You can barely see her sitting on her nest in the distance…
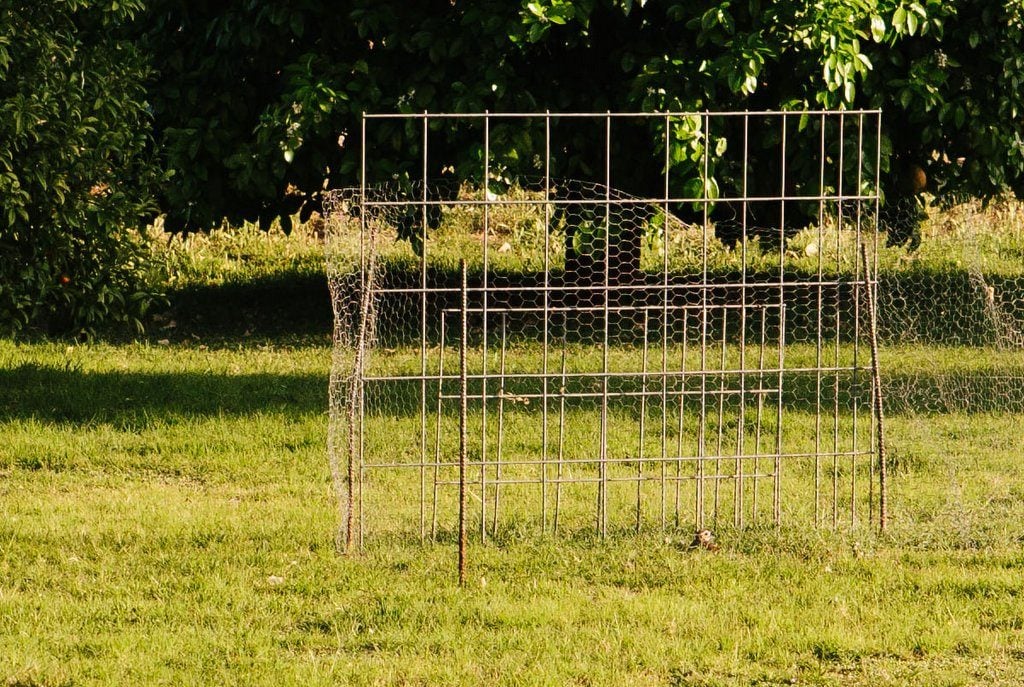
Here is a closer shot….
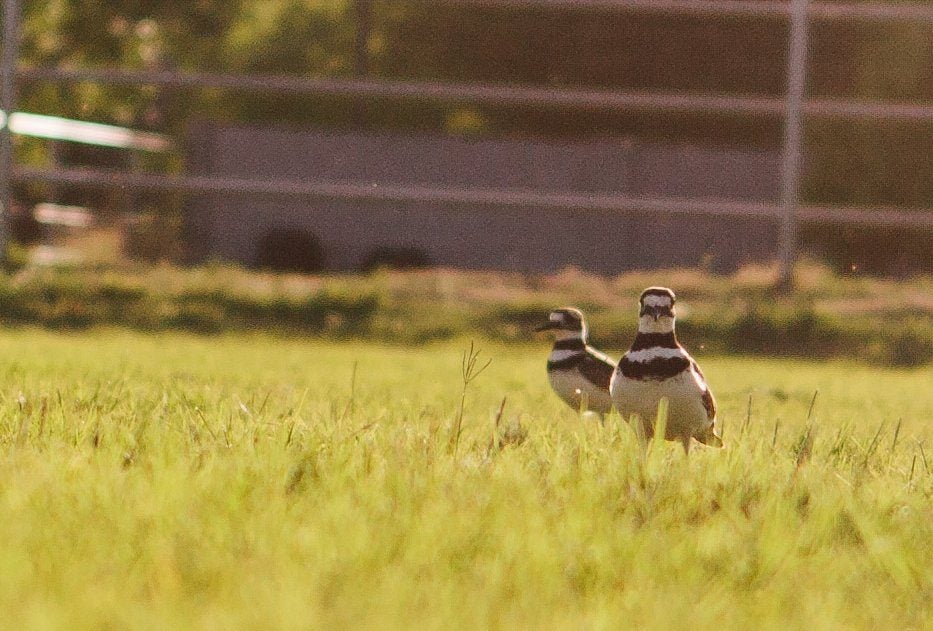
Occasionally, if a chicken or dog gets too close, she will call out and her mate will fly to her. One of the sounds that they make sounds like “killdee”.
Killdeer raise 2 – 3 broods in the south beginning in March. So, this is probably their first brood this year.
Killdeer are known to lay eggs in the middle of gravel, so I guess a nest in the middle of a busy backyard, isn’t all that out of the ordinary.
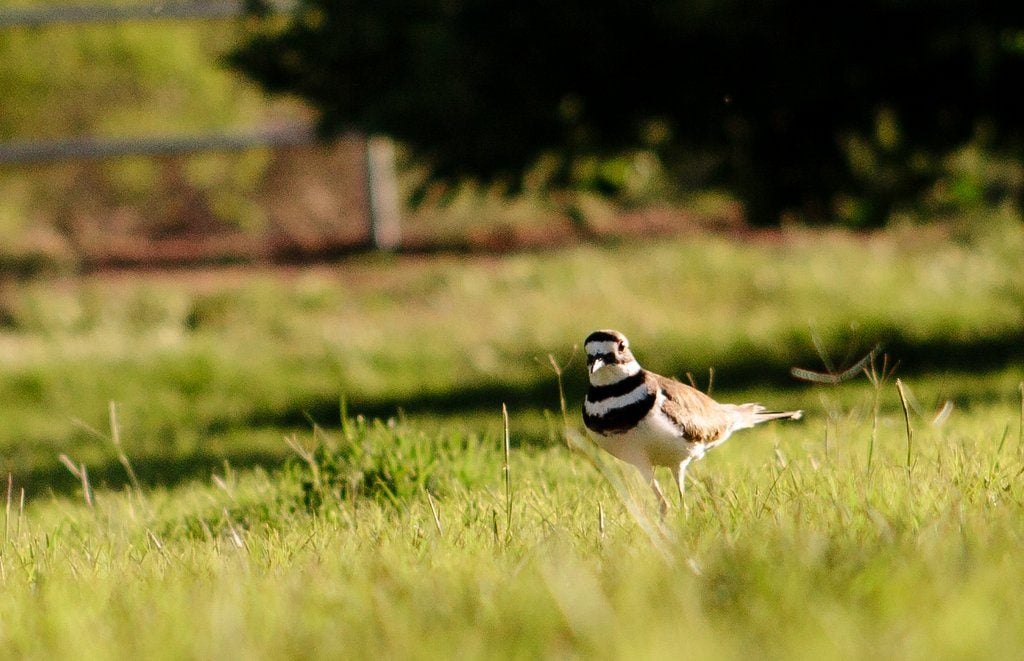
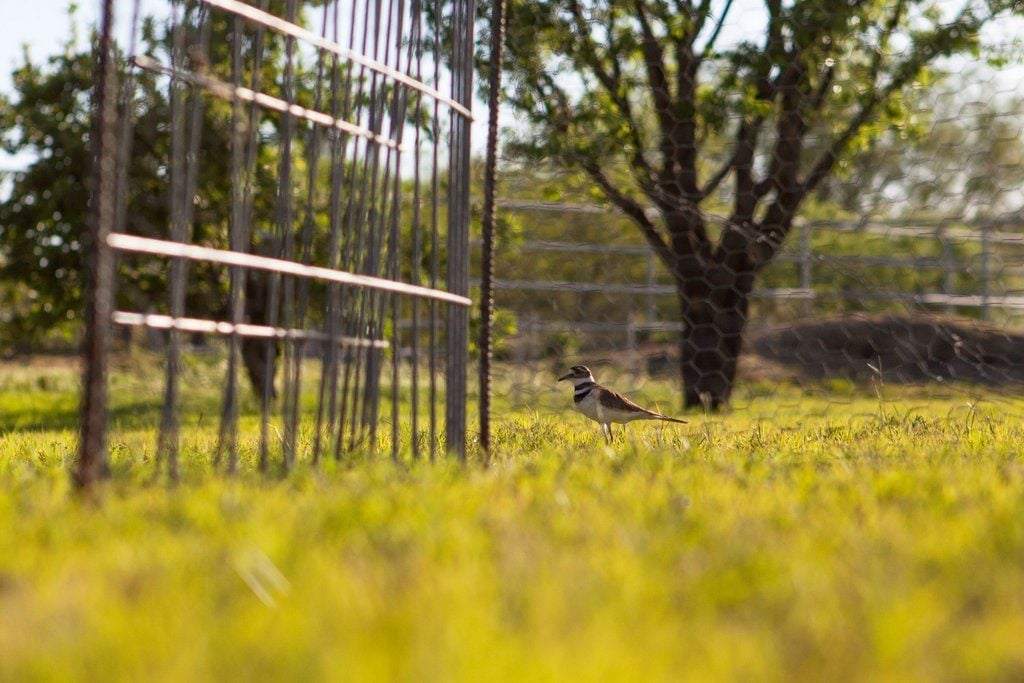
Killdeer are found throughout the entire United States. They are very vocal and found near human habitation. While they are technically shore birds, they are often found far away from bodies of water – these two have laid their eggs in the middle of the desert where there aren’t too many large bodies of water.
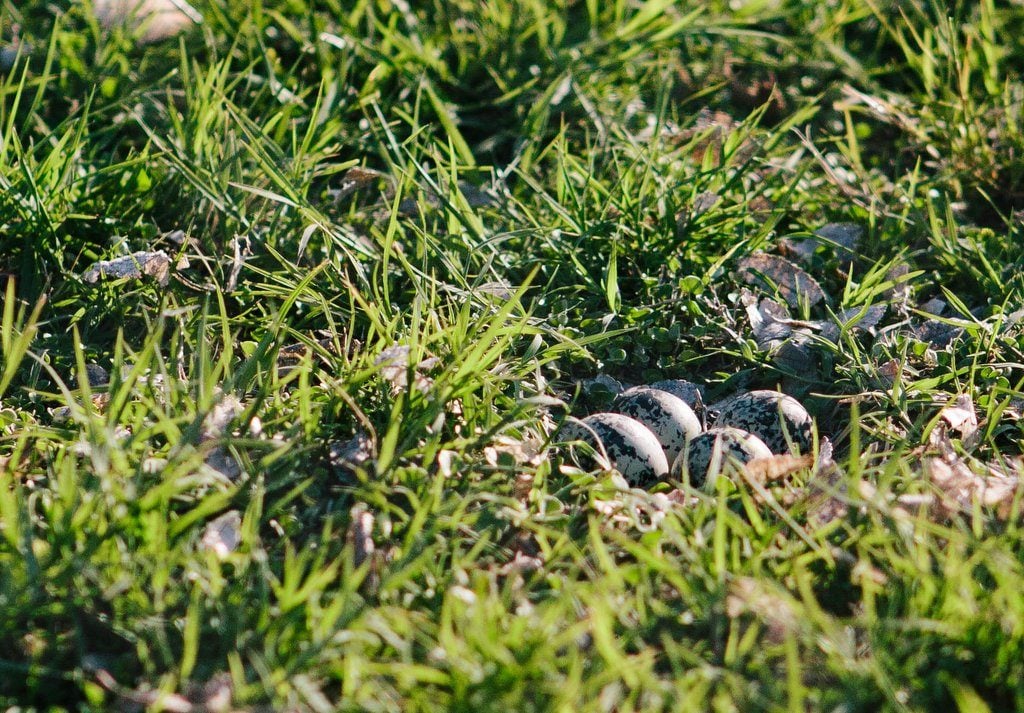
Killdeer eggs take 24 – 28 days to incubate. This may seem like a long time, but when young killdeer hatch, they are able to scurry about right away and forage for food with their parents. As a result, they spend twice as long inside the egg maturing as opposed to other birds such as robins and sparrows, which are born helpless and naked and have to rely on their parents to feed them.
I promise we will keep a close eye on this killdeer pair and their nest (from a distance, of course, so we don’t bother her). As soon as the chicks hatch – I’ll be sure to let you know and post pictures!
How about you? Have you ever seen a killdeer nest? Tell us where it was.
For more information on this interesting bird, check out this article by Birds & Blooms.