
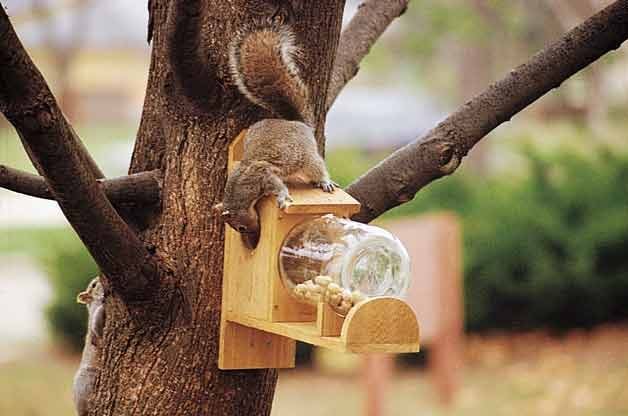
Many backyard birders also enjoy watching squirrels. That’s why we think you’ll like this “squirrel under glass” feeder. The DIY squirrel feeder offers a clear view of the squirrels, because the crafty critters actually climb inside the feed jar to eat!
James Motsinger of Manor, Texas shares the fun design. His “squirrel under glass” feeder provides a whole lot of entertainment in his backyard. As a side benefit, it helps keep the squirrels from raiding the bird feeders in his yard. Just mount it on the opposite end of your yard away from bird feeders and keep it filled.
James designed the squirrel feeder with holes in the sides large enough for the furry critters to crawl through, but snug enough to make the structure feel like a nesting box.
While squirrels were his target audience, the feeder has attracted a few other interesting visitors, too.
“I’ve found birds feeding in it, particularly during bad weather,” James says. “They seem to like being able to feed where it’s dry.”
Another plus is that this feeder requires only a minimum of materials. All that’s needed is a 6-foot fence board, a handful of screws and a 1-gallon glass jar. If you don’t have the glass jar, or don’t want to eat a year’s supply of pickles to build this feeder, ask local restaurants, schools or other establishments that buy food in bulk if they have a jar to spare.
“Offer to trade a finished feeder for a supply of jars,” James suggests. “If you can’t find a free jar, a sun tea jar bought at the store will work, too.” Just be sure it has an inside diameter of at least 6 inches, so squirrels can dine in comfort.

DIY Squirrel Feeder Materials:
- One 6-foot 1-inch × 6-inch “dog-eared” cedar fence board
- 2-1/2-inch and 1-5/8-inch galvanized deck screws
- One 1-gallon glass jar
Tools:
- Saber saw
- Rasp or rough sandpaper
- Compass
Step-By-Step Instructions:
Step 1
Cut the pieces from a 6-foot 1-inch × 6-inch fence board according to the board layout at left.
Step 2
Make the jar support by tracing the curve of the jar onto the wood. The lowest point of the curve should be 1 inch from the bottom of the board.
Cut along the line with a saber saw. Place the jar on the support to check that it fits well. Trim the sharp corners off the support (about 1/4 to 1/2 inch) and smooth rough edges with sandpaper.
The curved piece remaining from this will become the end piece.
Step 3
Cut entrance holes in both side pieces. Mark a spot about 3-1/2 inches from the highest corner of each board and center the hole from side to side. Draw a 3-inch-diameter circle with a compass, then cut out the holes with a saber saw. Smooth rough edges with sandpaper.
Step 4
Make a hole in the front of the feeder to hold the neck of the jar. This is a tricky step because jars vary in size. Start by determining the radius of the jar’s mouth. Then lay the jar on its side and measure from the tabletop to the bottom of the mouth. Add these two measurements plus 1 inch. Mark this distance from the bottom of the front board and center.
From this point, draw a circle 1/2 inch larger than the diameter of the mouth. Cut the hole with a saber saw.
Step 5
Assemble the front and sides of the squirrel feeder, then attach the assembled pieces to the base. These joints, and all others, will be fastened with 1-5/8-inch galvanized deck screws. Cedar splits easily, so be sure to drill pilot holes in each piece before driving in the screws.
Step 6
Attach the jar support about 3 inches from the far end of the base. Then position the rounded end piece—which keeps the jar from sliding out of the feeder—at the edge of the base. However, make sure there is enough clearance for you to tip the jar out for filling. If it’s too tight, use a rasp to round the inside curved edge of this end piece until the jar can easily be removed. If the jar is too loose, move the rounded end farther up the base before attaching it.
Step 7
Predrill holes in the mounting board, then attach it to the feeder with 1-5/8-inch deck screws.
Step 8
If you’d like to make a beveled edge on the roof piece so it tightly meets the mounting board, cut a 15° angle on the back edge with a table saw. Then attach the roof to the sides of the feeder, again using 1-5/8-inch deck screws.

Step 9
Mount the feeder on a tree with 2-1/2-inch deck screws (this is a heavy feeder—you’ll need large screws to mount it securely) and fill it with peanuts in the shell, cracked corn or birdseed. Then check your watch. It won’t be long before you’ll be inviting the neighbors over to admire your “squirrel under glass”!

Beautiful Flowering Trees: Tulip Tree
Liriodendron tulipifera • Zones 5 to 9
Though hard to see from a distance, the tulip tree’s unique early-summer flowers are sure to dress up your yard. The cup-shaped blooms on these beautiful flowering trees have greenish-yellow petals with orange bases. But be patient: Most types of tulip trees won’t begin to flower for 10 to 12 years.
Check out the top 6 trees with pink and white flowers in spring.
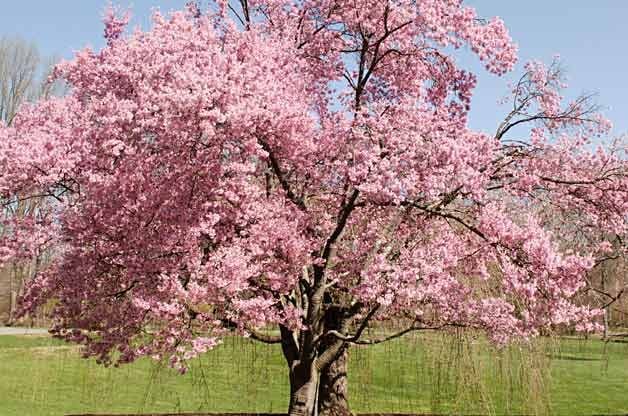
Cherry Tree
Prunus spp. • Zones 2 to 10
Whether you prefer flowers or fruit, you’re in for a treat if you plant a beautiful flowering cherry tree. Popular backyard choices are the ornamental purpleleaf sand cherry (Prunus x cistena), a shrubby variety with pink flowers and purple leaves, and the Sargent cherry (Prunus sargentii), a prolific bloomer.
Tree Growing Tip: Transplant cherry trees in spring. Select a protected spot to reduce the risk of snow or frost damage.
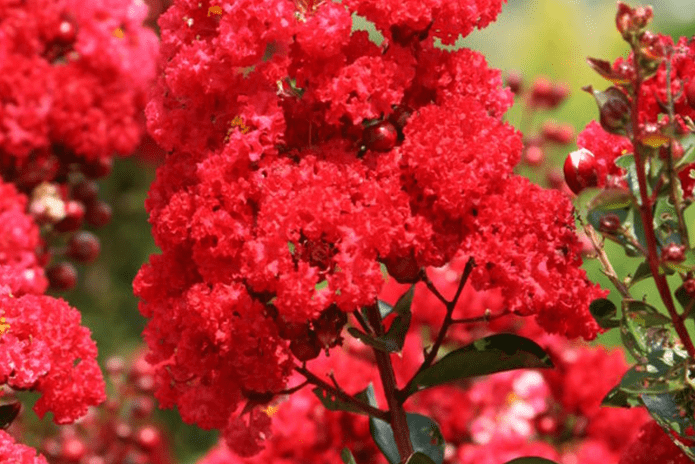
Crape Myrtle
Lagerstroemia indica • Zones 7 to 9
Crepe paper and crape myrtle have more in common than their pronunciations. The blossoms not only resemble the delicate paper, but the tree comes in almost as many colors, with flowers in endless shades of pink, red, white or purple. Fall brings a kaleidoscope of foliage, with reds, oranges and yellows mingling on the same tree. In winter, the smooth, peeling bark adds a subtle charm to the landscape.
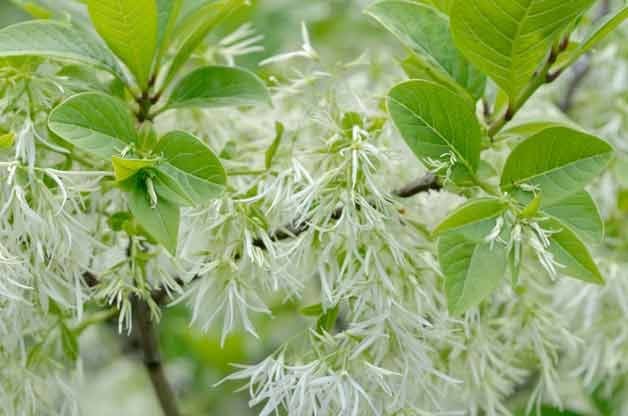
Fringe Tree
Chionanthus virginicus • Zones 3 to 9
We don’t know which we like more: The fringe tree’s captivating silhouette or its panicles of sweetly scented creamy-white flowers. This tree usually starts from seed and grows very slowly, reaching only about 20 feet. But even at an average of 6 inches a year, this delicate tree is worth the wait.
Check out 15 beautiful white flowering shrubs.
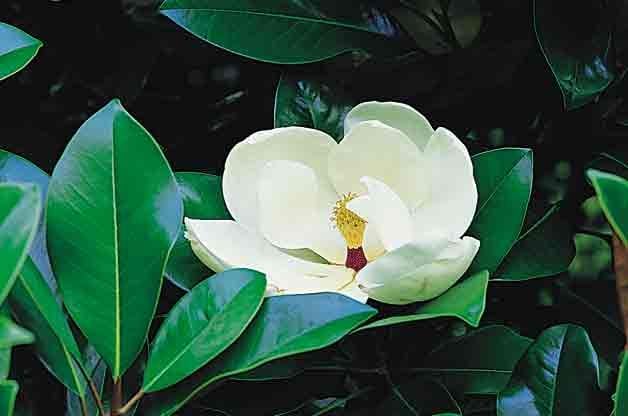
Southern Magnolia
Magnolia grandiflora • Zones 7 to 9
Big, bold and beautiful‚ the southern magnolia is a legend in the Deep South. In fact, it holds the honor of being the state tree and flower of Mississippi, and is the state flower of Louisiana. It’s the granddaddy of beautiful flowering trees, with lemon-scented white blooms that reach up to 1 foot across. And its glossy deep-green leaves are just as impressive—up to 10 inches long.
Check out the top 10 flowering bushes for your yard.
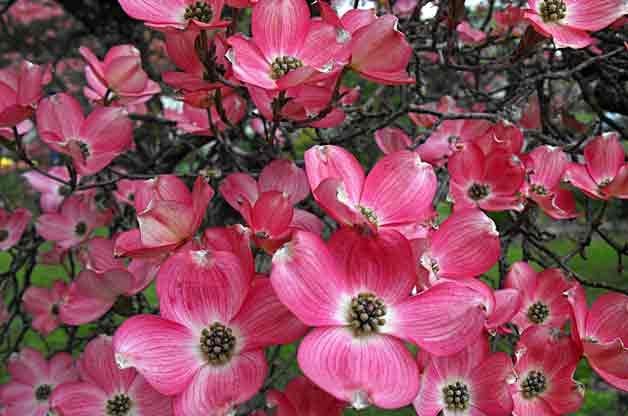
Flowering Dogwood
Cornus florida • Zones 5 to 8
The flowering dogwood could have inspired the phrase “a breath of spring.” Though its true flowers are small and green, its surrounding colorful bracts put on a glorious show. To avoid pests and disease, plant dogwood in areas where the foliage can dry well after exposure to dew or rain.
Check out 10 pretty shrubs with pink flowers.
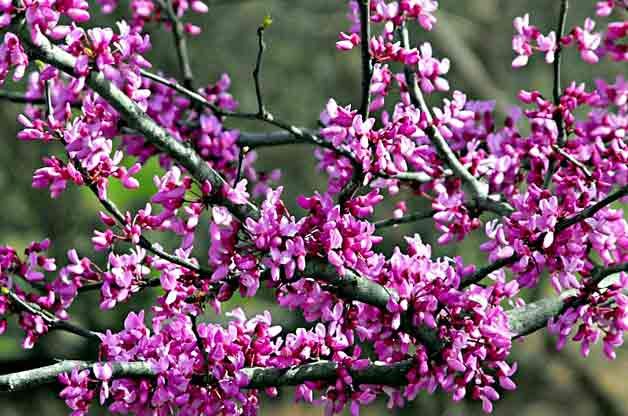
Redbud
Cercis spp. • Zones 4 to 10
After a long winter, the sight of a blooming redbud tree reminds us that spring is on its way! An early-spring showstopper, this tree bursts with a profusion of red, pink, purple or white blossoms before leaves emerge. Plant yours in a spot that has room to spread out, as redbuds are wider than they are tall.
Tree Growing Tip: Redbud’s flower clusters appear not only on new growth, but also on the trunk and older branches.
Check out more 22 early blooming flowers for spring.
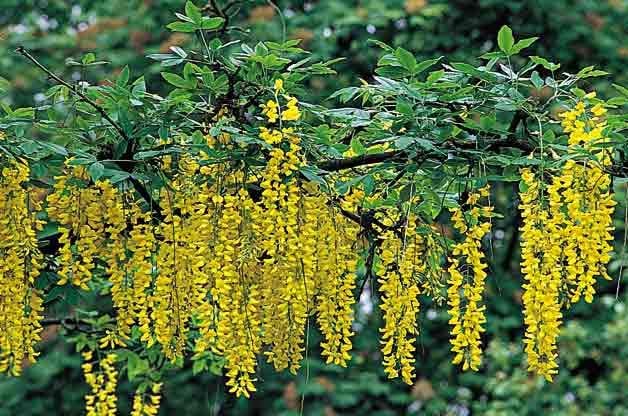
Golden Chain Tree
Laburnum x watereri • Zones 6 to 8
Though it’s small in stature, the golden chain tree demands a second look. In spring, graceful chains of yellow blooms drip from its branches. This tree makes an impression when standing alone, but it’s even more impressive when planted as part of a group. One caution, however: All parts of this tree contain a compound that can be fatal if eaten.
Discover the prettiest yellow flowering shrubs for your yard.
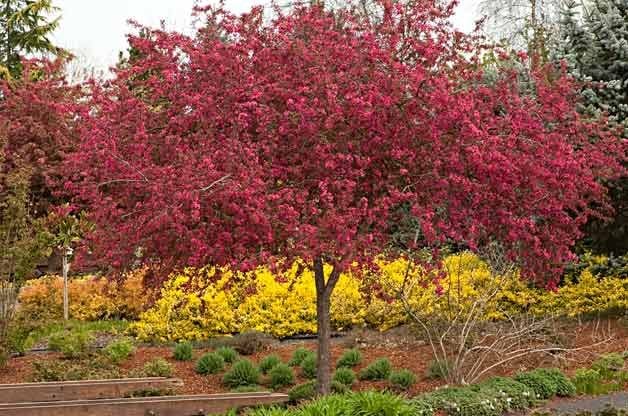
Crabapple
Malus spp. • Zones 2 to 9
This beauty’s spring blossoms are often so lavish that they hide entire branches. The flowers give way to leaves and then fruit to keep the color show going, sometimes through winter. New varieties provide the famous flowers and resist common tree diseases, too.
Psst—here’s why you should plant a weeping crabapple tree.
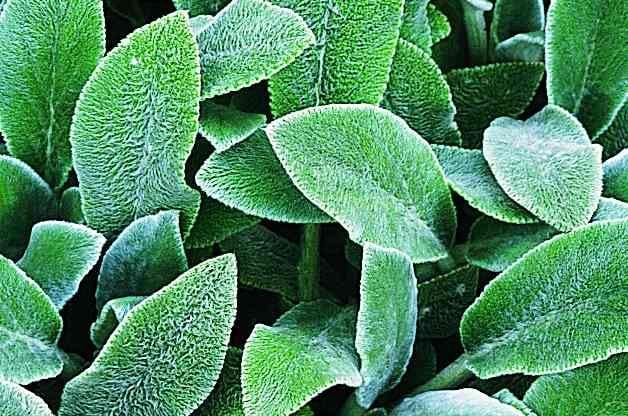
Lambs’ Ears
Stachys byzantina • Zones 4 to 8
With thick, woolly leaves, lambs’ ears is as soft as it looks. In early summer, spikes of small, pinkish-purple flowers, which range from 4 to 18 inches in height, bloom on most cultivars. Lambs’ ears makes a wonderful choice for beds and borders.
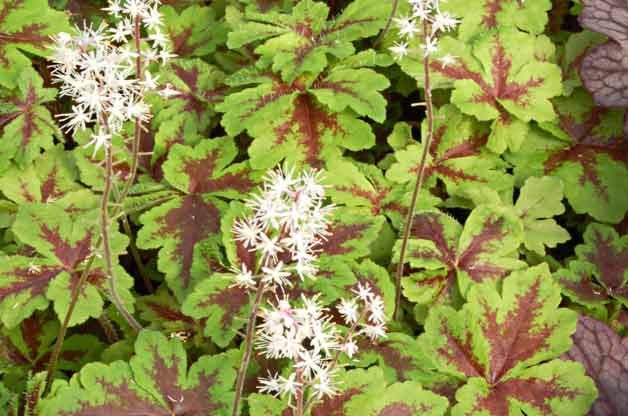
Foam Flower
Tiarella cordifolia • Zones 3 to 8
Putting on a spectacular show in late spring, foam flower’s dainty, blossom-dressed spikes offer a delicate note in containers. Just be sure to position your display in light to heavy shade, since this perennial doesn’t put up with bright sunlight.
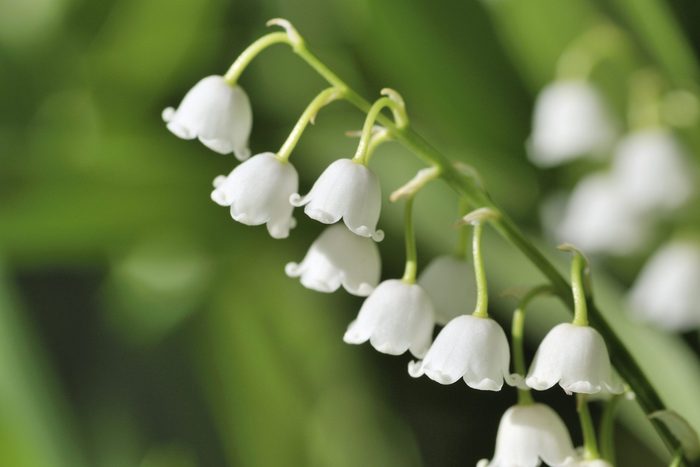
Lily-of-the-Valley
Convallaria majalis • Zones 2 to 7
This old-fashioned garden belle’s diminutive flowers and tender greenery might look delicate, but its appearance is deceiving. Truth is, lily-of-the-valley is tough as nails, able to adapt to conditions that topple even the most robust perennials. Clusters of fragrant, bell-shaped blooms grow on narrow, arching flower stalks. For plants under trees and shrubs, a yearly dose of fertilizer in spring will offer a hefty boost.
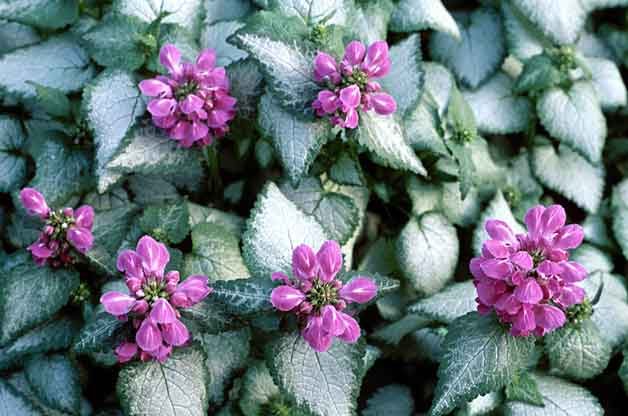
Lamium
Lamium • Zones 4 to 8
This pretty plant will definitely contribute a lovely new wrinkle to shady spots. Where some of these ground cover ideas can offer only color, lamium quickly adds a dense growth of corrugated foliage that is often variegated, for extra interest and visibility in shady spots. Use it to fill in bare areas under shrubs or other established perennials, where it will form textural mounds.
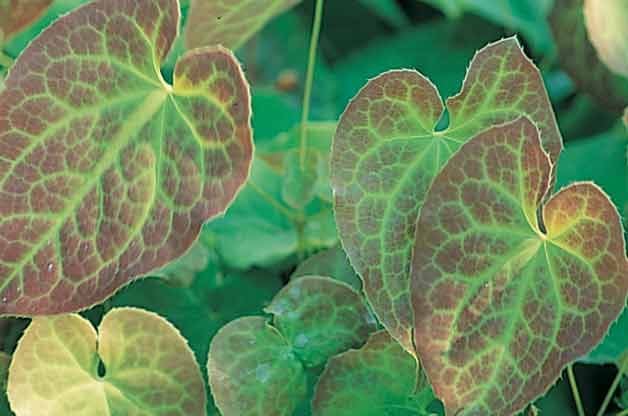
Barrenwort
Epimedium • Zones 5 to 9
Blanket your garden with a subtle splash of color. Barrenwort’s low-growing habit and delicate flowers work wonders in shady, otherwise bare areas under trees and shrubs. Its heart-shaped evergreen foliage often carries a pink edge or overall tint, which fades to bronze when autumn arrives.

Candytuft
Iberis sempervirens • Zones 5 to 9
Roll out the white carpet for your garden with this dense mat of pale blooms perfect for borders, rock gardens or containers. Clusters of flowers bloom from spring into summer, leaving candytuft’s evergreen foliage to maintain interest all year through.
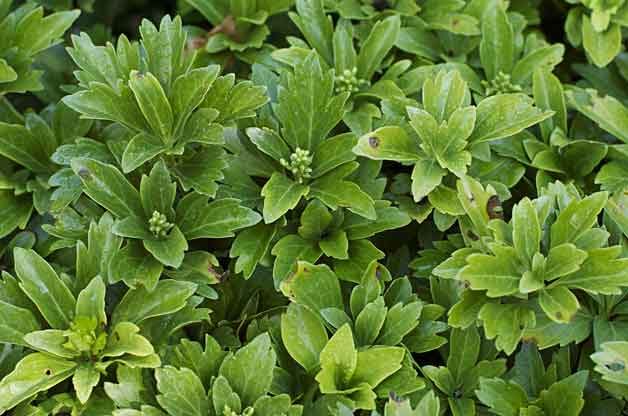
Pachysandra
Pachysandra terminalis • Zones 4 to 8
Regarded as the most dependable and resilient of ground covers, shade-loving pachysandra offers whorls of glossy evergreen foliage that are topped with white flowers in spring. Don’t fret if growth isn’t as profuse as expected in the first year. When it comes to pachysandra, good things come to those who wait a couple of years.

Common Bugleweed
Ajuga reptans • Zones 3 to 9
As ground cover ideas go, this evergreen perennial makes an excellent choice with its masses of green, bronze or variegated foliage. Spires of blue-toned flowers appear in late spring to early summer. Bugleweed is an aggressive grower and may invade lawns, so plant it within a barrier. On the upside, you won’t have to wait long for results.
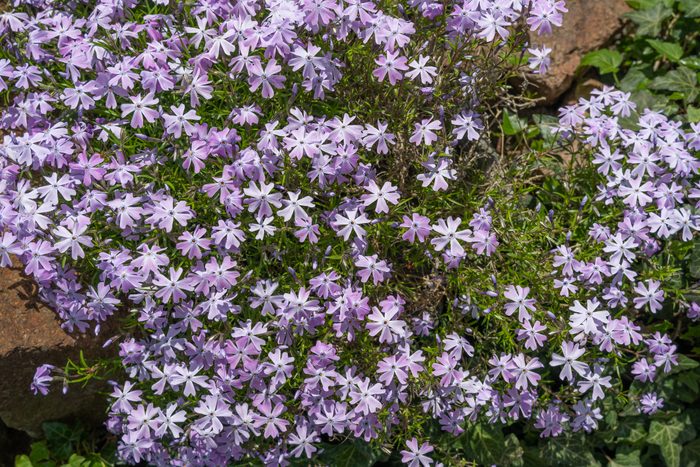
Creeping Phlox
Phlox stolonifera and Phlox subulata • Zones 4 to 8 and Zones 3 to 8
Topping off at just 6 inches high, creeping phlox is a smaller, low-growing, hearty relative of the familiar fragrant perennial. When it blooms in spring, it forms a cascading carpet of pretty little blossoms, making it a lovely choice for rock gardens. When nestled into a protective layer of mulch, creeping phlox doesn’t require much watering.
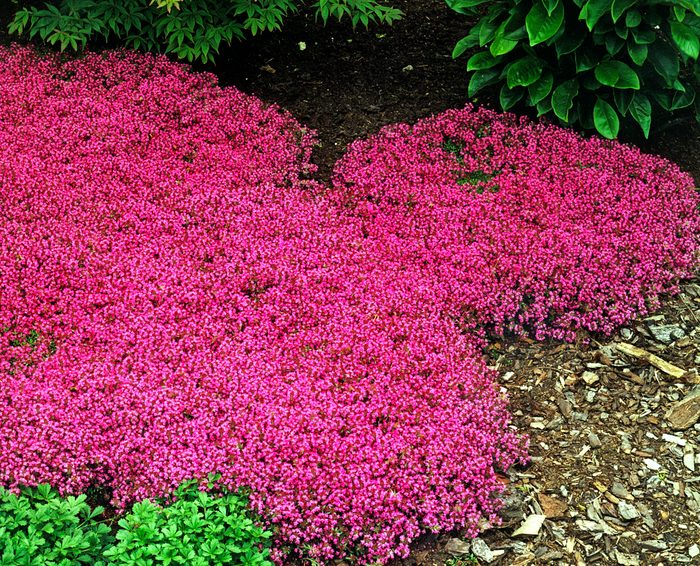
Creeping Thyme
Thymus polytrichus subsp. britannicus var. albus • Zones 5 to 9
Many of the most seasoned gardeners save a front- row seat for creeping thyme. Its short profile and low maintenance make it the perfect complement to any border, edging or even walkway.
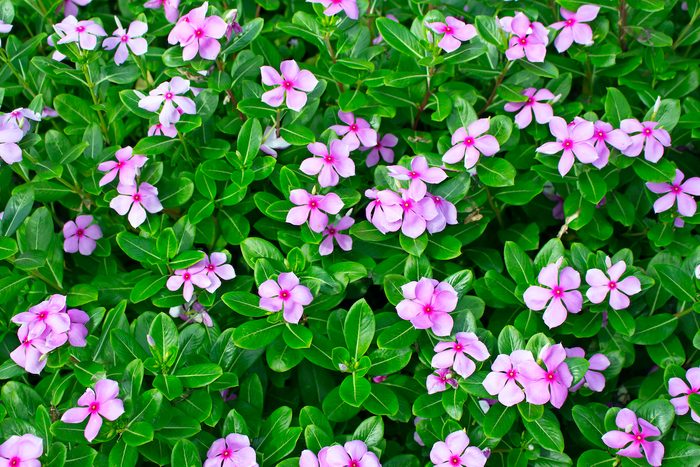
Madagascar Periwinkle
Catharanthus roseus • grown as an annual
If you experience lots of heat in summer, Madagascar periwinkle is the ideal plant on our list of ground cover ideas. It flourishes in full sun and doesn’t need excessive watering. In colder zones, this pretty plant is useful for filling in bare spots between perennials. In mild-winter areas, it may become invasive.
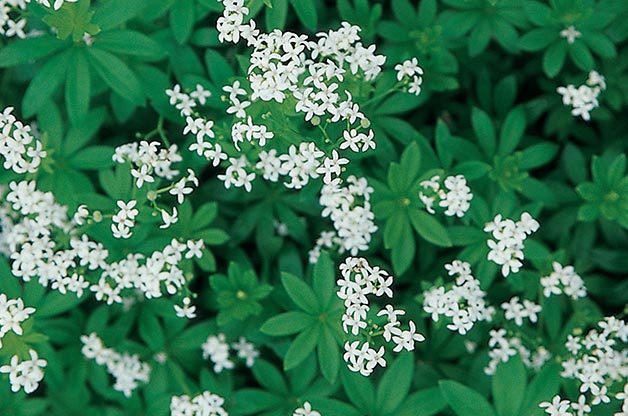
Sweet Woodruff
Galium odoratum • Zones 4 to 8
Despite its delicate appearance, this plant is tough and well suited to shady, wooded areas. Its star-shaped, white blooms last for several weeks in spring.
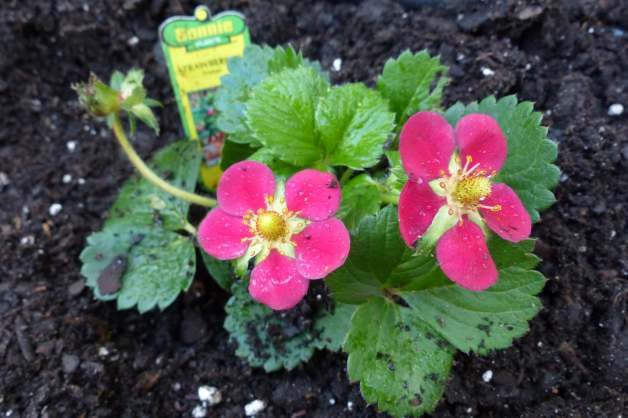
Winter is the time to plant strawberries in Florida. When I went to pick up some plants to add to my strawberry bed this year, I discovered something I hadn’t seen before: pink-flowered strawberry plants!
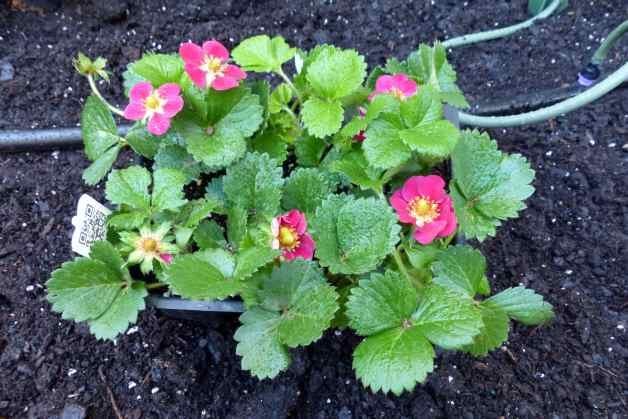
While pink-flowered strawberry plants have been available in the past, they usually didn’t produce much fruit. The variety I’m growing, ‘Tristan’, was introduced in 2012, and produces plenty of small sweet berries. This variety doesn’t send out the usual runners that strawberry plants do, making it even better for growing in containers. ‘Tristan’ is an everbearing variety, meaning it will continue to produce as long as conditions are right.
There are several other varieties of pink-flowered strawberries available to add to your own fruit garden this spring. Look for them at your local nursery when planting season begins, or try some of these websites for plants or seeds:
- Park Seed: Tarpan Hybrid or Rainbow Treasure
- White Flower Farm: Berries Galore Rose
- Burpee: Toscana
Have you ever grown pink-flowered strawberries? Tell us about your experiences in the comments below!
Pink-flowered strawberries would be a great part of an edible landscape. Learn about other edible ornamentals here.
“Birds are everywhere.” We’re always telling people that—especially when we’re trying to convince them you can go bird-watching anywhere. And it’s true. Birds are everywhere, from forests to prairies, from swamps to deserts to suburban yards. But can our metropolitan cities also serve as centers of bird life?
Actually, yes, they can. Surprising numbers of birds can be found even among the concrete and glass of our largest cities. Here are a few examples of birds that you might see among concrete jungles.
CITY BIRDS ADAPTING TO URBAN LIFESTYLES
When we think about city birds, some that come to mind first include pigeons, house sparrows and starlings. It makes sense that they would thrive in the city, because these are all birds imported from Europe. Over the course of many centuries, as European towns developed and grew into cities, these birds had time to adapt to the changes. When human settlers from Europe came to North America and started to build cities here, these imported birds had a head start over our native species.
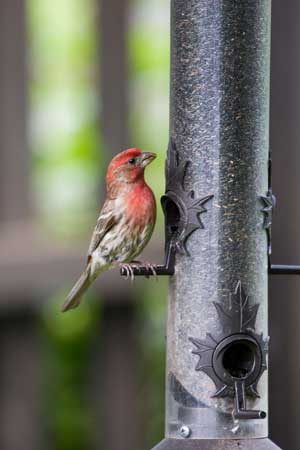
Adaptability is the key, and many native North American birds are proving to be adaptable as well. One prime example is the house finch. Originally found in the western U.S. and Mexico, this colorful songster probably learned to live around the villages of the Hopi, the Navajo and other Native American people in the Desert Southwest. When the house finch was accidentally introduced into the New York area in 1940, it soon adapted to eastern cities and started to spread. The new eastern population met the expanding western flocks on the Great Plains in the 1990s, and today house finches are found in cities and towns from coast to coast.
INNOVATIVE NESTERS
Some birds have very simple needs. They find their food in the air, so all they need is a place to build their nests. The chimney swift is a perfect example. It catches flying insects in high, swift flight, ranging for miles every day in search of airborne bugs. Centuries ago it built its nests in large hollow trees in the forest. Today, large hollow trees are harder to find, but every city has chimneys. The swifts use their sticky saliva to paste a small platform of twigs to the inside of a chimney, creating a secure nest where they can lay their eggs.
Other aerial insect-eaters also find nesting sites downtown. The common nighthawk will lay its eggs directly on a gravel roof, where they are perfectly camouflaged. Cliff swallows will build their mud nests on the sides of buildings, but in more and more cities they are now placing those nests under bridges, where they are better protected from weather.

Even birds of prey find places to nest among the concrete canyons. The peregrine falcon, the world’s fastest flying bird, will lay its eggs on ledges of skyscrapers in our largest cities. These urban peregrines often hunt high above the streets, chasing pigeons. In recent years, red-tailed hawks also have moved into cities, nesting on buildings and hunting squirrels and sparrows in the local parks. The most famous urban red-tail, New York City’s “Pale Male,” has even been the subject of a book and a movie.
MORE NEW KIDS IN TOWN
In cities located along the shores of the ocean, lakes or large rivers, some birds take advantage of the specific habitat parking lots have to offer. They are favorite haunts of ring-billed gulls. Most kinds of gulls are opportunists anyway, and ring-bills are quick to adopt large open parking lots as places to rest, their flocks lining up and facing into the wind. Parking lots next to fast-food restaurants are especially popular, as the gulls can usually find choice leftovers dropped on the pavement.
At one time, crows and ravens were absent from American cities. Crows lived in wide-open farm country and ravens were mostly wilderness birds. They were often shot, and they had learned to avoid humans. But in recent decades, these intelligent and adaptable birds must have noticed that they weren’t in danger when they ventured into suburbs and cities, so they moved right in. American crows now live in many cities from coast to coast, while common ravens thrive in some downtown areas of the West, like Phoenix and San Francisco. The stately raven of Poe’s poem can even be seen perched on neon signs in Las Vegas.
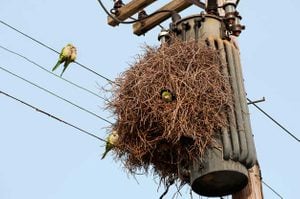
One of the most surprising and colorful urban birds is the monk parakeet. With its shrill voice and bright green plumage, it seems out of place on our city streets—and it is, since it’s native to South America, and was brought here as a cage bird. But in many parts of the U.S., monk parakeets have escaped from captivity, found each other and formed colonies. Dallas, Miami, Chicago and other big urban centers have thriving flocks of these flashy birds. They often build their bulky nests on power poles or substations, and show up at bird feeders alongside sparrows and other less colorful creatures.
TEMPORARY GUESTS
During much of the year, only a few of the most adaptable birds can be found downtown. But the sky’s the limit during spring and fall migration seasons, because migrating birds may drop in anywhere. We have seen thrushes, warblers
and other woodland species pausing among the skyscrapers in Boston, Philadelphia, Houston, Los Angeles and many other large cities. All they need
are a tree or two to forage and places to rest for their next flight. So keep your eyes open all the time, because birds really are everywhere!
Kenn and Kimberly Kaufman live out in the country in Ohio, but they relish the chance to go birding in big cities several times a year.
6 BIRD-FRIENDLY CITIES
While every city offers the chance to see some birds, a few of them have embraced birding in notable ways.
- Portland, Oregon. From great blue herons living along rivers in town to swifts roosting in local chimneys, Portland finds ways to celebrate all kinds of urban birds.
- New York City. America’s biggest city hosts an astonishing variety of birds, especially in parks like Central Park, where organized bird walks are held almost every day in spring and fall.
- Milwaukee, Wisconsin. Its location along Lake Michigan makes this a prime birding city all year. From ducks and gulls in winter to migrating hawks in fall and warblers in spring, there are always birds to see in Milwaukee’s parks and nature centers.
- Tucson, Arizona. Since 2001, Tucson has organized a citywide bird count every spring. Cactus wrens, verdins, curve-billed thrashers and other desert birds thrive even in the heart of town.
- Austin, Texas. Austin is famous for live music and other cultural highlights, but it’s also a hub of birding activity. Lakes and parks along the Colorado River bring abundant bird life to the city center.
- St. Petersburg, Florida. Surrounded on three sides by the waters of Tampa Bay, the city teems with birds in all seasons, including pelicans, egrets, ospreys and more. Migration brings warblers and other songbirds to every park in town.
Fresh is best. You can hardly go wrong with this motto in general, and it’s certainly true when it comes to herbs. For years, I’ve been growing herbs to use in cooking, tea and other things. I love walking over to a pot and snipping just what I need. Fortunately, growing herbs year-round for fresh use is easy and enjoyable. Just follow these seven basic steps, and you’ll soon know how to grow herbs in winter too.
1. Choose the right location
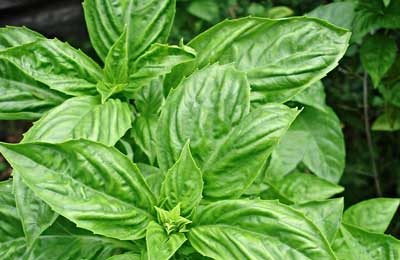
Many herbs lend themselves to indoor gardening, even during the coldest months of the year. Basil, chives, mints and parsley are just a few that do very nicely in pots with bright indirect light. It might surprise you to know you don’t need direct sunlight for growing most herbs; the indirect light most of us get will work fine.
East-, south- and west-facing windows should all give your herbs enough light, especially if you set up a small table or use a counter that keeps plants about a foot away from window glass. You should probably steer away from north-facing windows.
Look around your house and choose your best location. Don’t limit yourself to the kitchen. Why not have a pot of chamomile in the bathroom, anise hyssop in the living room and basil or sage in the kitchen window?
2. Buy the right pot and soil
After you figure out your location, it’s time to pot up your herbs. Seeds can be challenging to start indoors, so my suggestion is that you begin with starter herb plants. I prefer growing my plants in clay pottery or unglazed ceramic pots. Natural-fiber pots made from rice, wheat, coir or recycled newspaper are also good choices. I typically stay away from plastic pots because they hold water longer and less evenly than clay pots, making it hard to know when to water.
One of the most important steps in growing herbs is choosing a high-quality potting soil. This is a good place to spend a little extra if you can. Buy soil that feels nice and loose and moist when you take hold of a handful. It shouldn’t compact into a tight ball when you squeeze it. Poor-quality soils, which tend to compact quickly, can eventually become like concrete around plant roots, making it difficult for plants to develop a healthy root structure. If you’re unsure what soil is best, the garden center staff can help guide you.
3. Plant with loose soil
Now you’re ready to plant. Loosely fill the pot with soil up to the rim. Don’t press the soil down in the pot, which will make it harder for roots to get established. Before planting, water the soil thoroughly so that it is evenly moist. Now remove the starter herb plant from its pot and gently loosen the soil around the bottom inch of roots. Scoop out a hole in the planting pot and settle the plant in its new home.
Carefully fill soil back around the roots without compacting it. Water the plant moderately to settle loose soil in and around the roots.
4. Learn how to water
Learning to water herb containers is what takes the most practice, but don’t be intimidated. You want soil that stays evenly moist, not soggy and not bone dry. How fast the soil dries out will vary a lot from home to home, especially when furnaces are circulating warm air throughout the house. Until you get used to how fast your plants dry out, check them every couple of days.
To keep plants and soil from drying out too fast, avoid placing them near furnace vents or hot, sunny windows. Plan to water plants every three to five days or so. There should be liquid in the drainage saucer beneath the pot, which should get reabsorbed back into the pot within six to eight hours. If that doesn’t happen, pour off the excess, because standing water invites destructive insects.
5. Add organic fertilizer
Fertilize herbs once a month with organic fertilizer. Since you’ll probably be using the plants for cooking or tea, you don’t want to be eating chemical fertilizer residues. So I don’t forget, I mark my calendar for the fifth of the month, which is my fertilizing day for all indoor plants.
6. Prevent insect pests
Whenever you grow plants indoors, insects can come calling. You can prevent most problems by making sure your soil doesn’t get soggy. It’s also important to keep dead and dying foliage from gathering on top of the soil, as decaying plant matter is the perfect habitat for insects like fungus gnats.
If you notice a few pests on your herbs, take action right away by spraying with a soap- or neem oil-based plant product. These treatments are organic and are safe around children and pets. It’s important to treat plants every five to seven days for at least three weeks to catch all the insect life cycles and eliminate the problem.
7. Harvest for good health
Finally, be sure to pinch back or harvest your plants regularly every week or so. Pinching back the top couple of inches of growth helps plants stay bushy and healthy, and the harvest is perfect for cooking, making tea or adding to your bath. If you have extra, you can dry or freeze it for later use.
It takes a little discipline, but growing herbs indoors is actually pretty easy. Before long, you’ll wonder why you didn’t start sooner!
Tammi Hartung is an herbalist and organic grower in southern Colorado. She is also the author of Homegrown Herbs and The Wildlife-Friendly Vegetable Gardener. Read her blog at desertcanyonfarm.wordpress.com.
Year-Round Herb Recommendations
- Basil—Pesto or pizza
- Sage—Whole grains and poultry
- Chives—Salad herb
- Anise hyssop—Tea
- Mint—Herbal mouth rinse
- Chamomile—Bath herb, tea
- Lemon balm—Herbal skin toner

While gardens in cold, northern climates may be shivering under a layer of snow and ice, southern gardeners in warm climates are being greeted by the sight of ripening citrus.
Growing up in Southern California, our garden always included citrus trees. We had a large lemon tree next to the patio that produced baskets filled with countless lemons. There was also an orange tree just outside my bedroom window. Springtime would bring the most heavenly scent of orange blossoms wafting through my bedroom.
Fast forward to the present and I now have my own garden in Arizona, where citrus is widely grown. Our first home had a large grapefruit tree that my oldest daughters would climb. Later, we built a new home and I spent time creating an ‘edible garden’, which is filled with three vegetable gardens, blackberry bushes, apple and peach trees.
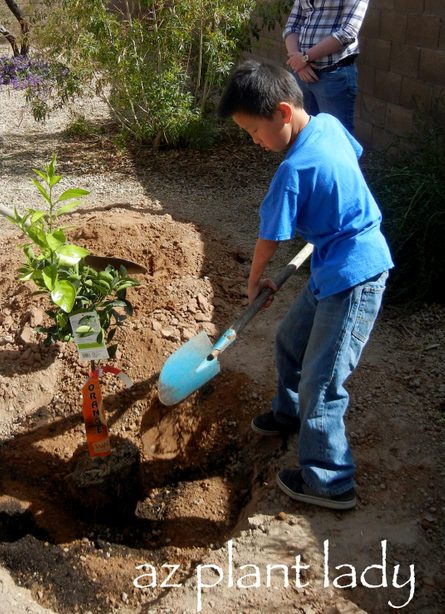
A couple of years ago, we added an orange tree to our edible garden. The kids were so excited about the prospect of fresh oranges right off of the tree.
It was a very small tree, but younger trees (of all types) handle the transplanting process better then older trees.
Like many fruit trees, I knew that we would have to wait a few years before our little tree would bear any fruit because most of the tree’s resources were being spent on growing new roots before it could concentrate on top growth.
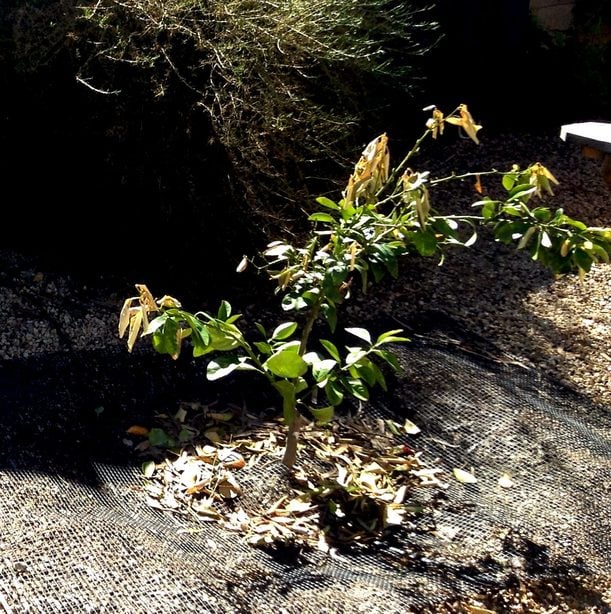
The first year in the ground was not a happy one for our little tree. A hard freeze came that dipped temperatures into the low 20’s for 5 days in a row.
Citrus grow in the warmer areas of the United States including California, Arizona, Texas and Florida (in zone 9 and above) and do suffer damage when temps dip below freezing.
Any hope of any fruit being produced were dashed because the branches had been damaged by the frost.

Eight months after the frost, I was delighted to see that our small tree had five green oranges on it. It has also grown a bit larger, which meant that it could support a few oranges.
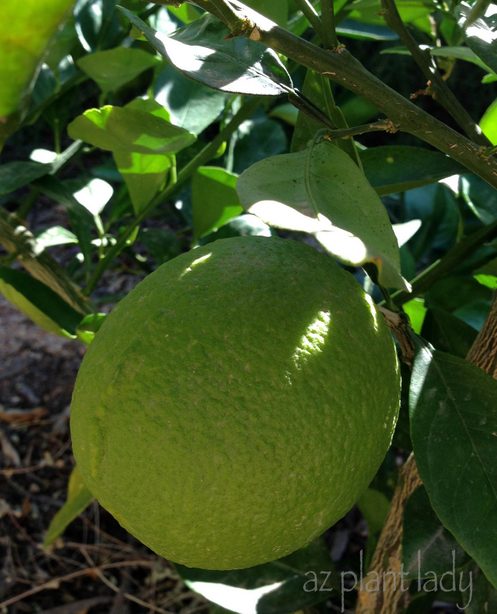
Both my husband and kids were impatiently waiting for our oranges to start ripening. Every week, we would check to see the green color on the oranges slowly disappearing and being replaced with a lovely shade of orange.
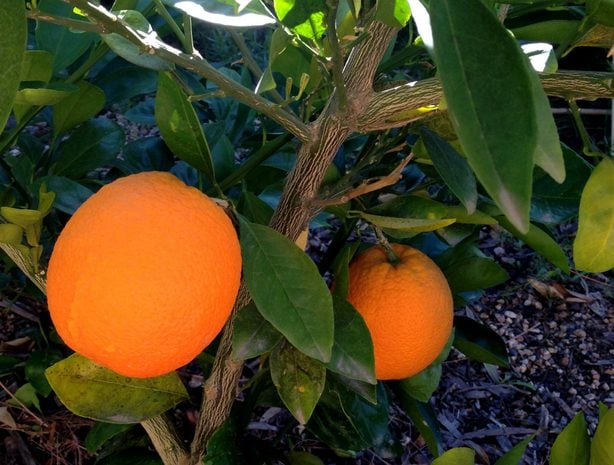
Finally the day arrived when our oranges were ready to be picked.
An easy way to tell if oranges are ready to be harvested is to lightly pull them while twisting them off the branch. If they do not come off easily, then wait another week before trying again. Thicker-skinned Navel oranges are usually completely orange when ready while thin-skinned Valencia oranges still retain some green coloring mixed with orange when ripe.
**Oranges do not ripen after being picked, so keep them on the tree until they are fully ripe.
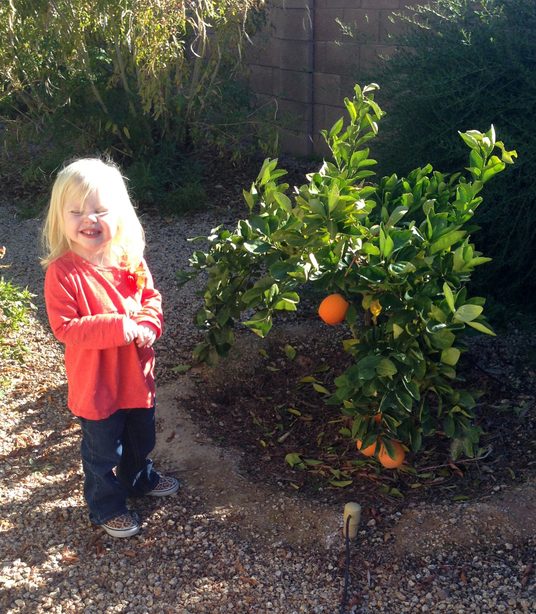
My 2-year old granddaughter, Lily, was excited to help me pick the oranges, which brought back memories of picking oranges from the huge trees in my own grandparent’s backyard.
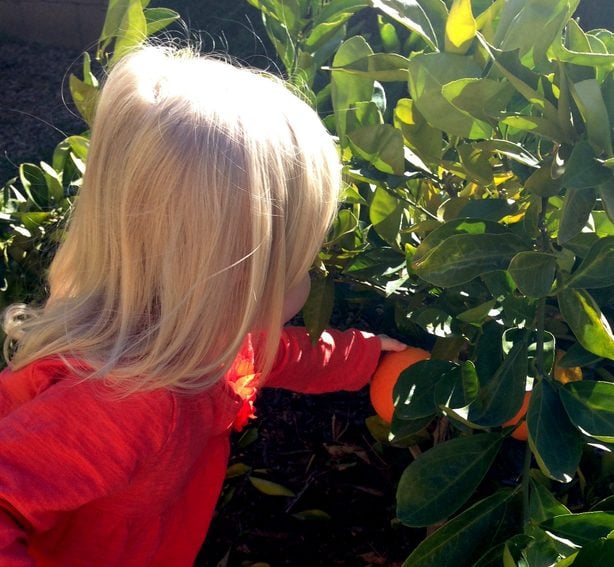
Because our first harvest was so small, we picked all five oranges off of the tree.

Then we went inside and sliced up the largest orange to taste. It was sweet and absolutely delicious.
Because this was our first taste of fruit from our tree, they tasted extra special.
As our orange tree grows larger and our harvest bigger, I plan on making lots of orange marmalade.
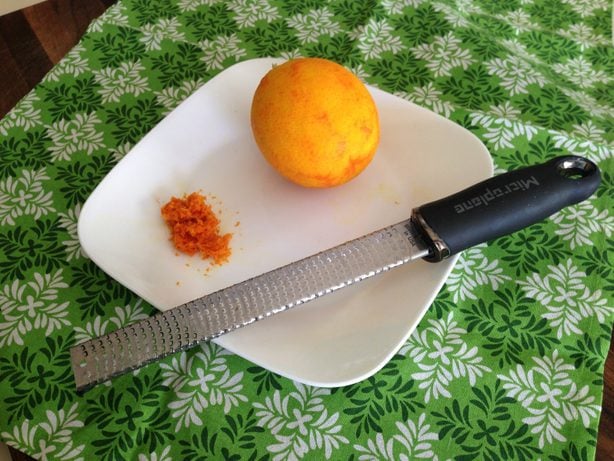
In the meantime, I decided to preserve the zest from the skin by freezing it. This way, we will be able to enjoy our small harvest a little bit longer when we use the zest to flavor our favorite dishes.
You can freeze the zest from all types of citrus. Earlier, I wrote about freezing the zest from lemons, which I often use when I cook. Read how to freeze zest here.
I am looking forward to later this year when our peach and apple trees will bear fruit 🙂
Do you have any fruit trees in your garden? What types?
How to Wrap a Plant
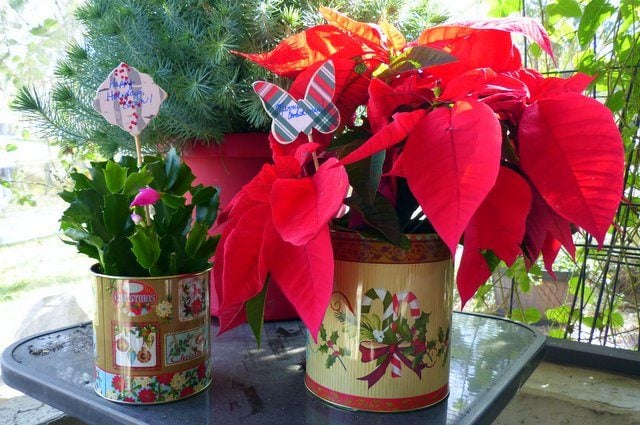
I love gifting potted plants, especially at the holidays. This is a gift the recipient can enjoy for a long time to come, and surprisingly nice selections are usually available at your grocery store. The only thing I don’t like is the foil wrapping that these plants often come in; I prefer to take a few more minutes to personalize my gift plants in some way. This year, I stumbled across an incredibly easy solution for how to wrap plant gifts, just by using some cookie tins I found at the bargain store. Not sure what kind of plants to give? Check out easy-care holiday houseplants.
I liked these tins because they were taller instead of shallow. Most stores have a wide variety of tins available this time of year, so you should be able to find some that work for you.
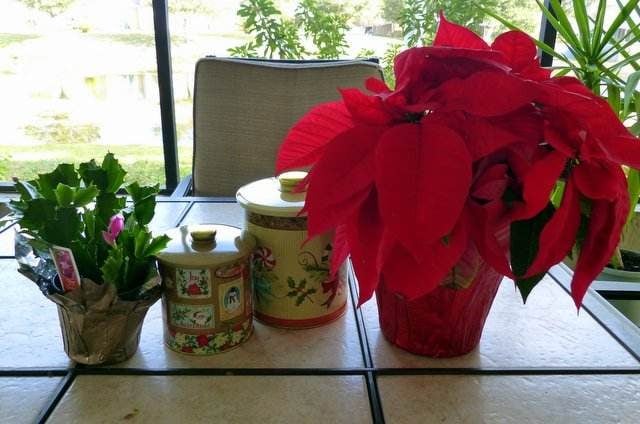
I left the plants in their original pots and removed the foil wrapping. The small Christmas cactus on the left slid right in.
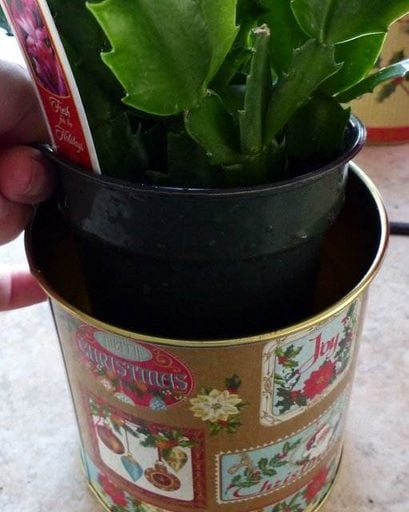
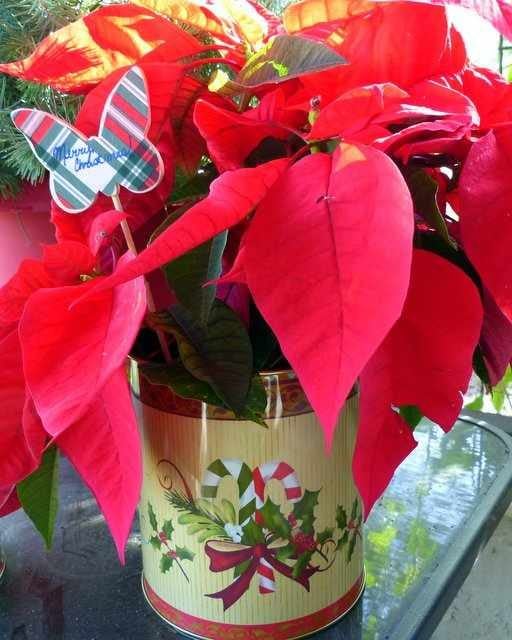
The bigger poinsettia had a wide lip on the pot that made it a little too big to slide all the way down. I solved that problem in no time by trimming the rim with a pair of scissors. Once I had the plants in the pots, I quickly made up some holiday tags using some wooden stakes I picked up at the craft store last summer, along with some wrapping paper and Mod Podge.

I haven’t decided what to do with the lids from the tins, yet – I may give them to my recipient so they can use the tin for something else along the line if they decide to re-pot the plant eventually.
If you have trouble finding tins you like, there are still plenty of options out there for dressing up your potted plant gifts. Happy gifting!
Next, check out the best gift ideas for gardeners.
I’ve never met a gardener who didn’t want to share or expand his or her garden. And there are so many ways to do just that. One easily overlooked way is by taking plant cuttings. You can take a snip of a plant to start a whole new one—for yourself or a friend! Bear in mind that you can’t take a cutting from a plant that is patented. That’s usually any new variety, but you can tell by checking the plant tag. Most old fashioned favorites and garden classics are fine to use for cuttings. Most important, though: Don’t get discouraged if growing from plant cuttings doesn’t work the first couple of times around. It can be a tricky process and takes some trial and error. This list includes some of the easiest plants to propagate.
Learn more tips for plant propagation.
On This Page
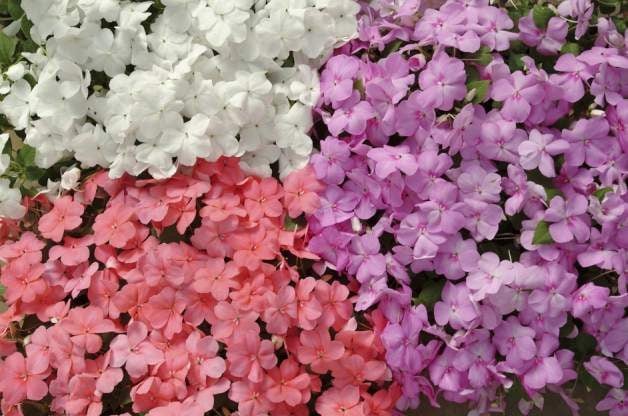
Impatiens
Impatiens, Annual
It’s true: This garden standby is in danger, but research is underway to save this beauty from downy mildew. But for the meantime, don’t count impatiens out in gardens that haven’t been afflicted with the disease! Resilient and reliable, it’s a cheerful, shade-loving flower that will do well in almost any part of the landscape.
Taking cuttings: Take cuttings only from healthy plants and keep them short, with no more than two or three mature leaves on each.
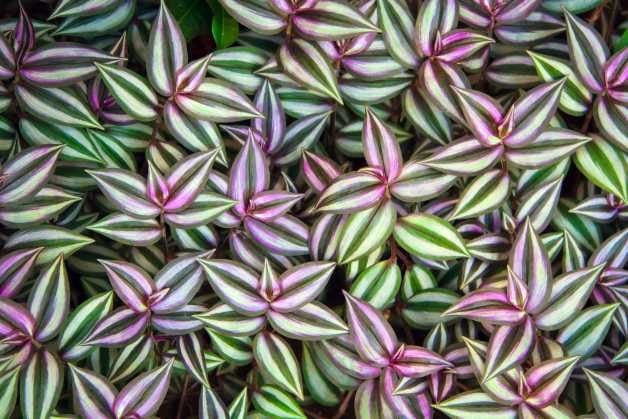
Inch Plant
Tradescantia, Zones 8 – 12, Annual elsewhere
A longtime favorite houseplant inch plant can be grown outdoors in containers or as a ground cover where winter-hardy. For prime leaf color, grow inch plant in filtered sun.
Taking cuttings: It’s easy to start this colorful plant from cuttings because you can take them from outdoor plants anytime during the season and year-round from houseplants.
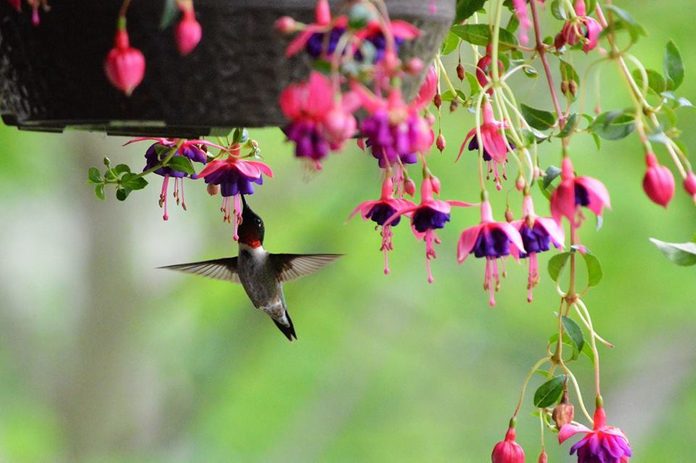
Fuchsia
Fuchsia, annual
Fuchsia’s dainty flowers might be some of the most recognizable blooms of all. Some even say that the delicate blossoms resemble a ballerina. Outdoors, this graceful plant will benefit and thrive in shade. Fuchsia is most commonly grown in a container. Try it mixed with other annuals, too! Fuchsia also attracts hummingbirds.
Taking cuttings: The good news is that fuchsia cuttings will root quite quickly, sometimes even in 10 days or fewer. Take cuttings in late summer, and don’t allow them to wilt. Place the cuttings in the growing pot right away.
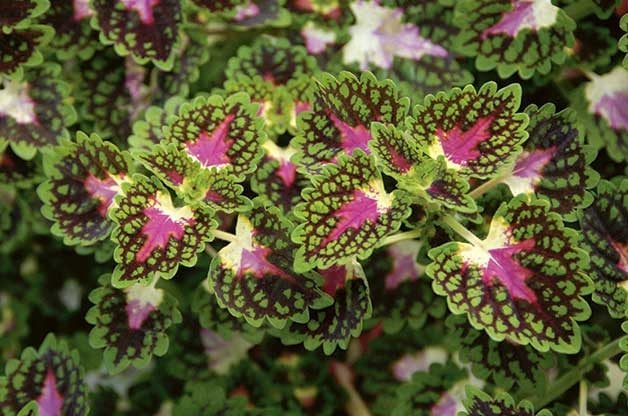
Coleus
Solenostemon, Annual
Coleus is both a garden classic and an ever-evolving star, with fresh varieties popping up every year. And it’s not just a shade favorite anymore, either. New hybrid plants can tolerate full sun, but this means they also need more water than traditional cultivars. Coleus will do best in rich, moist, well-draining soil. Check out our top 10 favorite colorful coleus.
Taking cuttings: Take a 2- to 3-inch stem cutting and remove the lowest leaf. Stick the cutting in vermiculite, perlite or a well-drained potting mix, covering the leaf scar, and put it in a warm, bright location out of direct sunlight. Cuttings root in about two weeks, and several weeks later they can be planted in a well-drained potting mix.
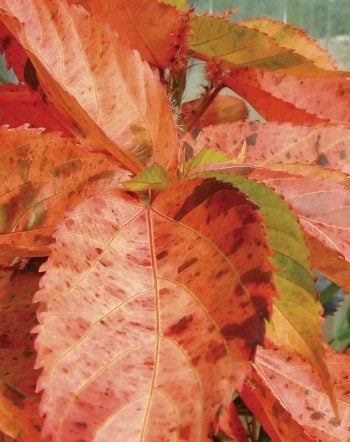
Copperleaf
Acalypha wilkesiana, Annual
This copper-colored charmer can be grown as both an annual outdoor plant and a houseplant. Use it to add fiery color to partially shaded beds, borders or even a large container. You may see yellow-white summer blooms.
Taking cuttings: Easy to maintain, copperleaf is equally easy to grow from stem cuttings. (See instructions for coleus, above.) Take the cuttings in late summer and let them root and grow indoors over the winter.

Sweet Potato Vine
Ipomoea batatas, Annual
Classic sweet potato vine is generally grown for its fabulous chartreuse foliage, but new varieties like Blackie are options, too. The foliage has a more intense color when planted in the sun, but it will perform in partial shade.
Taking cuttings: Make a cut straight across the stem about 6 inches from the tip. These cuttings are actually the easiest way to start new plants; some gardeners swear by placing the cutting directly in the ground in spring, keeping the area moist until the roots develop.
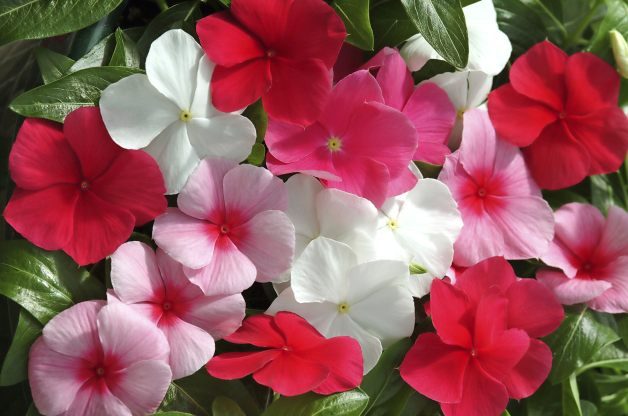
Annual Vinca
Catharanthus roseus, Annual
Also known as Madagascar periwinkle, this annual is great for full sun or part shade and tolerates heat stress. Annual vinca is similar to impatiens in look and growth habit, so it is an excellent substitute for impatiens in hot, sunny areas. The glossy green leaves are a nice complement to the colorful blooms.
Taking cuttings: Vinca cuttings can be taken throughout the growing season before the first frost. They’ll root quickly and may bloom when grown in a sunny window.
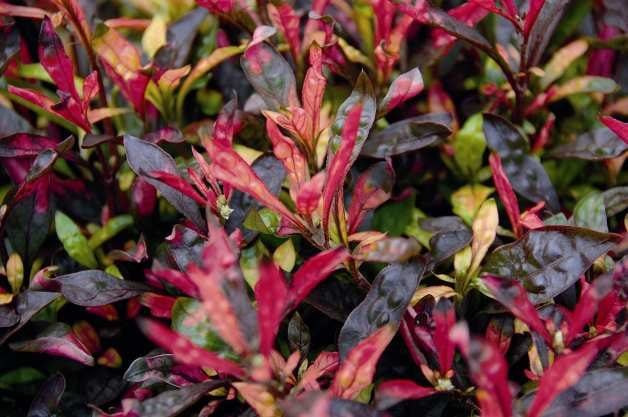
Alternanthera
Alternanthera, Annual
A visual delight because of its riotously colorful foliage, alternanthera is a bushy shrub you can pinch and shear to maintain shape and size. Because you can keep it under control, it’s an ideal container plant. Grow it in full sun to bring out its knockout leaf color.
Taking cuttings: You’ll want to make any divisions of alternanthera in spring, but take cuttings in late summer. Then overwinter the young plants indoors.
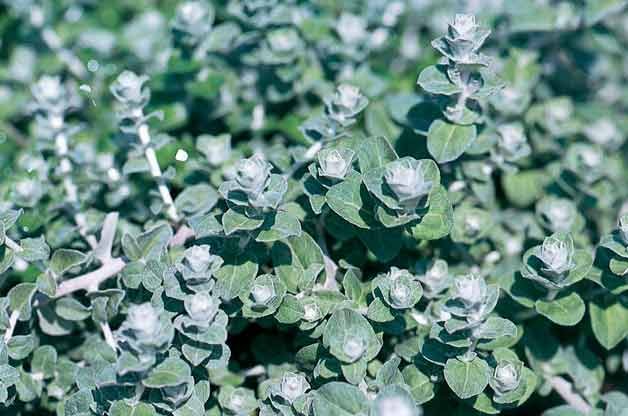
Licorice Vine
Helichrysum petiolare, Zones 9 to 11
Here’s a drought-tolerant vine you’ll want to use as a trailer or filler, especially in large containers or hanging baskets. It can be grown as an annual in places outside Zones 9 to 11. The fuzzy, silvery foliage offers wonderful texture in a grouping of plants. It loves to soak up the sun but will do well in partial shade, too.
Taking cuttings: Licorice vine cuttings will do best when taken in late summer. The rooted cutting will be ready for planting in spring when the danger of frost has passed.
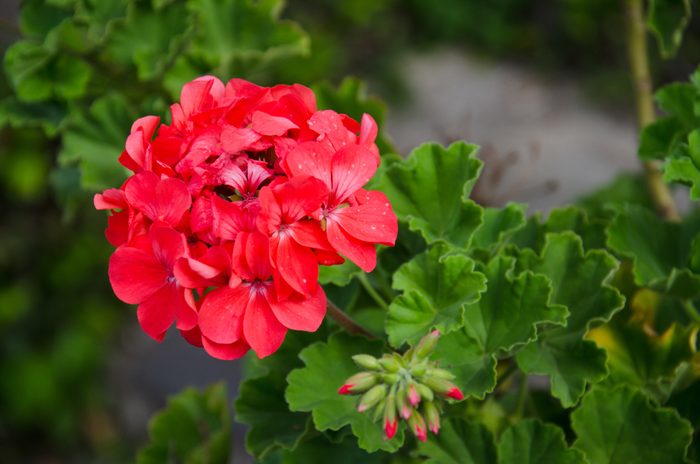
Geranium
Pelargonium x hortorum, Annual
Geraniums have so many virtues, and they don’t always get enough credit. Sure, they’re somewhat old-fashioned, but they’re pretty, sun-loving, long-lasting, tough, and perfect in containers and window boxes.
Taking cuttings: Make sure your tools, rooting mix and pots are sterilized; geraniums are very susceptible to disease. At the end of summer, make a cut about 4 inches down from one of the growing tips of the plant, remove flowers and buds, and place cuttings in a pot. They should root within 20 days. You can also try a rooting hormone for increased success.
Why Trust Us
For nearly 30 years, Birds & Blooms, a Trusted Media Brand, has been inspiring readers to have a lifelong love of birding, gardening and nature. We are the #1 bird and garden magazine in North America and a trusted online resource for over 15 million outdoor enthusiasts annually. Our library of thousands of informative articles and how-tos has been written by trusted journalists and fact-checked by bird and garden experts for accuracy. In addition to our staff of experienced gardeners and bird-watchers, we hire individuals who have years of education and hands-on experience with birding, bird feeding, gardening, butterflies, bugs and more. Learn more about Birds & Blooms, our field editor program, and our submission guidelines.