
Grow a Vertical Herb Garden in a Shoe Organizer

Updated: Mar. 21, 2024
Running out of garden room? This space saving gardening project will have you growing a vertical herb garden in no time! Just add herbs!
Our editors and experts handpick every product we feature. We may earn a commission from your purchases.
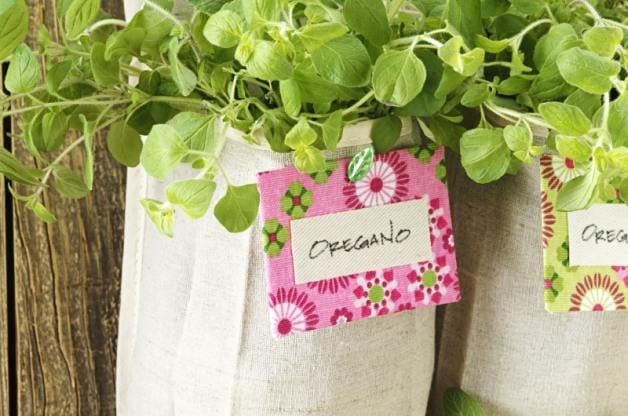
Ever feel like you’re running out of place to put new plants? You need to start thinking “up”! This space-saving vertical herb garden uses a fabric shoe caddy to create space for plenty of plants, all in just a few vertical feet. Here’s the top 10 herbs to grow for cooking.
Materials for a Vertical Herb Garden:
- Cloth shoe organizer
- Potting soil or compost
- Rod, hooks or nails for hanging
- Herbs or plants of your choice (With all those pouches to fill, this is a good time to experiment with little-known herbs you haven’t tried before. Bonnie Plants offers a variety of herbs to choose from.)
Step-By-Step Instructions:
Step 1
Decide on a location for your vertical herb garden. A fence or the side of a garage or shed are some good options. Use nails or screws to attach the caddy directly to the wall where it will hang, or use a shower curtain rod and hooks. Just make sure whatever you use will be able to support the weight of the soil, water, plants, any extra supplies and the caddy itself.
Step 2
Check the drainage of the pouches before planting by pouring in some water. If there’s not sufficient drainage in the fabric, poke a few small holes in the bottom of each pouch.
Step 3
Fill the pouches with soil or compost, but leave about an inch between the top of the pouch and the soil. Add the herbs, plants or seeds. And watch your new vertical herb garden grow!

Step 4
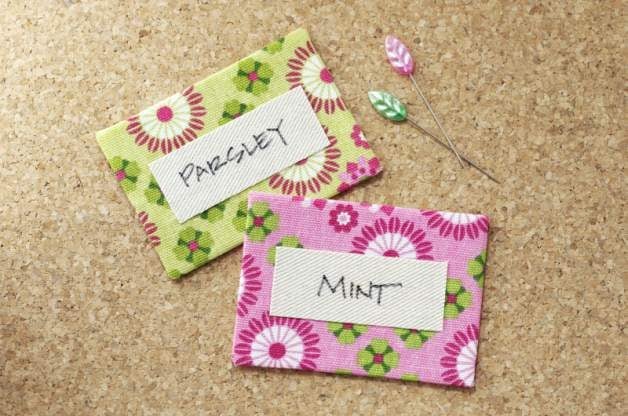
Optional – Make plant tags for your vertical herb garden:
- Round up some fabric scraps, ultra-firm stabilizer and iron-on adhesive.
- Adhere the stabilizer to the middle of the fabric (leave enough fabric around the edges to fold over) using an iron and the adhesive. Cut triangles out of the corners so you can make a nice fold. Attach the flaps with iron-on adhesive.
- Attach a piece of canvas or other heavy cloth to the front of the tag so you can label it. Use a permanent marker to write the plant name.
Originally Published: January 08, 2021