Bowling Ball Garden Art Ladybug
Updated: Mar. 21, 2024
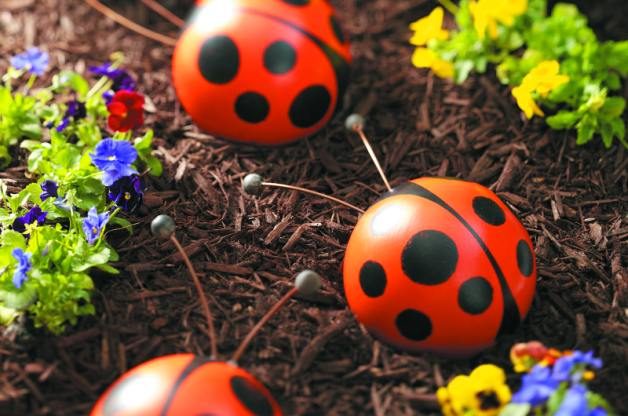
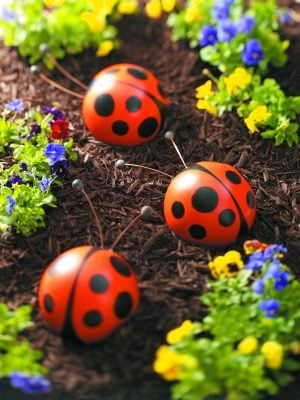
Recycle an old bowling ball into a ladybug (or three!) with a little paint and a few supplies. This bowling ball garden art project brings charm to any yard!
We got the idea for this bowling ball garden art craft project from reader Joyce Kline and had so much fun creating our own, we knew we had to share!
Materials:
- Bowling ball
- Black silicone caulk
- Two 8.5-inch lengths of #6 copper wire (have the hardware store cut it for you)
- Two 1-inch round wooden beads
- 1 quart Kilz exterior primer
- 1 quart red exterior latex paint
- 1 quart black exterior latex paint
- Painter’s tape
- Utility knife or scissors
- Stenciling brush or sponge
Step-By-Step Instructions:
Step 1
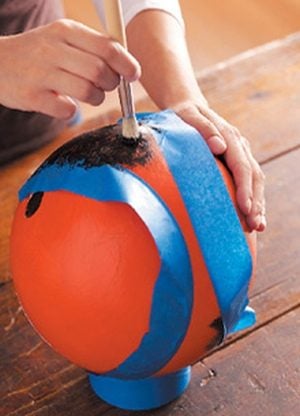
Prime and paint the bowling ball (three coats of red paint might be needed). After the paint is completely dry, apply painter’s tape in the desired pattern. Stipple on black paint with a stenciling brush or sponge for texture.
Step 2
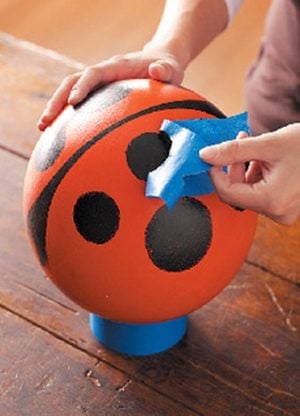
Make your own stencil by cutting differently sized circles from two pieces of painter’s tape put top to bottom. We used 2-1/2-inch- and 1-3/4-inch-diameter dots. Stipple the dots. After paint dries, remove the tape.
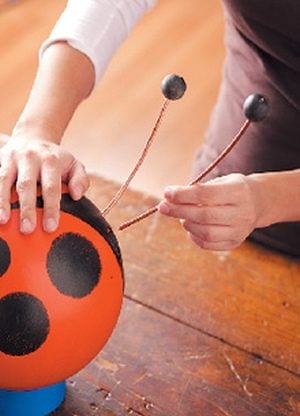
Step 3
Fill the thumb hole with black caulk. Set in two antennae made from lengths of copper wire with painted wooden beads affixed to the top. You may need to prop them up so they don’t droop while drying for 24 hours.
Step 4
These ladybugs are so easy to create, you may want to make a whole flock!