Green Roof DIY Birdhouse
Updated: Mar. 14, 2023
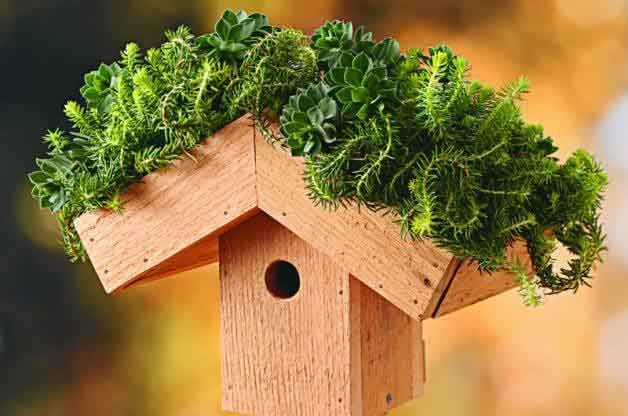
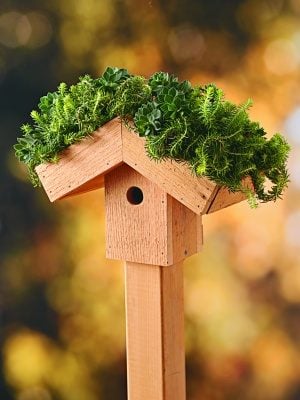
This DIY birdhouse project incorporates the green roof concept, helping to keep the birds inside cooler in the summer heat.
Builders know that “green roofs” help keep houses cooler. This DIY birdhouse designed by Gary Baltz does the same for our feathered friends! This green roof birdhouse is surprisingly easy to build, and you can choose to grow grass, succulents, moss or other small plants right on top. Bring the birdhouse inside for the winter in cooler areas and plant it anew in the spring.
Psst! While you’re at it, learn how to make a DIY coffee can birdhouse, too.
Materials:
- 7/8-inch-thick wood
- Exterior wood glue
- Two 1-1/2-inch wood screws
- 38 1-1/2-inch nails
- 2 x 7-1/4-inch-long piece of flashing
- Six 1/2-inch copper flashing nails
- 3-inch metal brace with screws
- Clear silicone
- 1/8-inch drill bit
- 1-3/8-inch or 1-1/2-inch hole saw
- Saw, Hammer, Clamp, Drill, Ruler, Pencil
Step-By-Step Instructions:
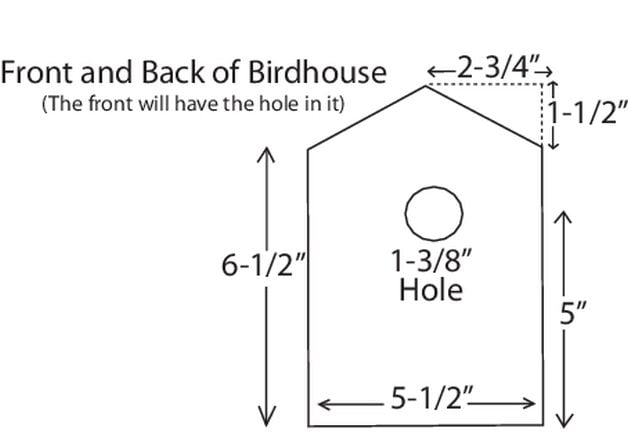
Step 1
Cut two pieces of 7/8-inch wood (we used thick rough-sawn cedar) as shown in Diagram A. You will need these for the birdhouse front and back.
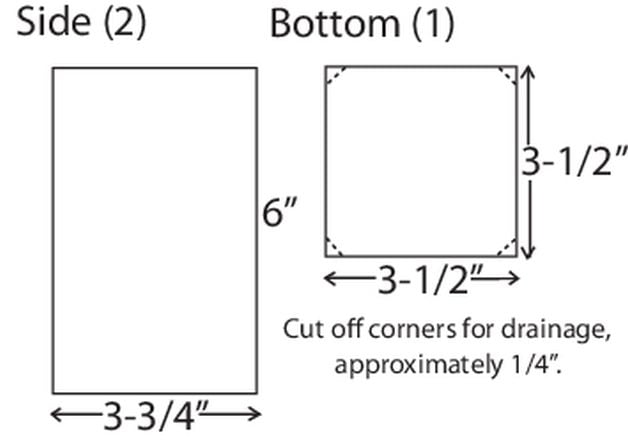
Step 2
Cut two side panels measuring 3-3/4 by 6 inches and one bottom measuring 3-1/2 by 3-1/2 inches (Diagram B). Cut about 1/4 inch off each corner of the bottom piece to allow for drainage.
Step 3
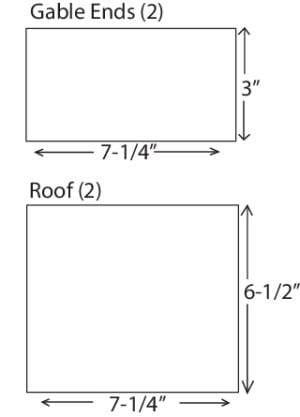
Cut two roof panels measuring 7-1/4 by 6-1/2 inches and two gable end pieces that measure 3 by 7-1/4 inches, as shown in Diagram C.
Step 4
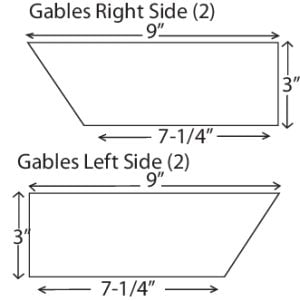
Next, cut the edges of the roof that will hold the soil in place. Cut two right-facing gable pieces and two left-facing pieces as shown in Diagram D.
Step 5
Make a cleat (this block of wood will go on the lower back of your birdhouse) from scrap lumber by gluing two pieces together so that the result measures about 1-5/8 inches thick by 4 inches long by 1 to 2 inches wide. Use a clamp to hold the pieces together until the glue is dry.
Step 6
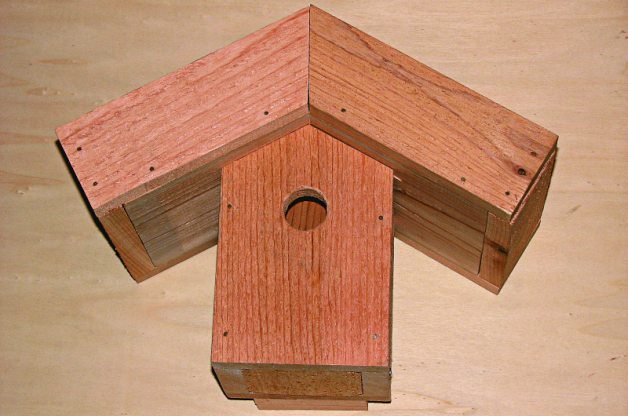
Taking one of the panels you cut from Diagram A, measure 5 inches from the bottom center of the panel, and make a small X. Drill through this area using your hole saw to make an entrance hole for the birdhouse.
Step 7
Glue the front and back panels to the side panels from Diagram B so that all pieces are flush on the bottom. Once the glue has set up, hammer in two siding nails along each side.
Step 8
Take the bottom panel of the birdhouse and tightly fit it up inside. Drill two pilot holes and then attach each side with the wood screws.
Step 9
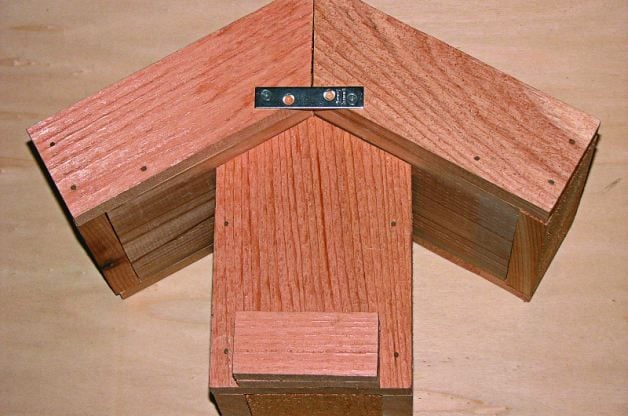
Run a bead of glue along the peaked edge of the top of the birdhouse base and center the roof panels on top. Secure the roof with two nails along each roofline, for a total of eight nails. Once the roof is in place, attach the long metal flashing to the center of the peaked roof using a bead of silicone and six flashing nails. This will prevent water from leaking in on your nesting visitors.
Step 10
Run a bead of wood glue along the edges and attach the gables and the ends to make a box to hold the soil. Use at least two nails on each piece of wood to secure it.
Step 11
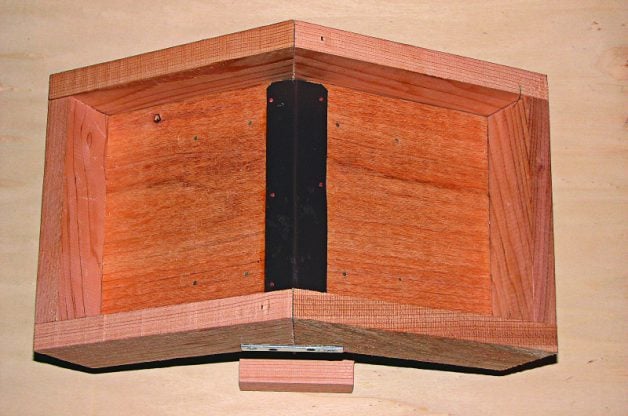
To hang the birdhouse, attach a metal mending brace to the back of the top near the peak of the roof. Glue the cleat you made to the bottom of the back of the birdhouse so that the birdhouse will hang flat against a post or tree.
Step 12
If you need to add drainage holes in the roof, do it in the overhang portion so that birds inside the house stay nice and dry.